In Gothic 1 Remake, you will have to pick a camp at the end of Chapter 1. If you choose to be a Shadow at the Old Camp, you will be given an infiltration quest by Raven. This quest is called The Brotherhood’s Plan, which is also the main quest of Chapter 2.
In this guide, we will break down how to complete The Brotherhood’s Plan in Gothic 1 Remake.
How to complete The Brotherhood’s Plan in Gothic 1 Remake
The Brotherhood’s Plan is an eight-part quest in Gothic 1 Remake Chapter 2 that gives you a glimpse of the true enemy inside the Colony. At the beginning, you will be sent to the Swamp Camp to get a report from Caine, who is a Shadow mole placed by Raven, which marks the beginning of The Brotherhood’s Plan quest.
Here is a step-by-step guide on how to complete the quest in Gothic 1 Remake:
Quest 1: The Lost Apprentice

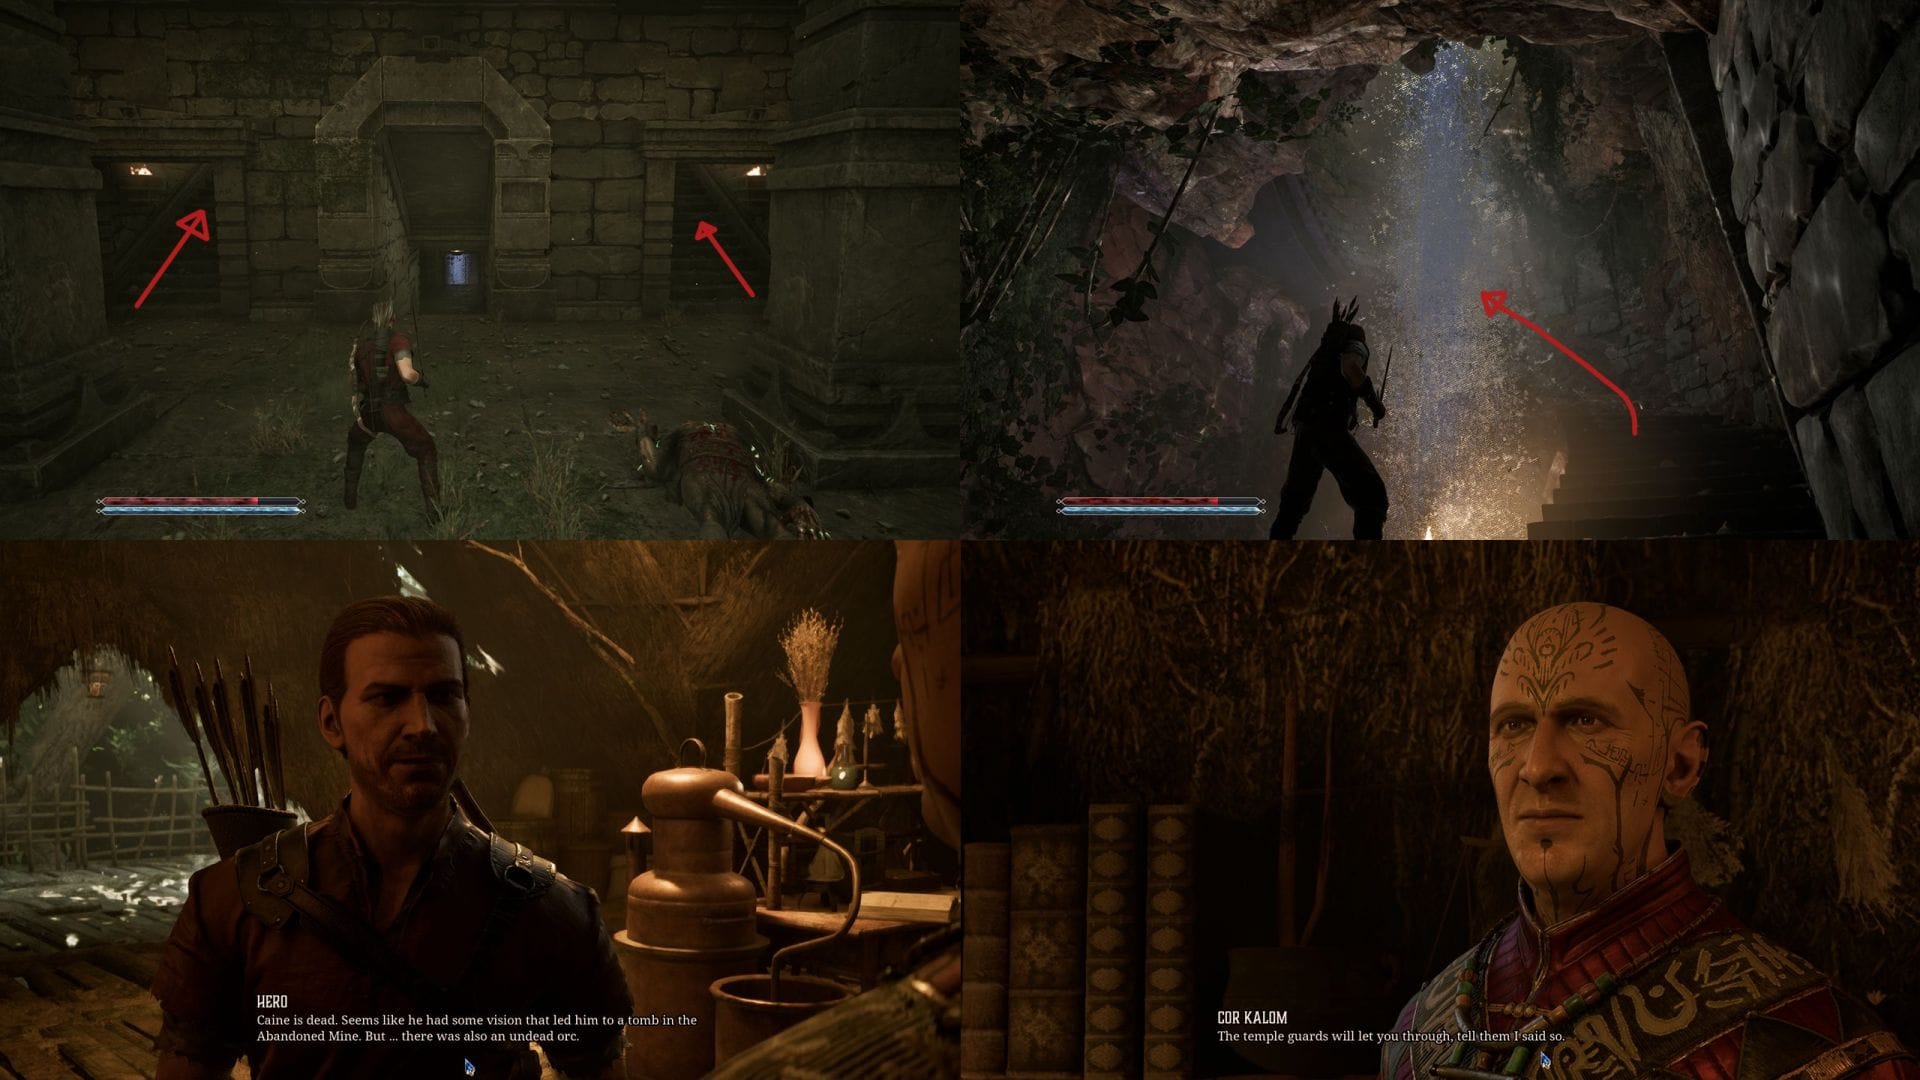
Once you have made it to Cor Kalom’s laboratory in the Swamp Camp, the Templar guarding the gate will stop you. Answer correctly to get an audience with Cor Kalom.
Answer him with: ‘It’s about Ore, Caine still owes us’.
After that, enter the laboratory and speak with Cor Kalom; he will inform you that his apprentice (Caine) has gone missing. Cor Kalom will ask you to see what has happened to him.
Go outside and ask the Templar where to look for more information. He will tell you to check his hut.
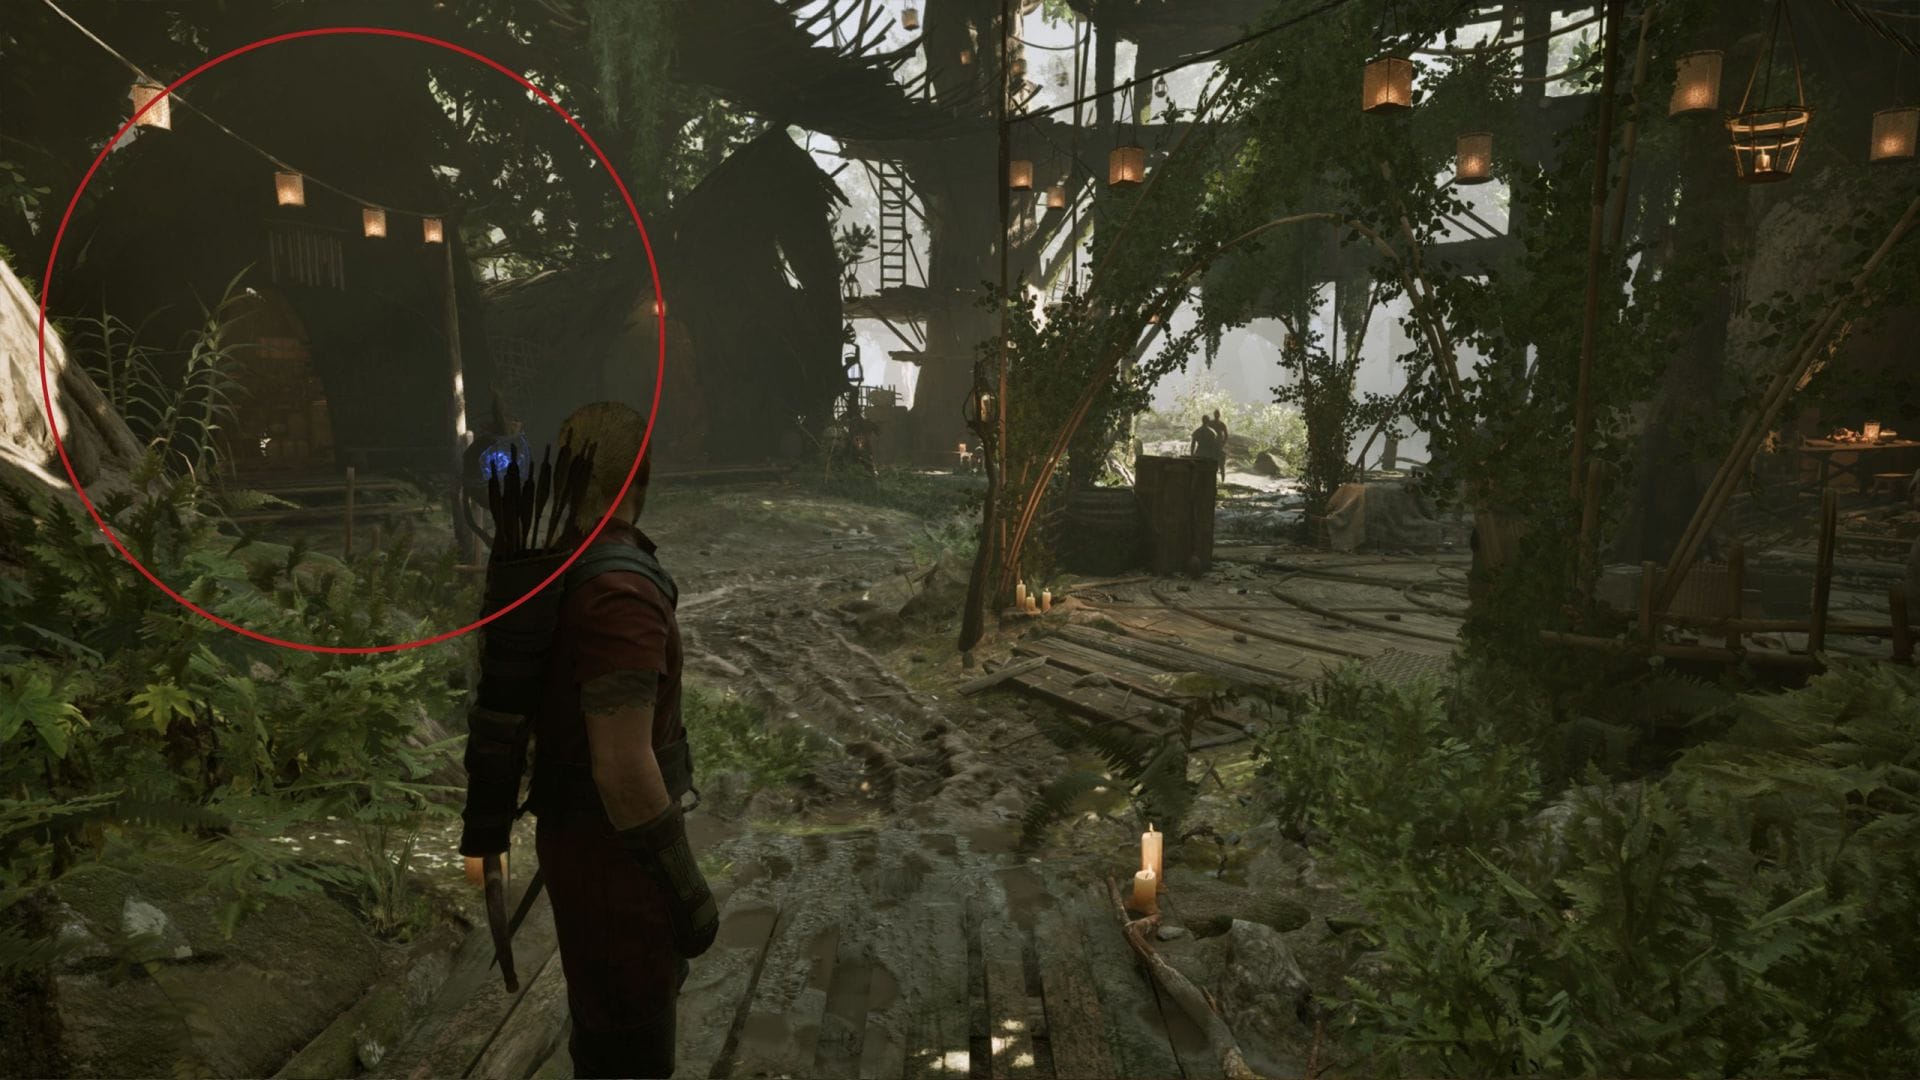
You can find the hut of Caine near the Swampweed-mashing station. You will find two adjacent huts in the area and a Novice sitting in between them.
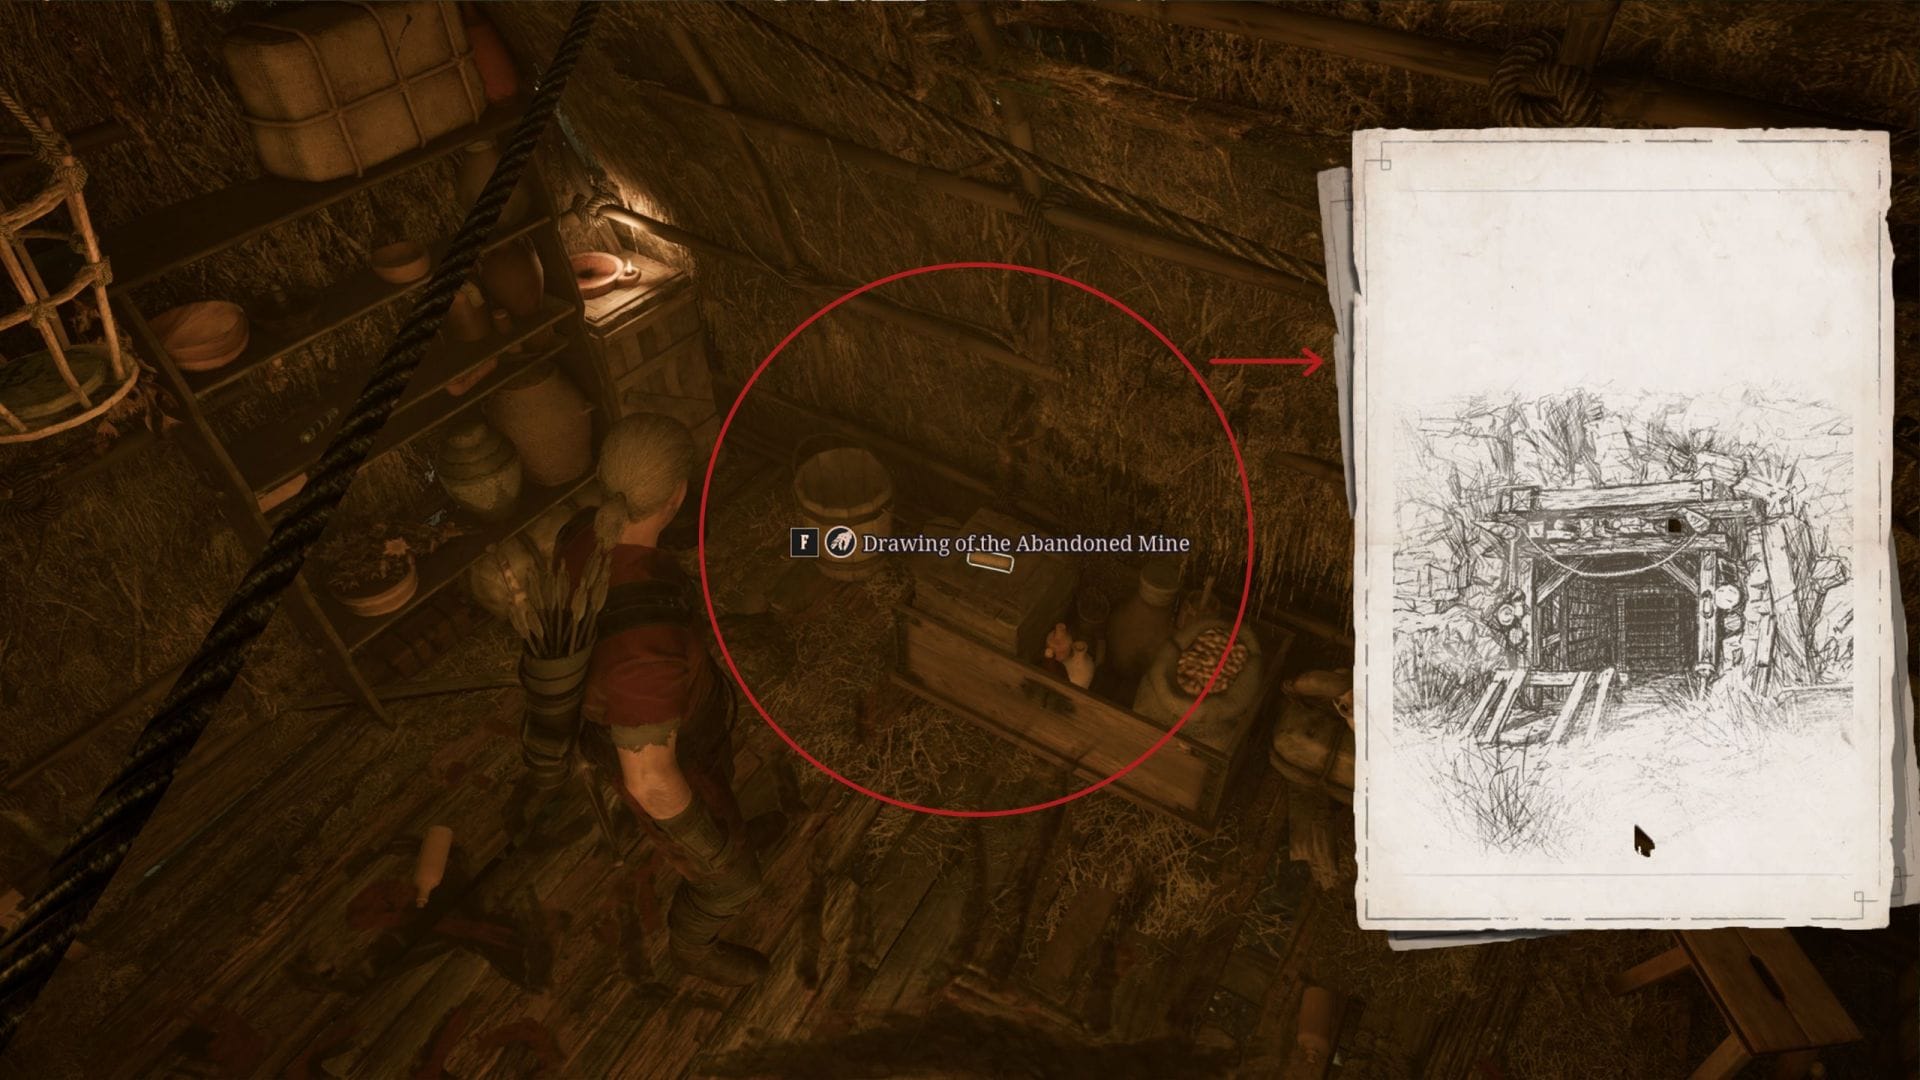
Enter the hut and look to the bottom left side, near the boxes. You will find a piece of paper with the drawing of a mine in it.
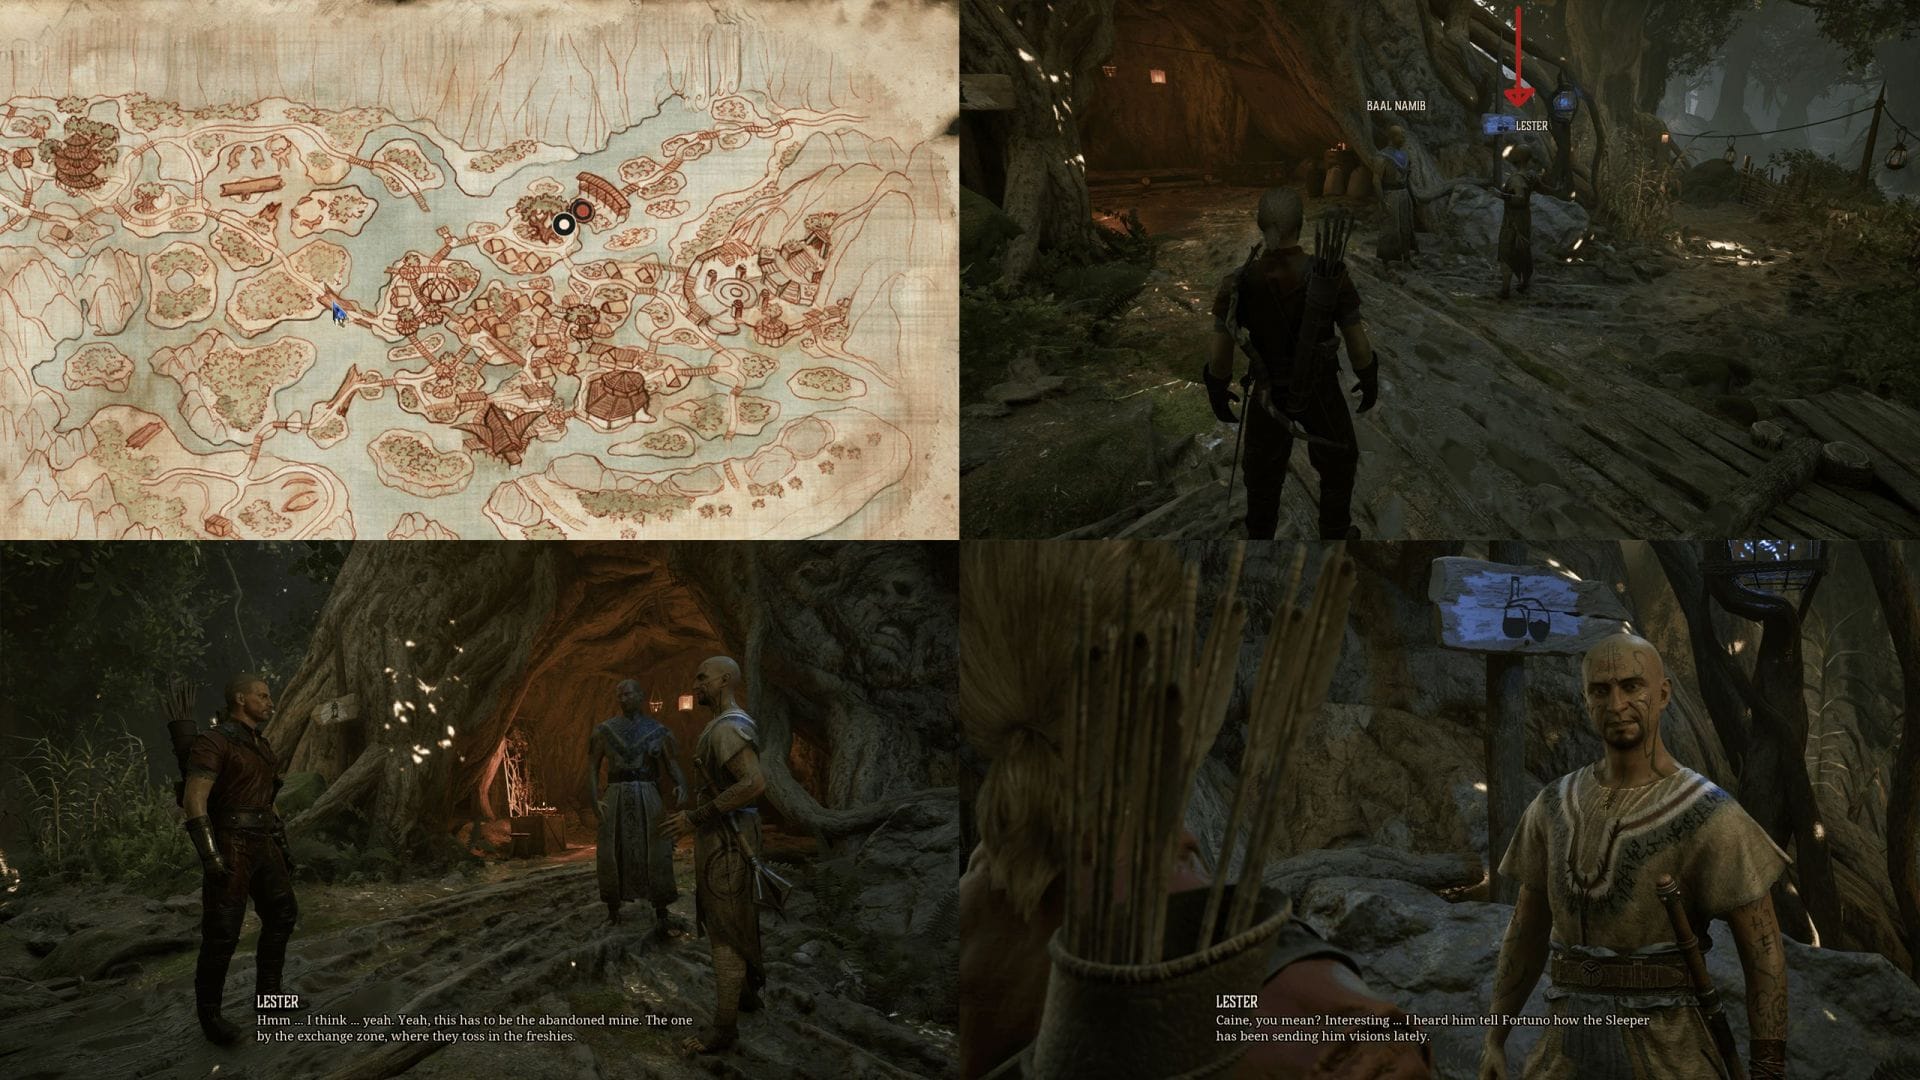
Approach the Novices in the area and ask them about the Sketch, and they will eventually point to Lester. You can find Lester talking to Baal Namib near the entrance of the Swamp Camp. Ask him about the mine and he will agree to take you to it. Lester will give you the directions to the mine. Apparently, it’s the closed mine near the wooden bridge, where you get your first weapon in Gothic 1 Remake.

The mine will now be guarded by a Warder from the Old Camp, who will tell you that someone had already entered the mine by bribing him. But you don’t need to pay him; just say that you are investigating for Raven, and he will let you enter the mine for free.
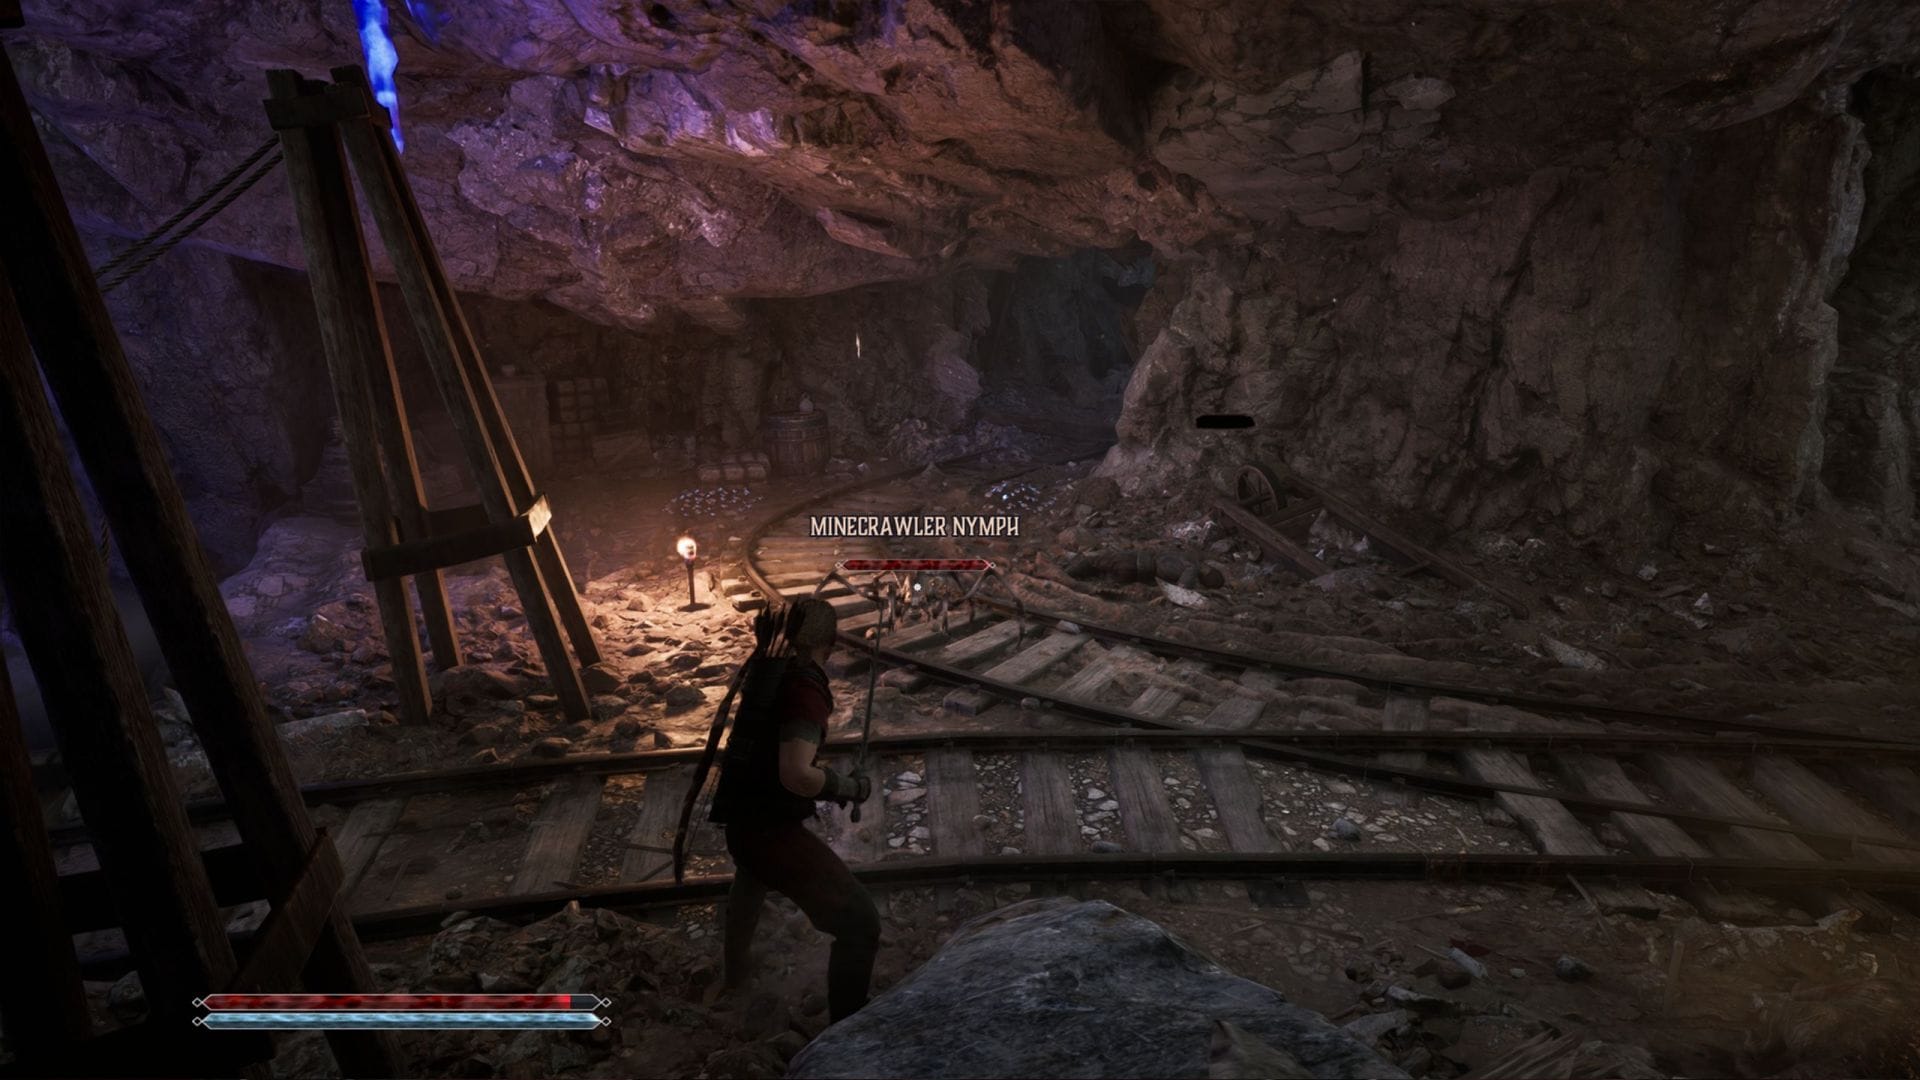
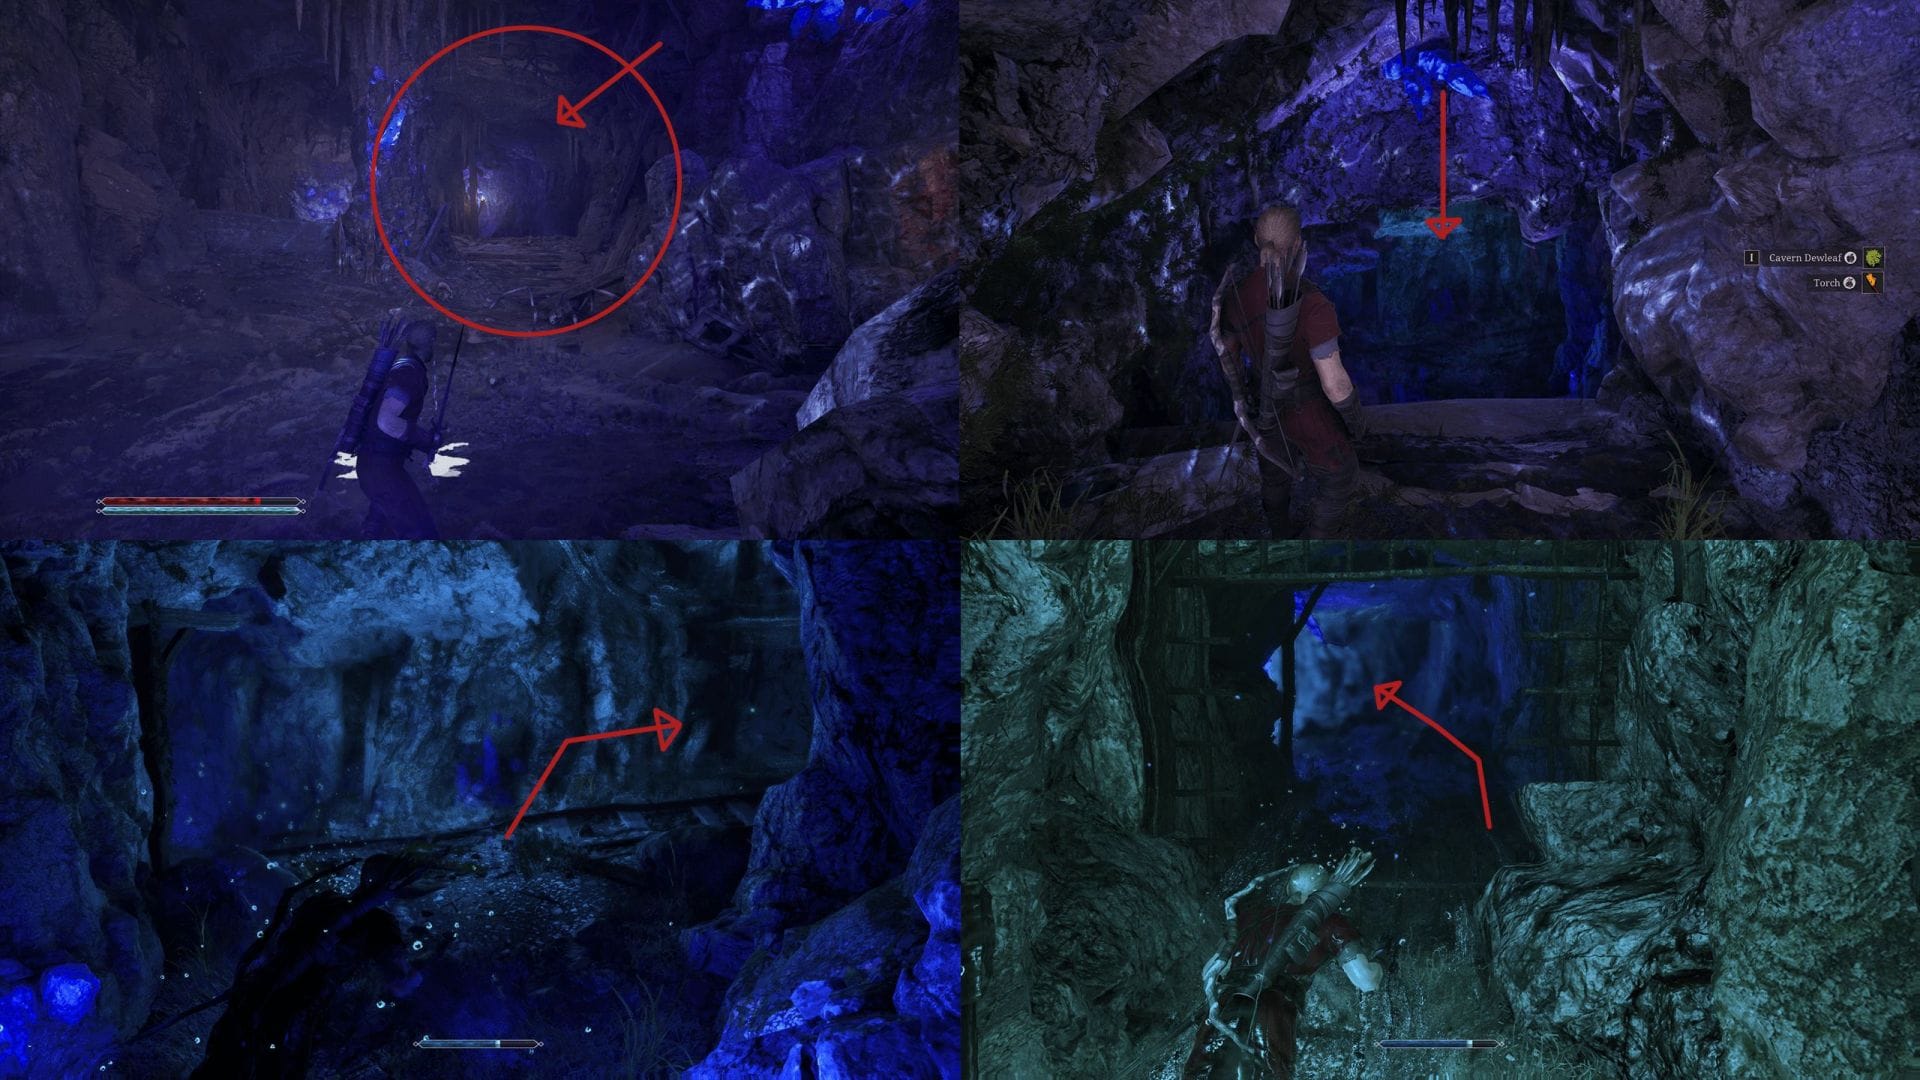
Enter the mine and follow the path straight ahead, but you will be attacked by Minecrawler Nymphs. So be prepared to tackle ambushes.
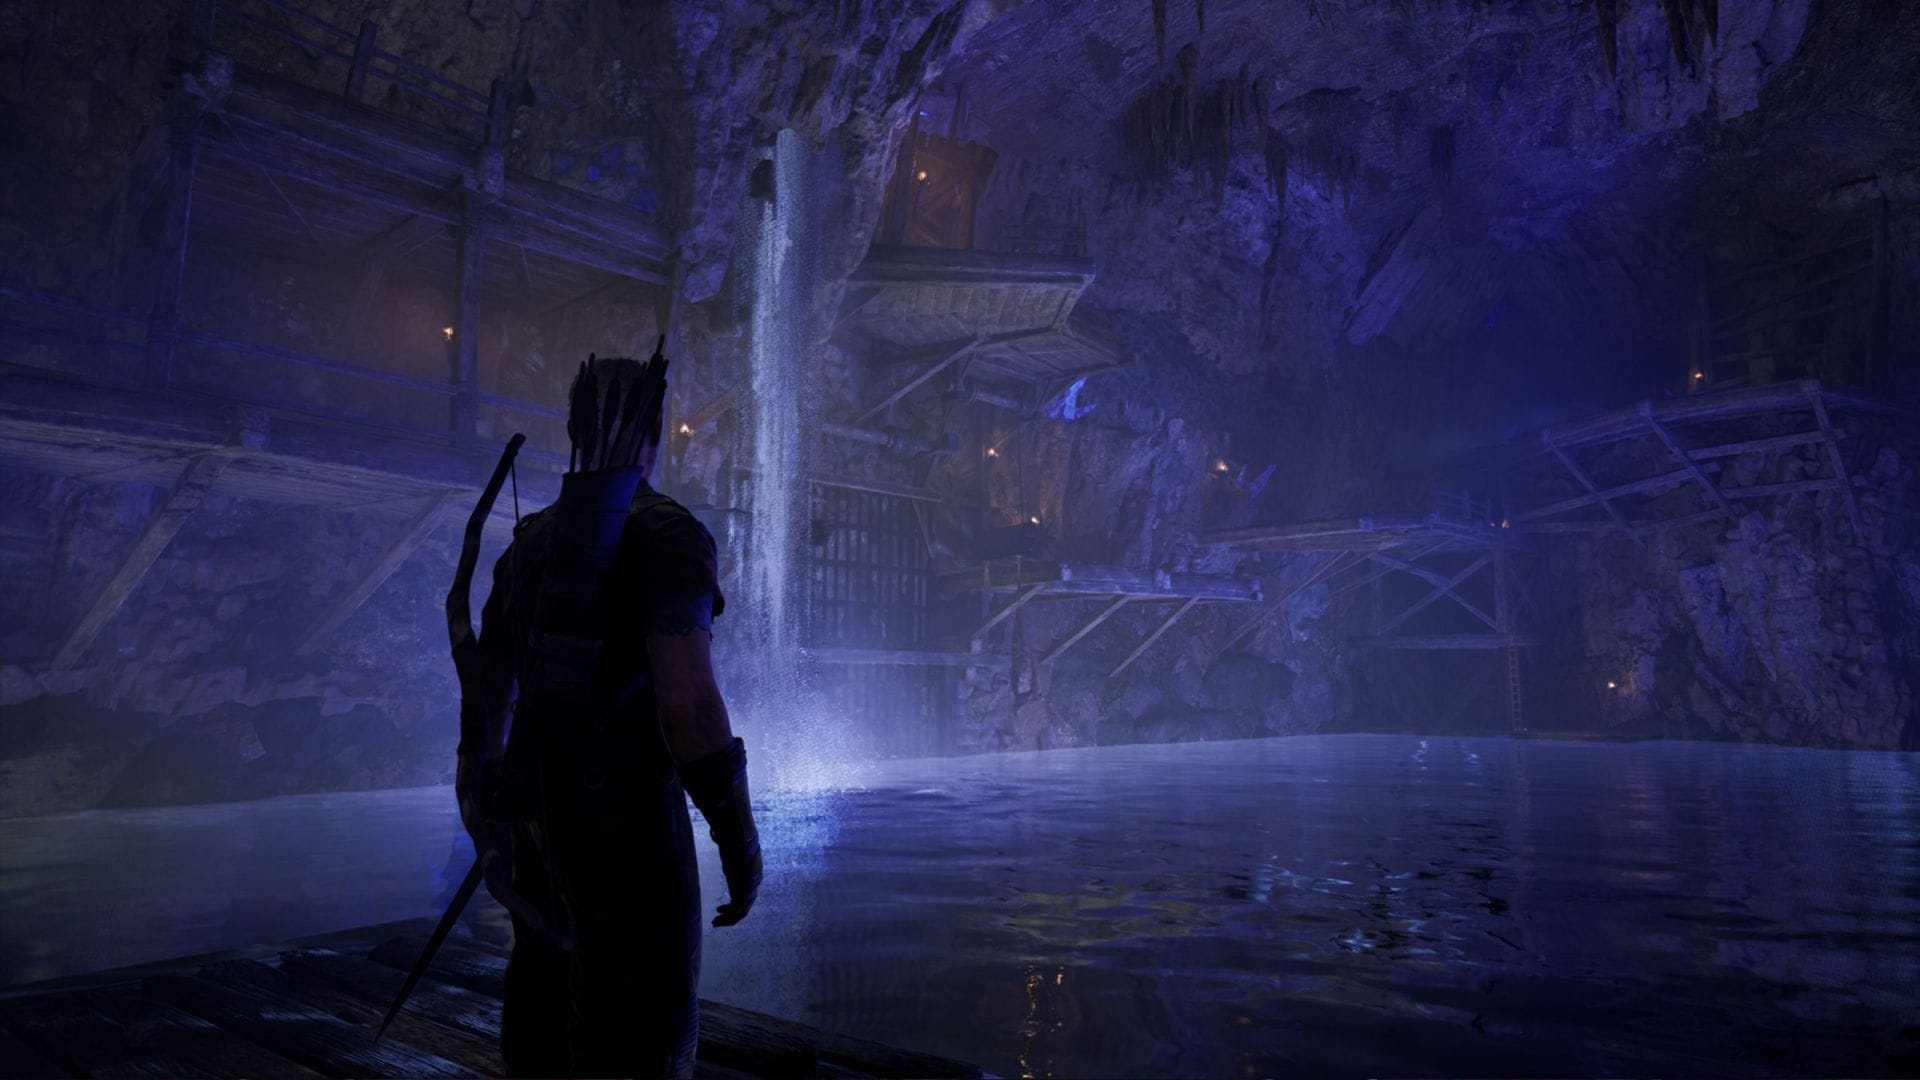
Keep moving forward until you reach a massive flooded chamber with some wooden structure around you. The goal here is to open the grate to the left side wall. Here’s how to do it:
Step 1: Jump into the water and dive deep towards the glowing ore on the mine floor. Pick up the cog lying on the ore.
Step 2: Attach the cog to the pulley located on the platform above. You will find a ladder on the far side platform that will help you reach the pulley.
Step 3: Once attached, open the grate using the pulley system and go through it.
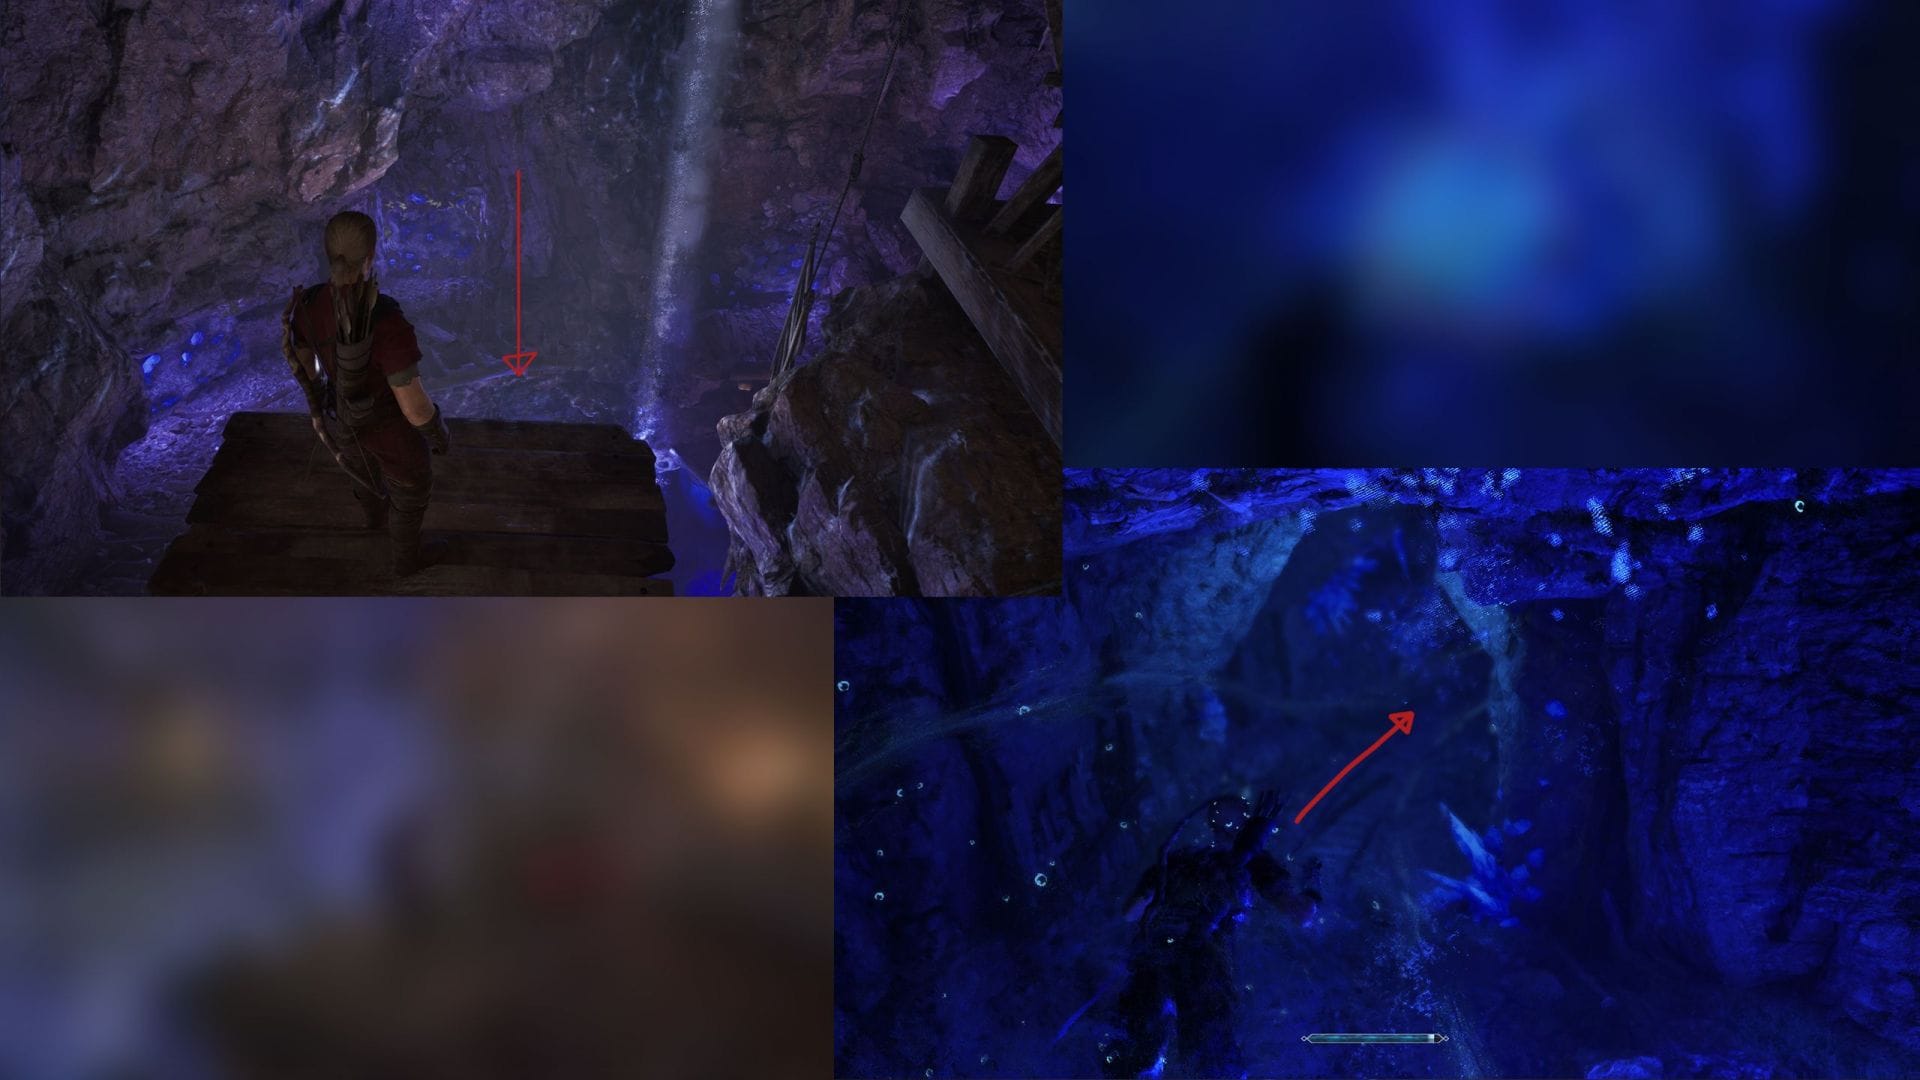
You will come across another small open area with a few wooden platforms above, dive down and keep going through the opening until you find an opening. But be ready to face a miniboss in the next room.
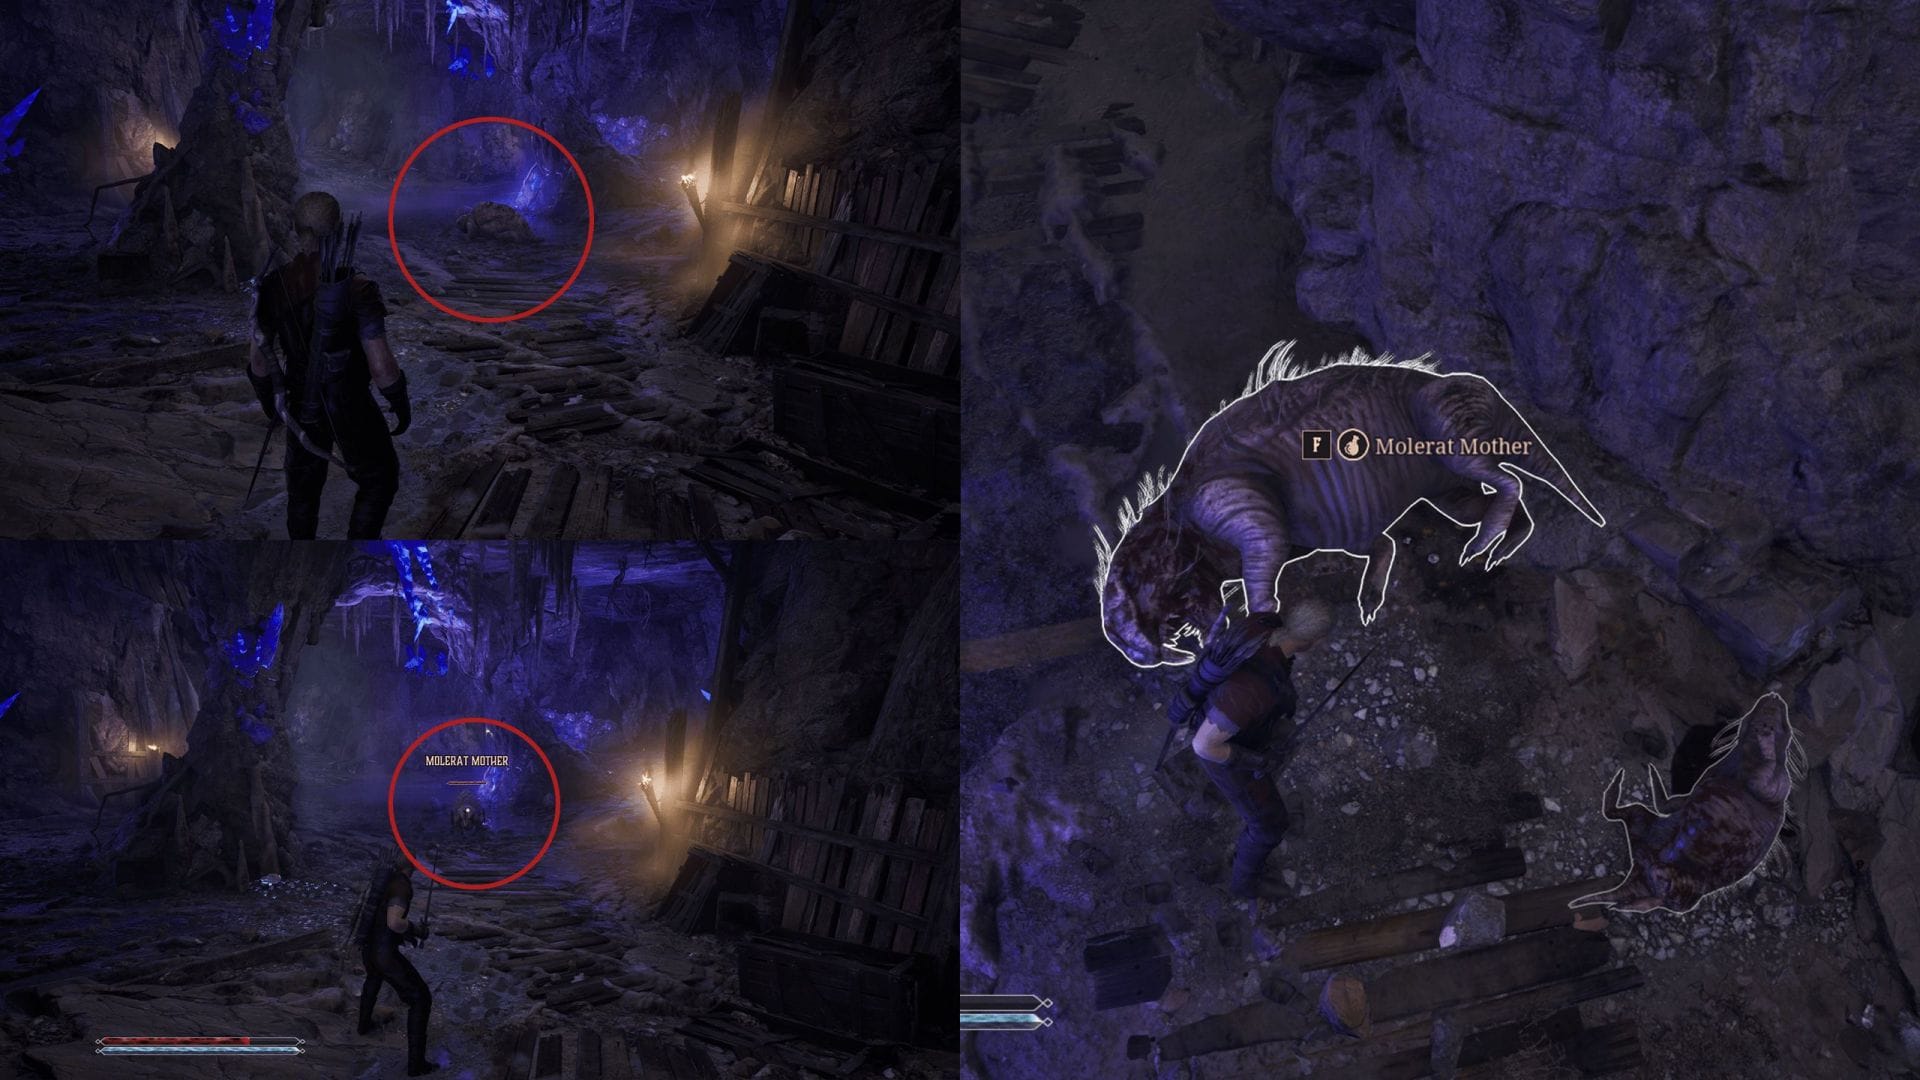
Defeat the Mole Mother:
The Mole Mother is an aggressive miniboss that behaves very similarly to the smaller counterparts of the species in Gothic 1 Remake. She will also summon three additional molerats to fight beside her. Do not get surrounded or cornered during the fight. Target the small ones first and only then go after the Mole Mother.
Once you have defeated the Mole Mother, go through the opening on the opposite side of the cavern. You will come up on another submerged section. Jump down and prepare for a long swim.
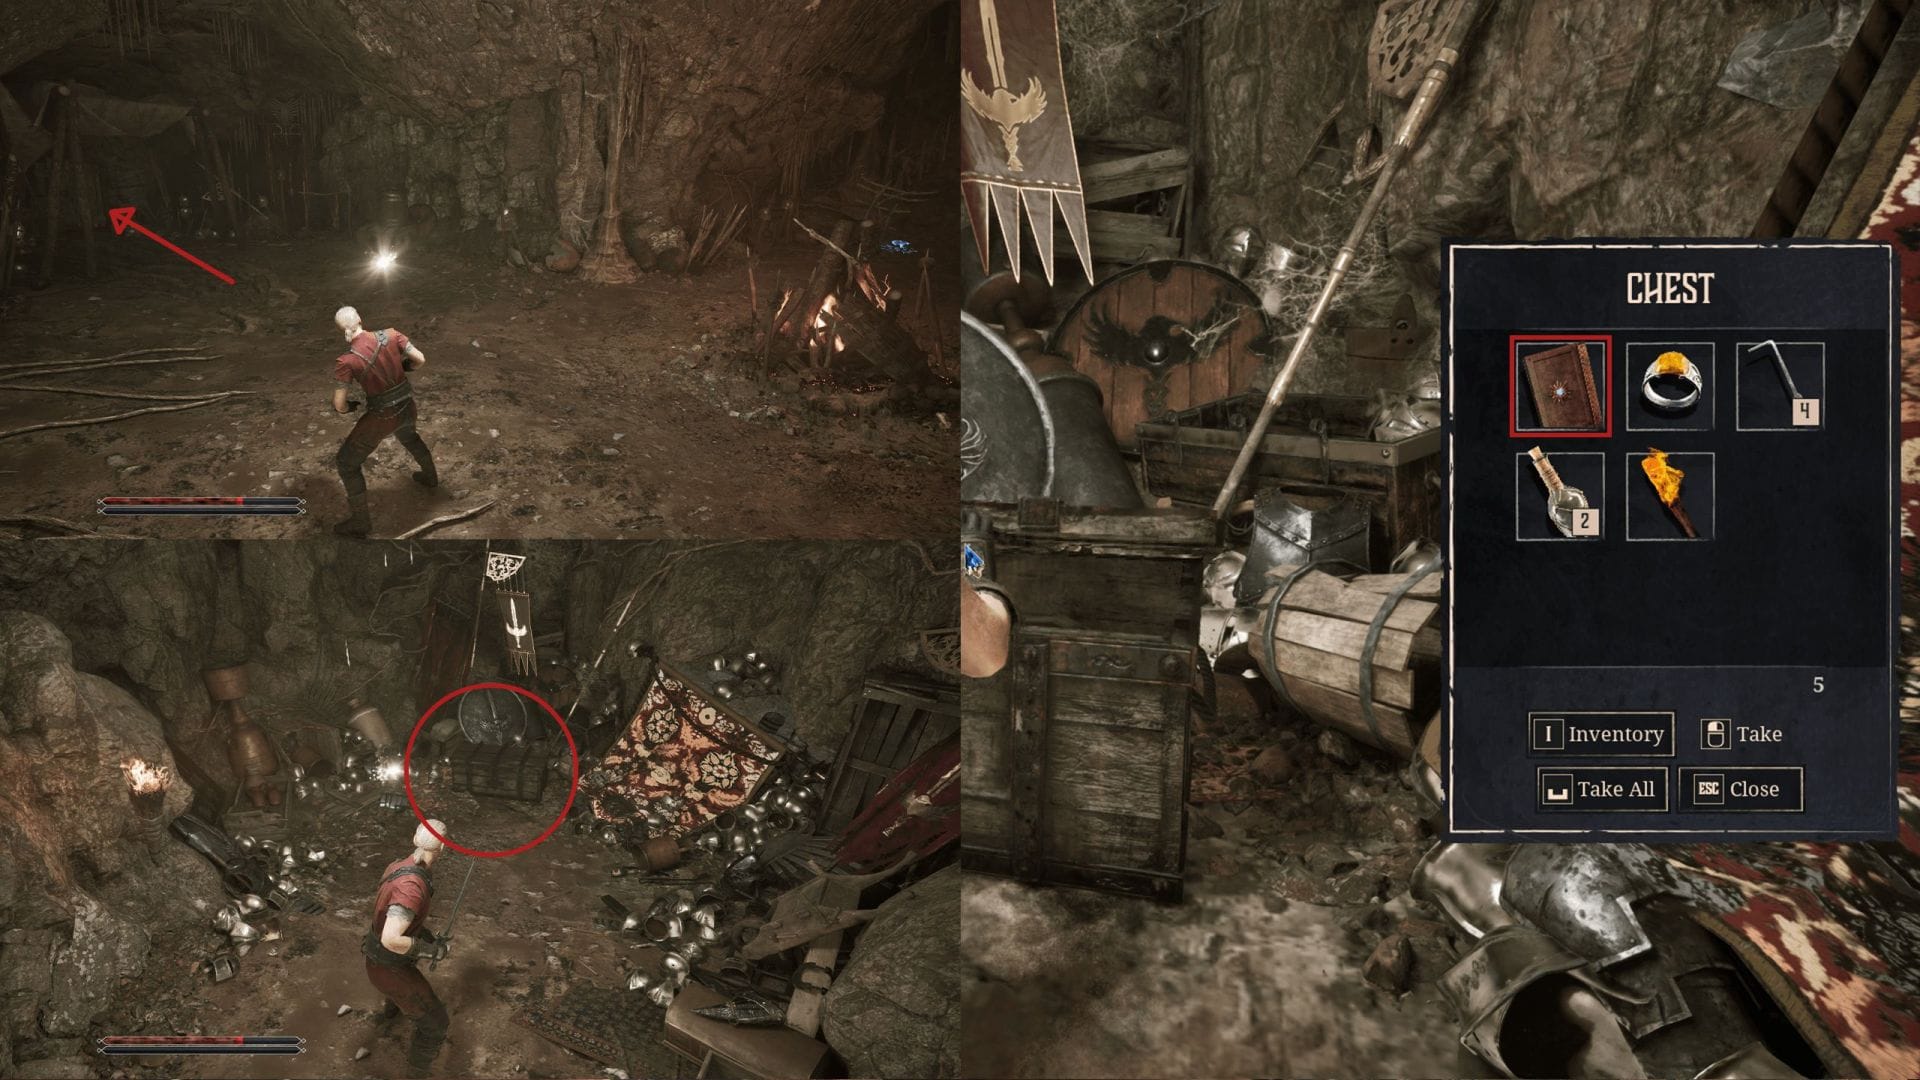
There will be two paths ahead of you. The left path will lead into a dead end, but you will find a locked chest (you must have at least one level of diving training from Homer). The right path will eventually open up into a large cavern with a temple-like structure on the opposite side.

Enter the structure and explore it a bit; you will find a healing potion and a mana potion in the side rooms. Be sure to save the game before moving forward. Climb up the staies, and you will find an Undead Orc standing over a corpse.
Defeat the Undead Orc:

The Undead Orc is extremely powerful and uses heavy attacks using an axe. Avoid getting hit by the two-hit combo attacks, as they will completely drain your life. Wait for him to finish the combo attack, and then you move in for an attack. Don’t get greedy during the fight, as the Orc is quick to retaliate. Hit him once and then move back. Once you understand his attack pattern, the fight becomes simple but not easy. Having the Dodge Roll skill is a lifesaver against Orcs in Gothic 1 Remake.
Once defeated, you will find two items on the Orc:
- Krush Pach (two-handed axe)
- Strange Amulet
You will also find that the dead figure on the ground is none other than Caine, who got killed by the Undead Orc.
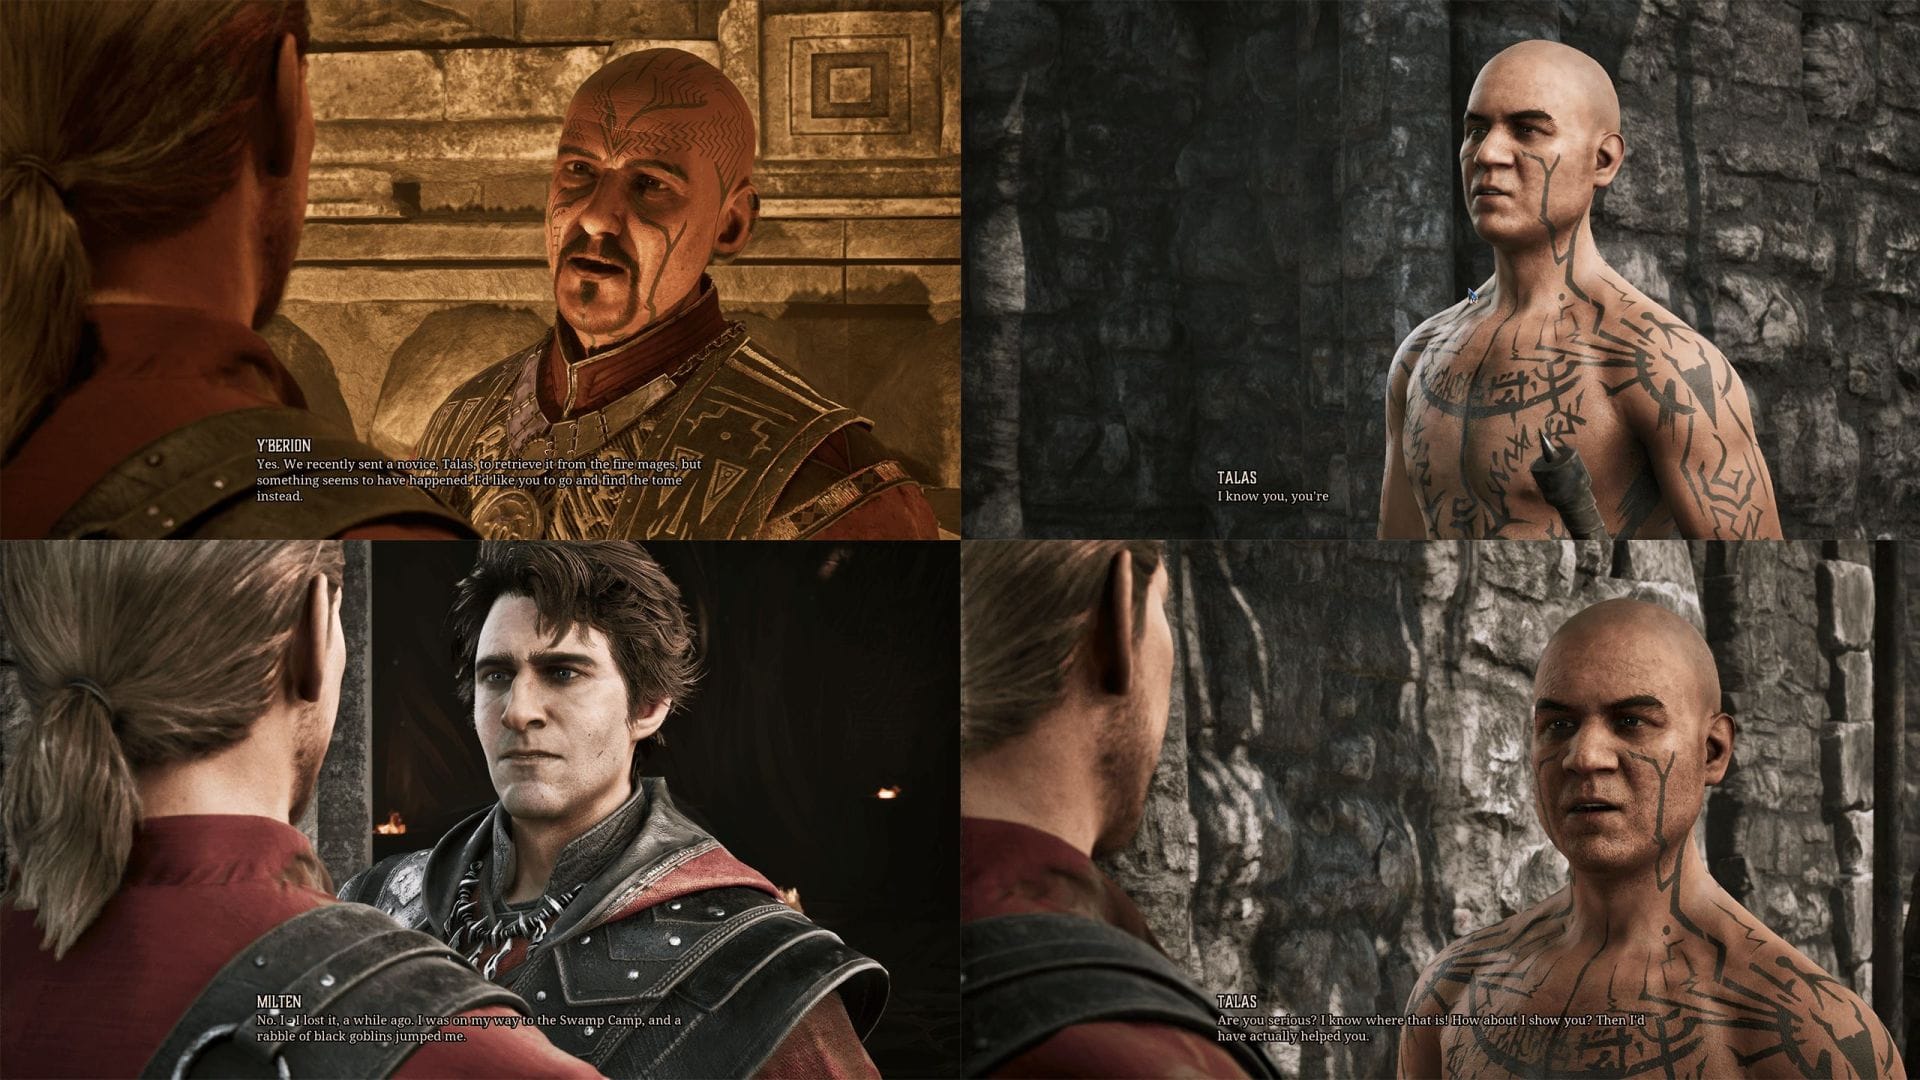
Once you have the Amulet, exit the mine through the staircase leading upwards. You will come out on a ledge just above the Mine. Drop down and make your way towards the Swamp Camp. Report your findings to Cor Kalom to end the quest. He will ask you to speak with Y’Berion, leader of the Swamp Camp. You will find Y’Berion inside the inner sanctum of the temple in the Swamp camp.
After you tell him about Caine and show him the amulet he found, he will theorise that the amulet is key to destroying the barrier. Y’Berion will task you with acquiring a Focus Stone by using the Mysterious Amulet, which will then trigger the Focus Stone quest in Gothic 1 Remake.
Quest 2: The Focus Stone

Y’Berion will task you with using the Amulet to acquire a Focus Stone. You will have to follow Nyras, one of the novices, to the location of the Focus Stone. The hero will use the Focus Stone to break the barrier around the Focus Stone, which will knock him to the ground.
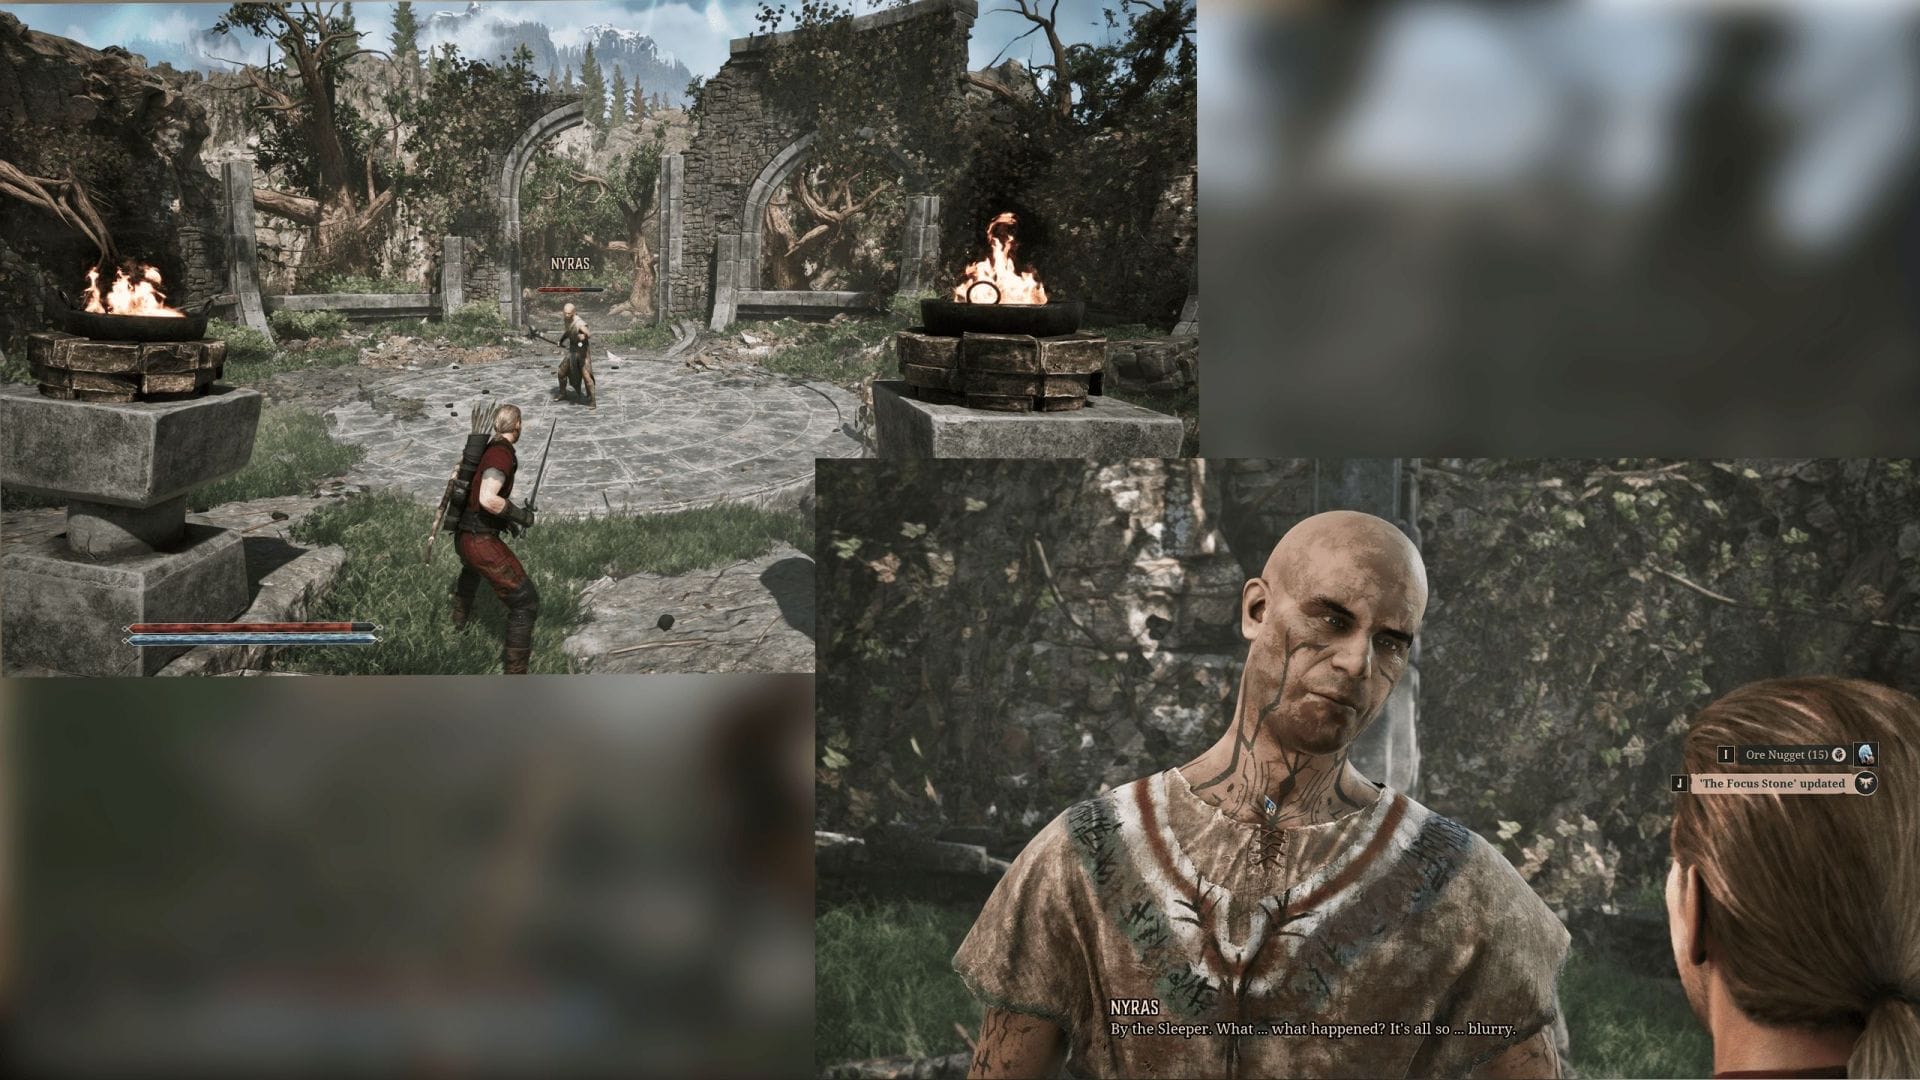
Nyras will go into a trance and try to steal the Focus Stone. You will need to defeat him, but do not kill him.
Return to Y’Berion and deliver the Focus Stone and tell him about the incident with Nyras.
Quest 3: The Almanac
If you have not invested in your defensive stats (better armor), this quest will give a lot of trouble. So before progressing, be sure to improve the armor you have.
After reaching the Old Camp, you will find Talas near the castle entrance, just beside Thoros. Apparently, he has been smoking too many Swmapweed Rolls and arrived late and has been denied entry by Thoros.
All you need to do is go inside the castle and find Milten the fire mage. He will tell you that he lost the book when he got attacked by a bunch of Black Gobkins in the forest.
Go back to Talas and tell him what you have learned; he will tell you the location of the Black Goblin cave. Follow him to the Black Goblin cave, which is located just opposite of a waterfall.
Deal with the Goblins inside the cave:
You will face over 20 Black Goblins inside this cave, and they will always try to gang up on you. You can’t even create distance, as they will start lobbing rocks.
There are a few things you should bring:
- Light Scroll: Will dramatically improve visibility, and you won’t need to walk around with a torch.
- Health Potions: The Black Goblins use mace and do a ton of damage.
- Magic Items: Use fire or lightning damage, as the Goblins tend to group up.
Find a large room at the end of the cave; you will see a wooden door to the left side. The chest containing the tome is inside that room. Once you have acquired it, go through the opening to the right side, and you will drop down near the entrance of the cave.
Return the book to Y’Berion, and he will reward you with an Amulet of Flames. This will conclude The Almanac quest. Y’berion will then ask you to visit Cor Kalom, which will trigger the next part of the quest.
Also Read: Gothic 1 Remake Walkthough: How to complete New Souls for the Brotherhood
Quest 4: The Minecrawler’s Nest
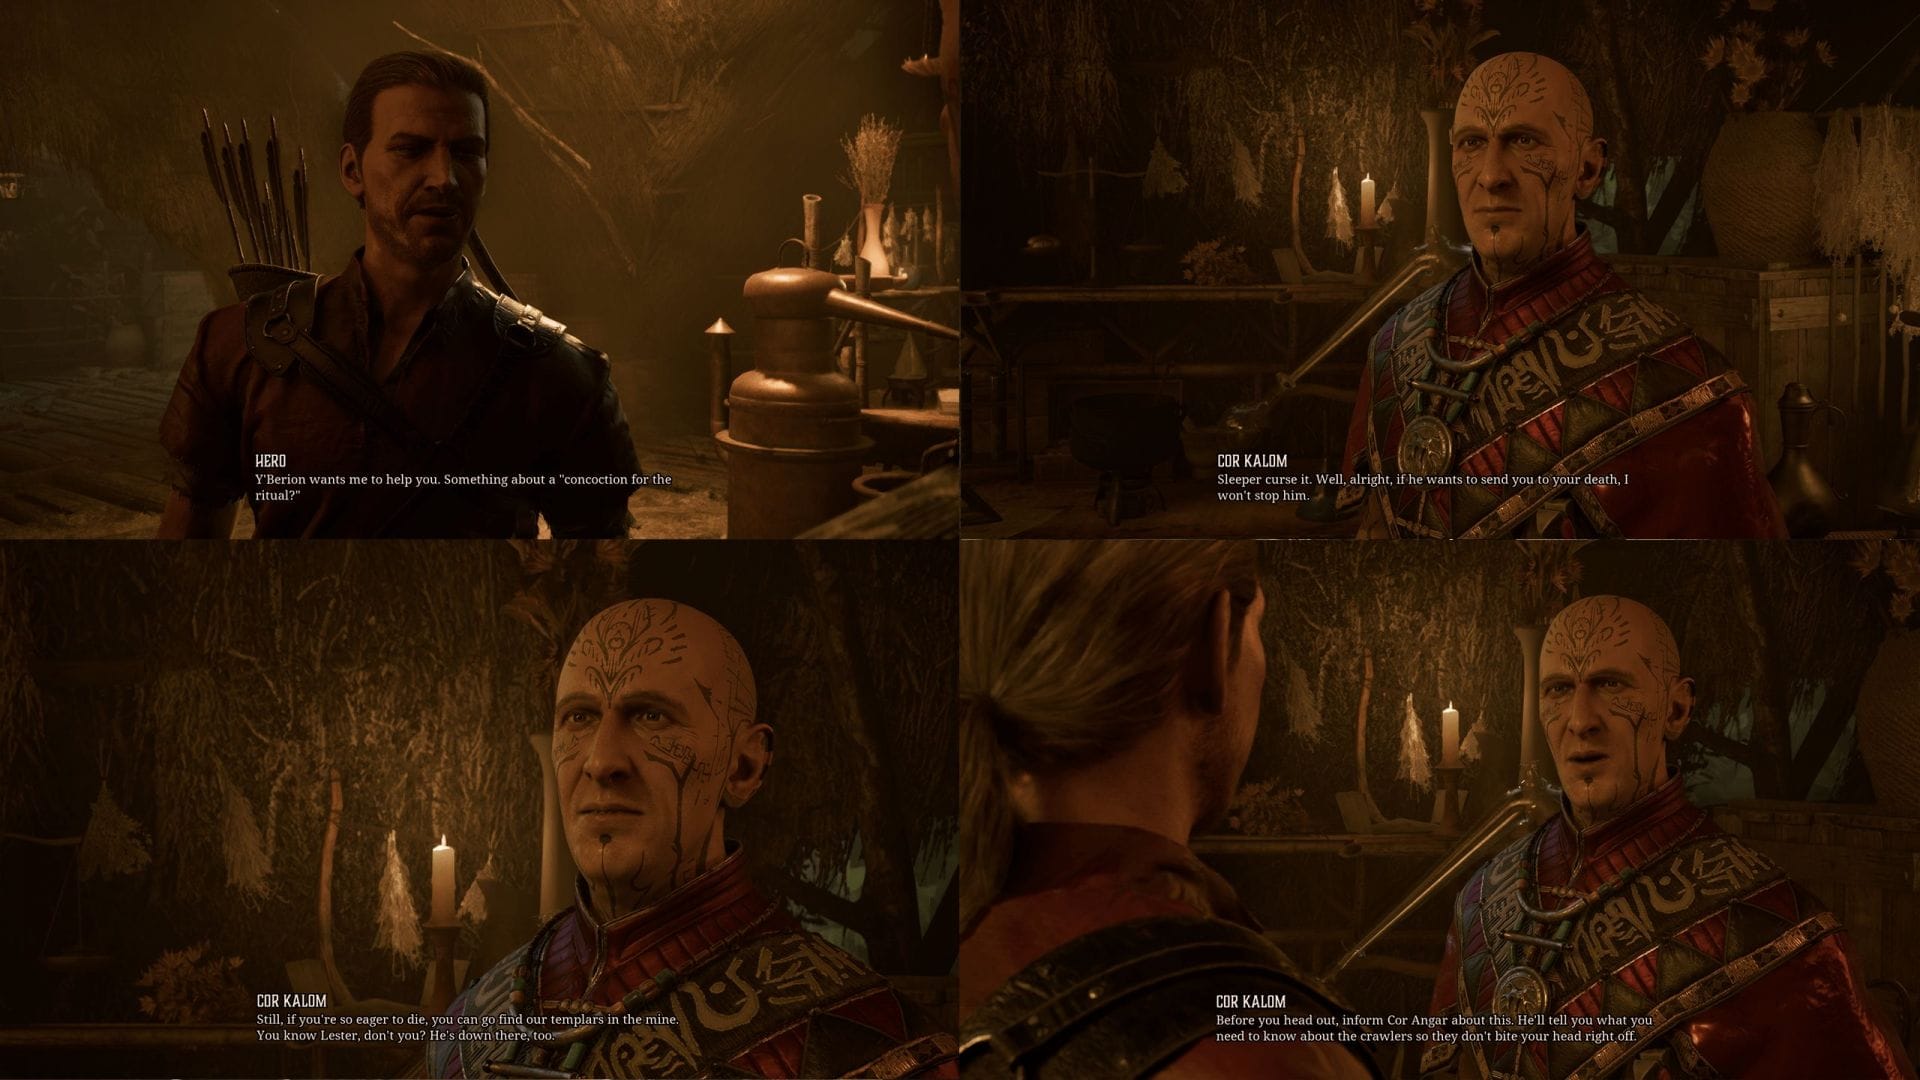
Speak with Cor Kalom, and he will tell you to go to the Old Mine and meet Lester about finding the Minecrawler’s nest. But before that, he wants you to meet with Cor Angar so that he may test your might.
You can find Cor Angar in the training area, but if you are having difficulty finding him, ask a novice to show you the way.
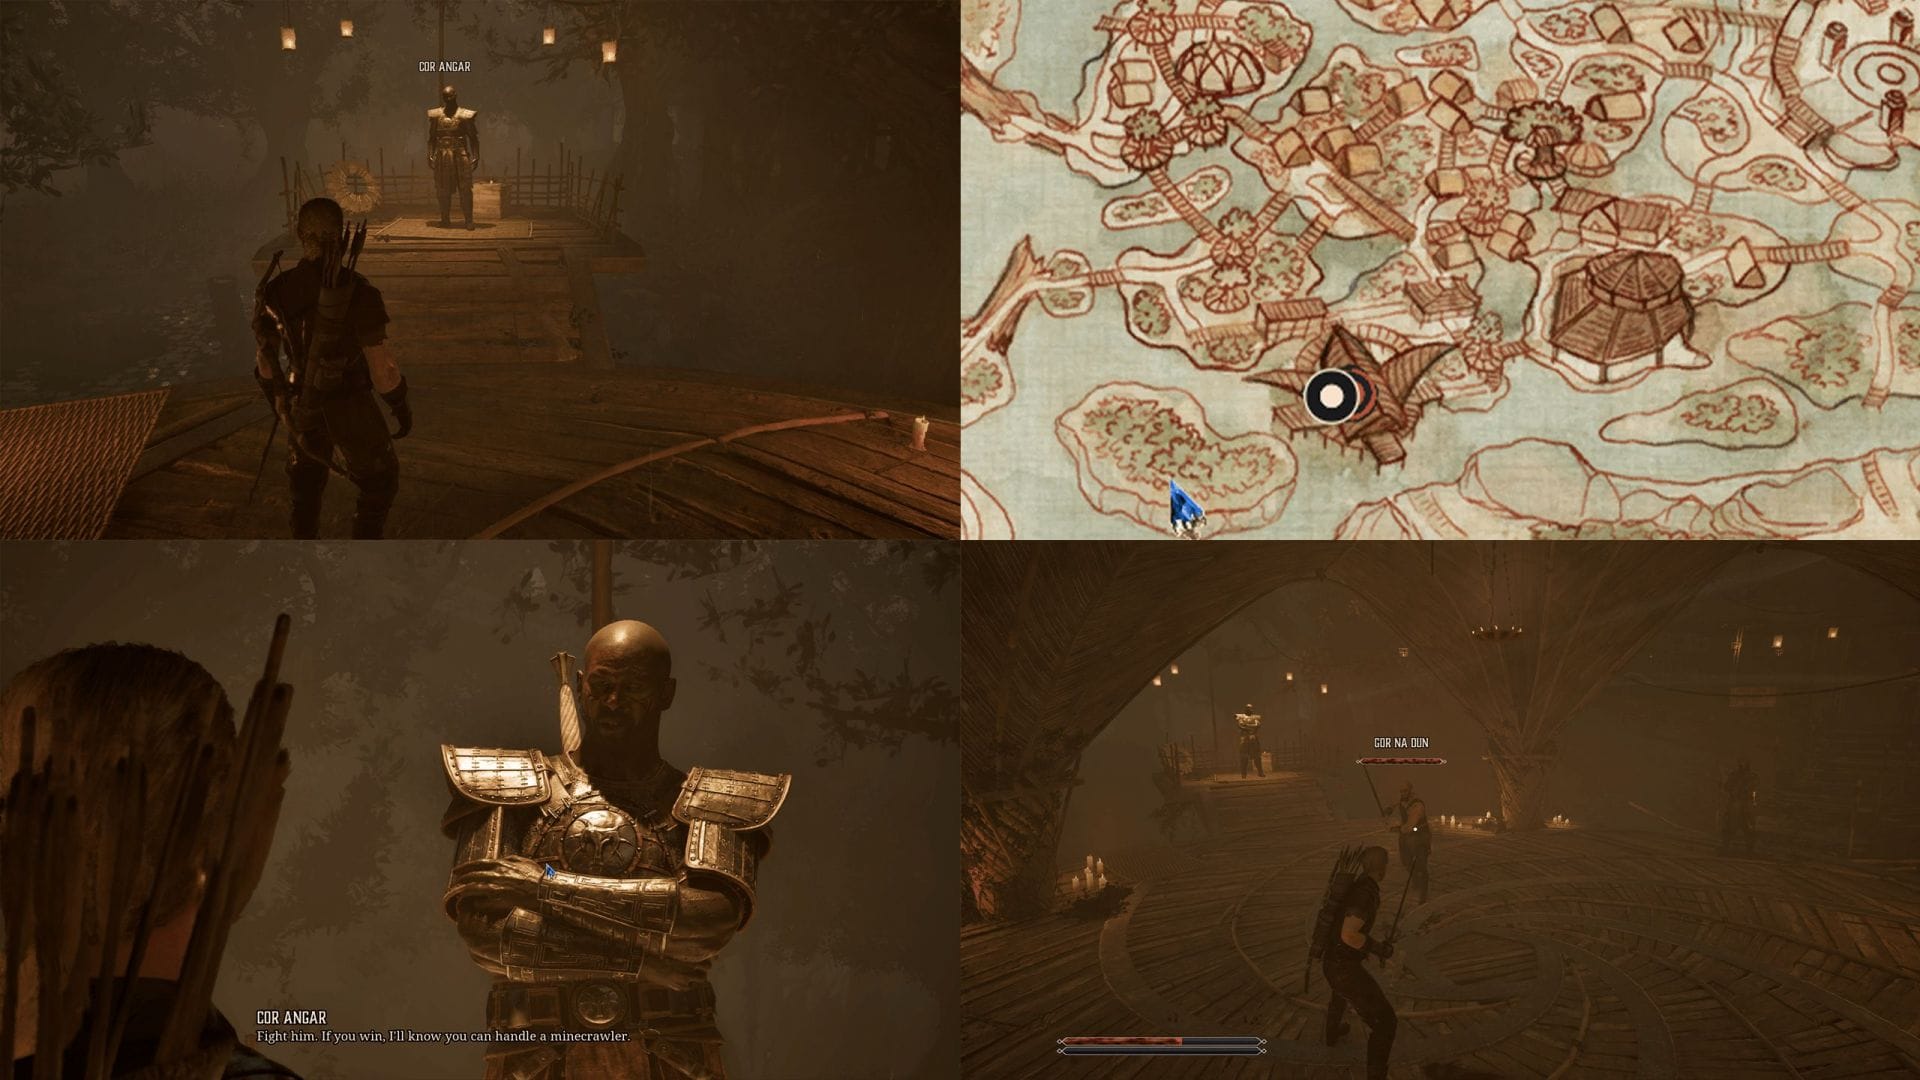
Cor Angar will ask you to defeat Gor Na Dun in a fight to test your might. If you succeed, Cor Angar will teach you how to collect Minecrawler mandibles.
Speak with Lester in the Old Mine:
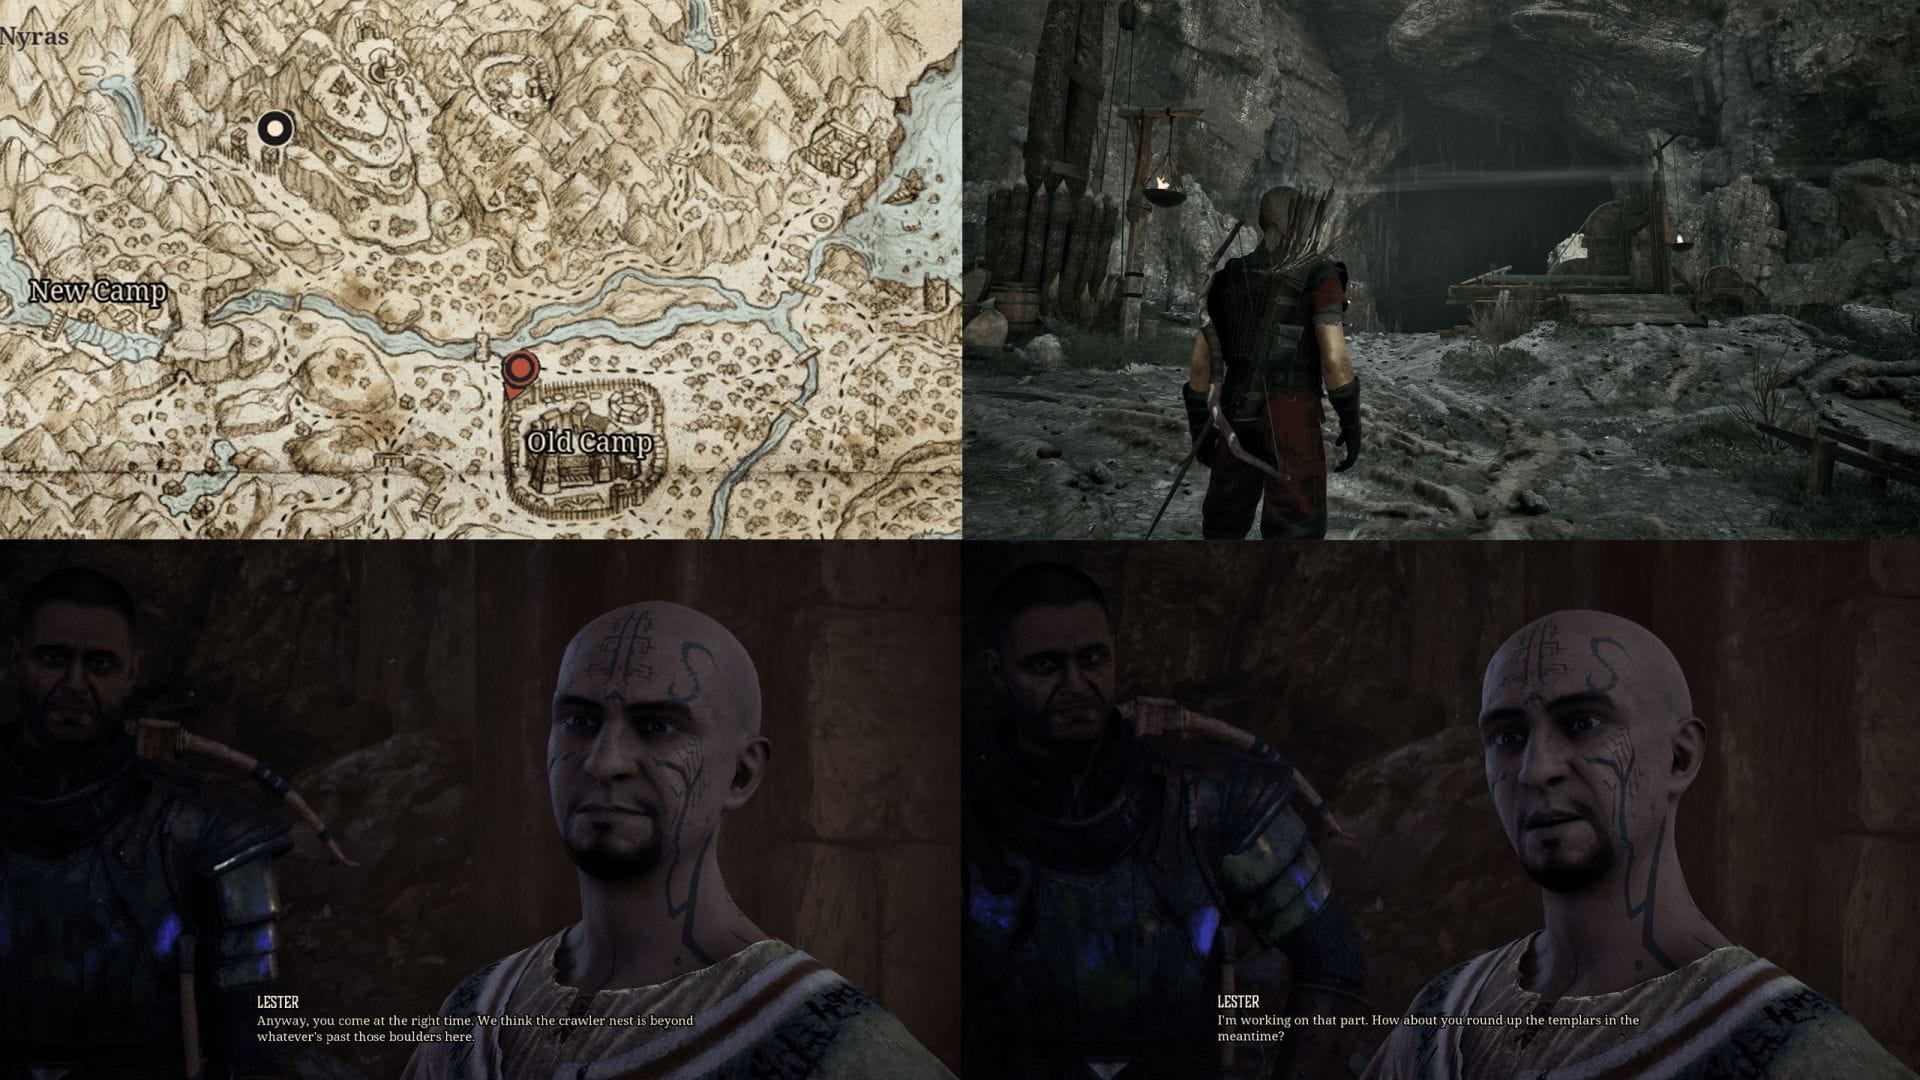
After that, travel to the Old Mine and meet with Lester. Lester will be located at the bottom of the mine, so follow the wooden pathway and you will find him speaking with Asghan.
Lester will tell you to gather three Templars and speak with Ian about opening the collapsed section.
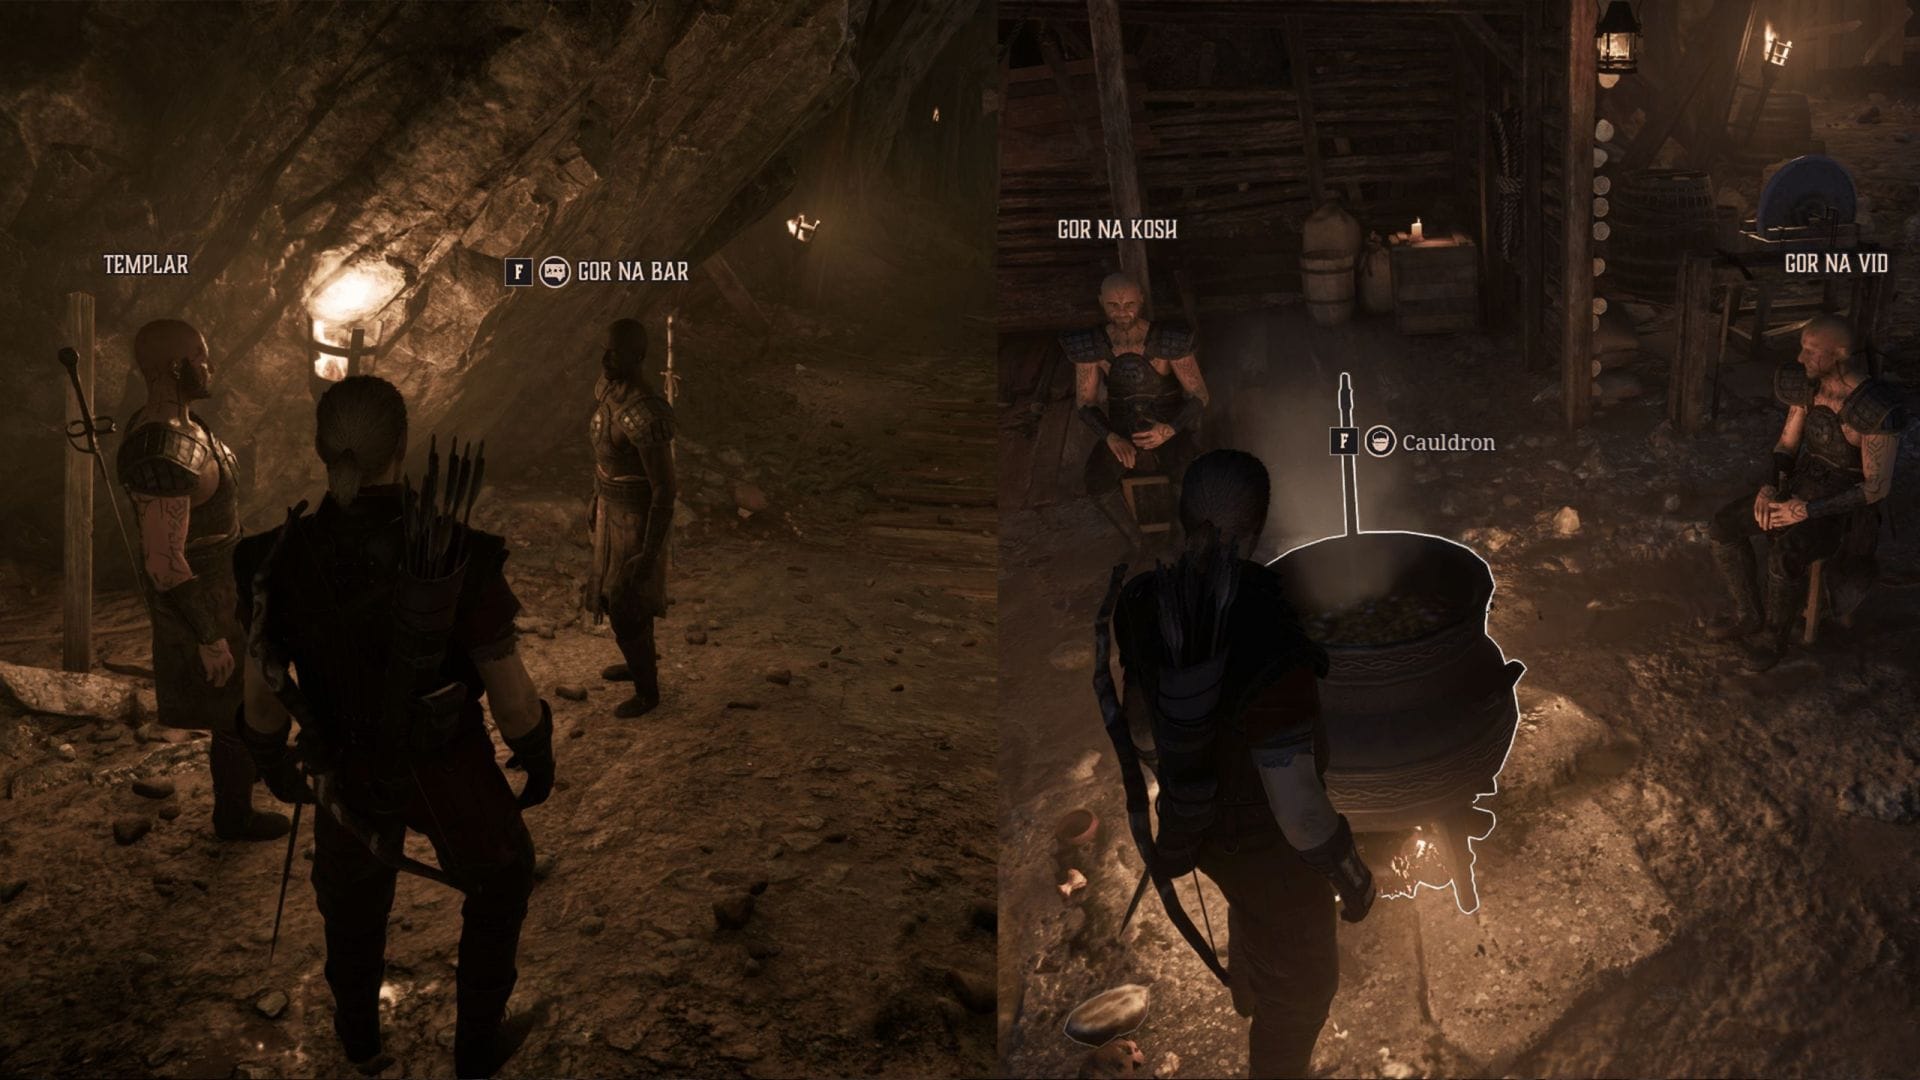
Here’s how to find the Templars:
- Gor Na Bar can be found in the upper area near a mine entrance (a few floors below Ian). He will ask you to fight four Minecrawlers and collect their mandibles as proof of your capability. Luckily, you will find a few near his location.
- Gor Na Kosh is located in the bottom section of the mine, and he will join you without any requirement.
- Gor Na Vid can also be found chatting near the cauldron at the bottom floor. Give him a few Swampweed Rolls, and he will agree to fight with you.
Help Ian fix the Ore Crusher:
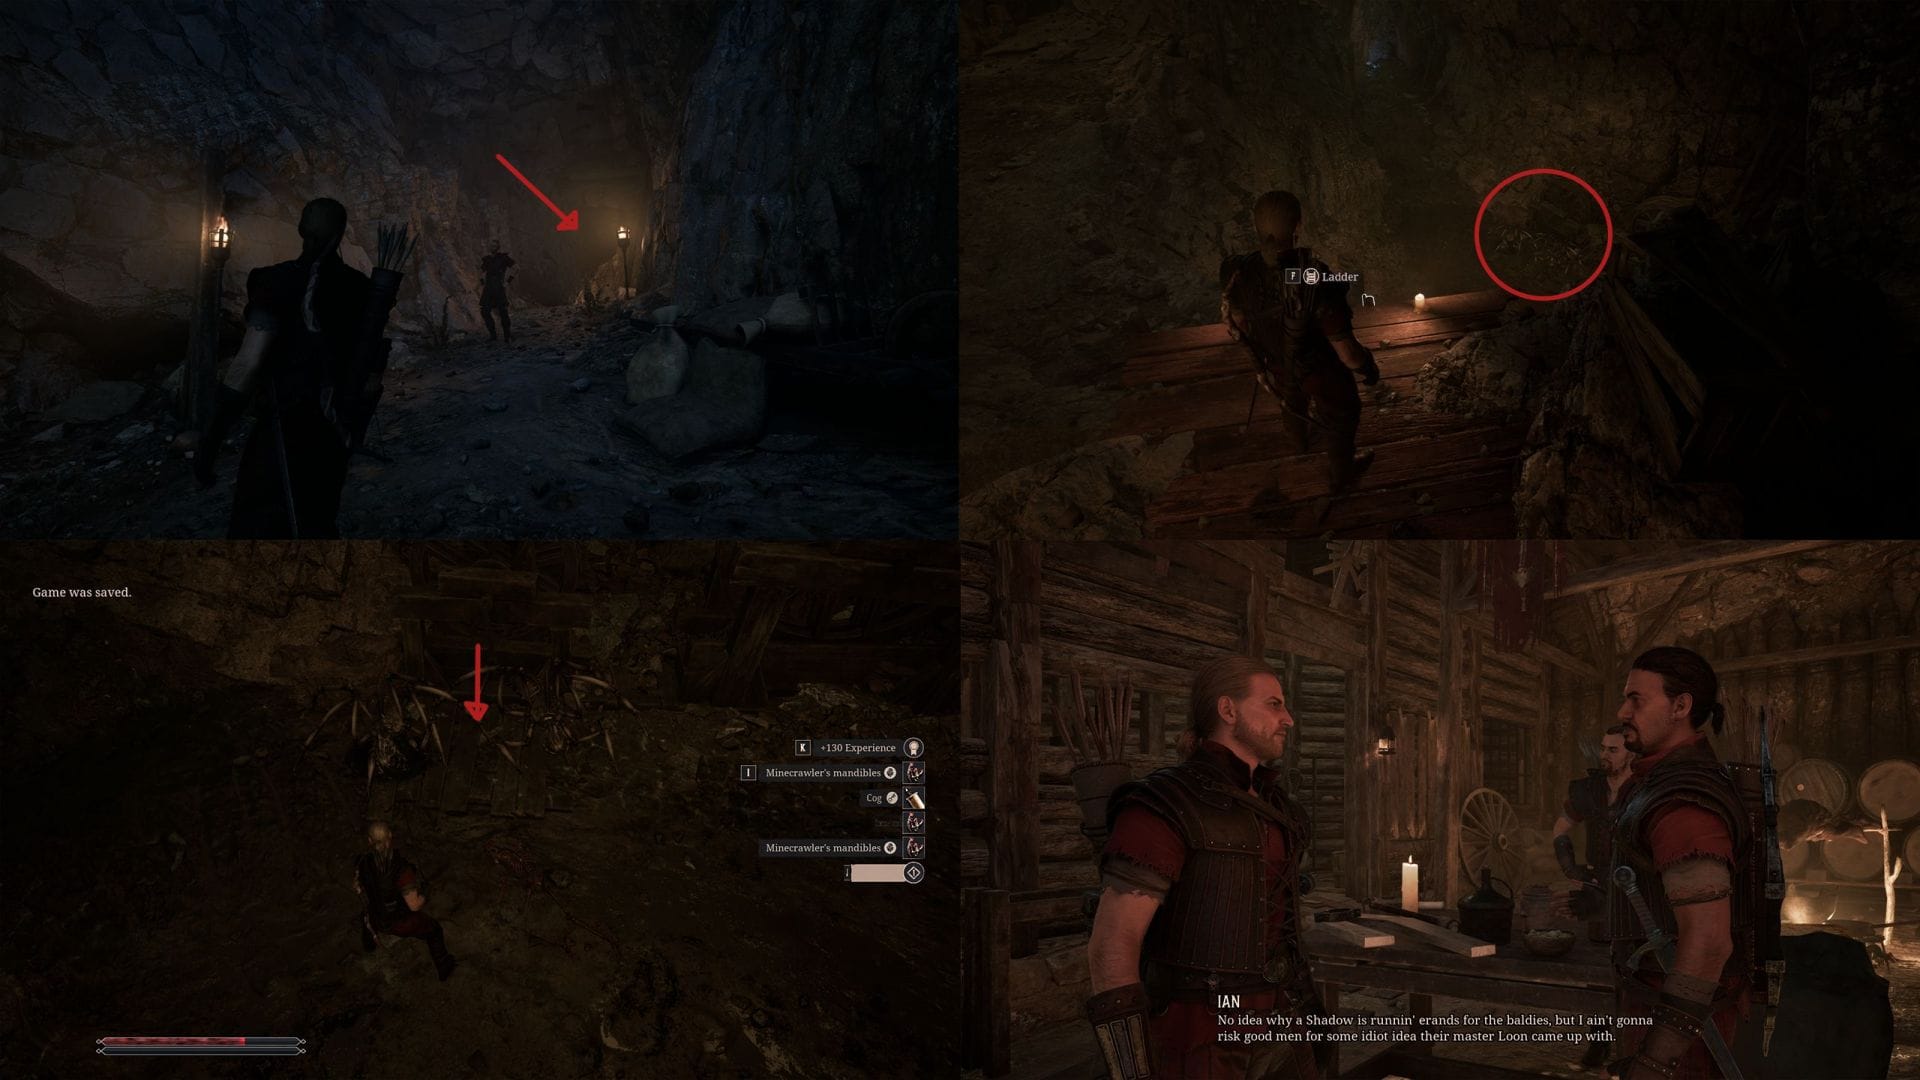
Afterwards, speak with Ian about opening the sealed mine. He will only help you if you can get a replacement Cog for the Ore Crusher.
The right path can be determined by the absence of Minecrawlers near the entrance. Once you enter the correct path, you will find three Mincrawlers at the bottom. Since they can’t climb walls, you can just shoot them with arrows or bolts from a distance.
Once they are dead, search near the machinery to find the Cog. Bring it back to Ian to finish the quest; Ian will still refuse to open the blocked area.
Find Lester outside the Old Mine:
Go outside to find Lester and follow him to a secret meeting, where Diego will tell you that he will convince Ian; you will also be given a bomb by Gorn (New Camp) and an ignition scroll by Melton.
Enter the Minecrawler nest:
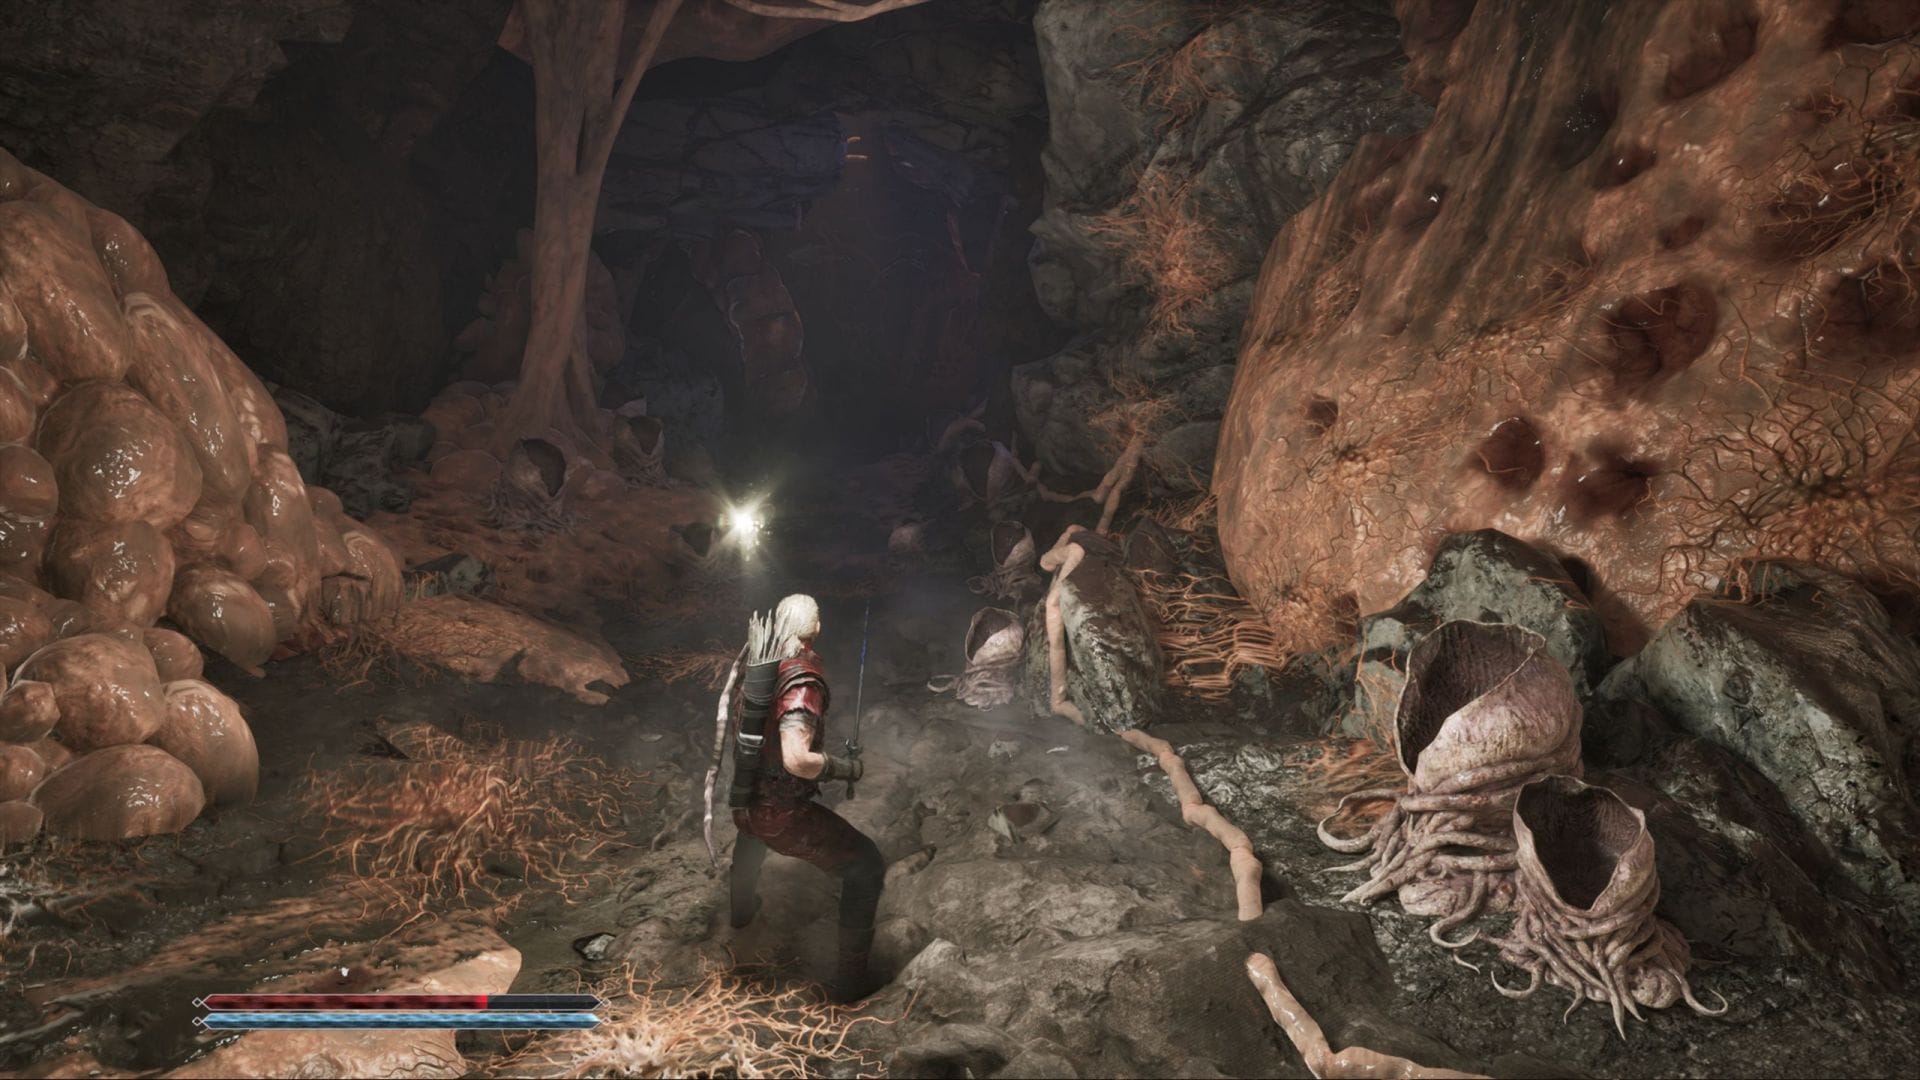
Return to the blocked off section and plant the bomb. Once it explodes, you will be ambushed by a few Minecrawlers. Once they are defeated, you will need to explore the nest, but the templars will refuse to go with you.
Defeat the Minecrawler queen:
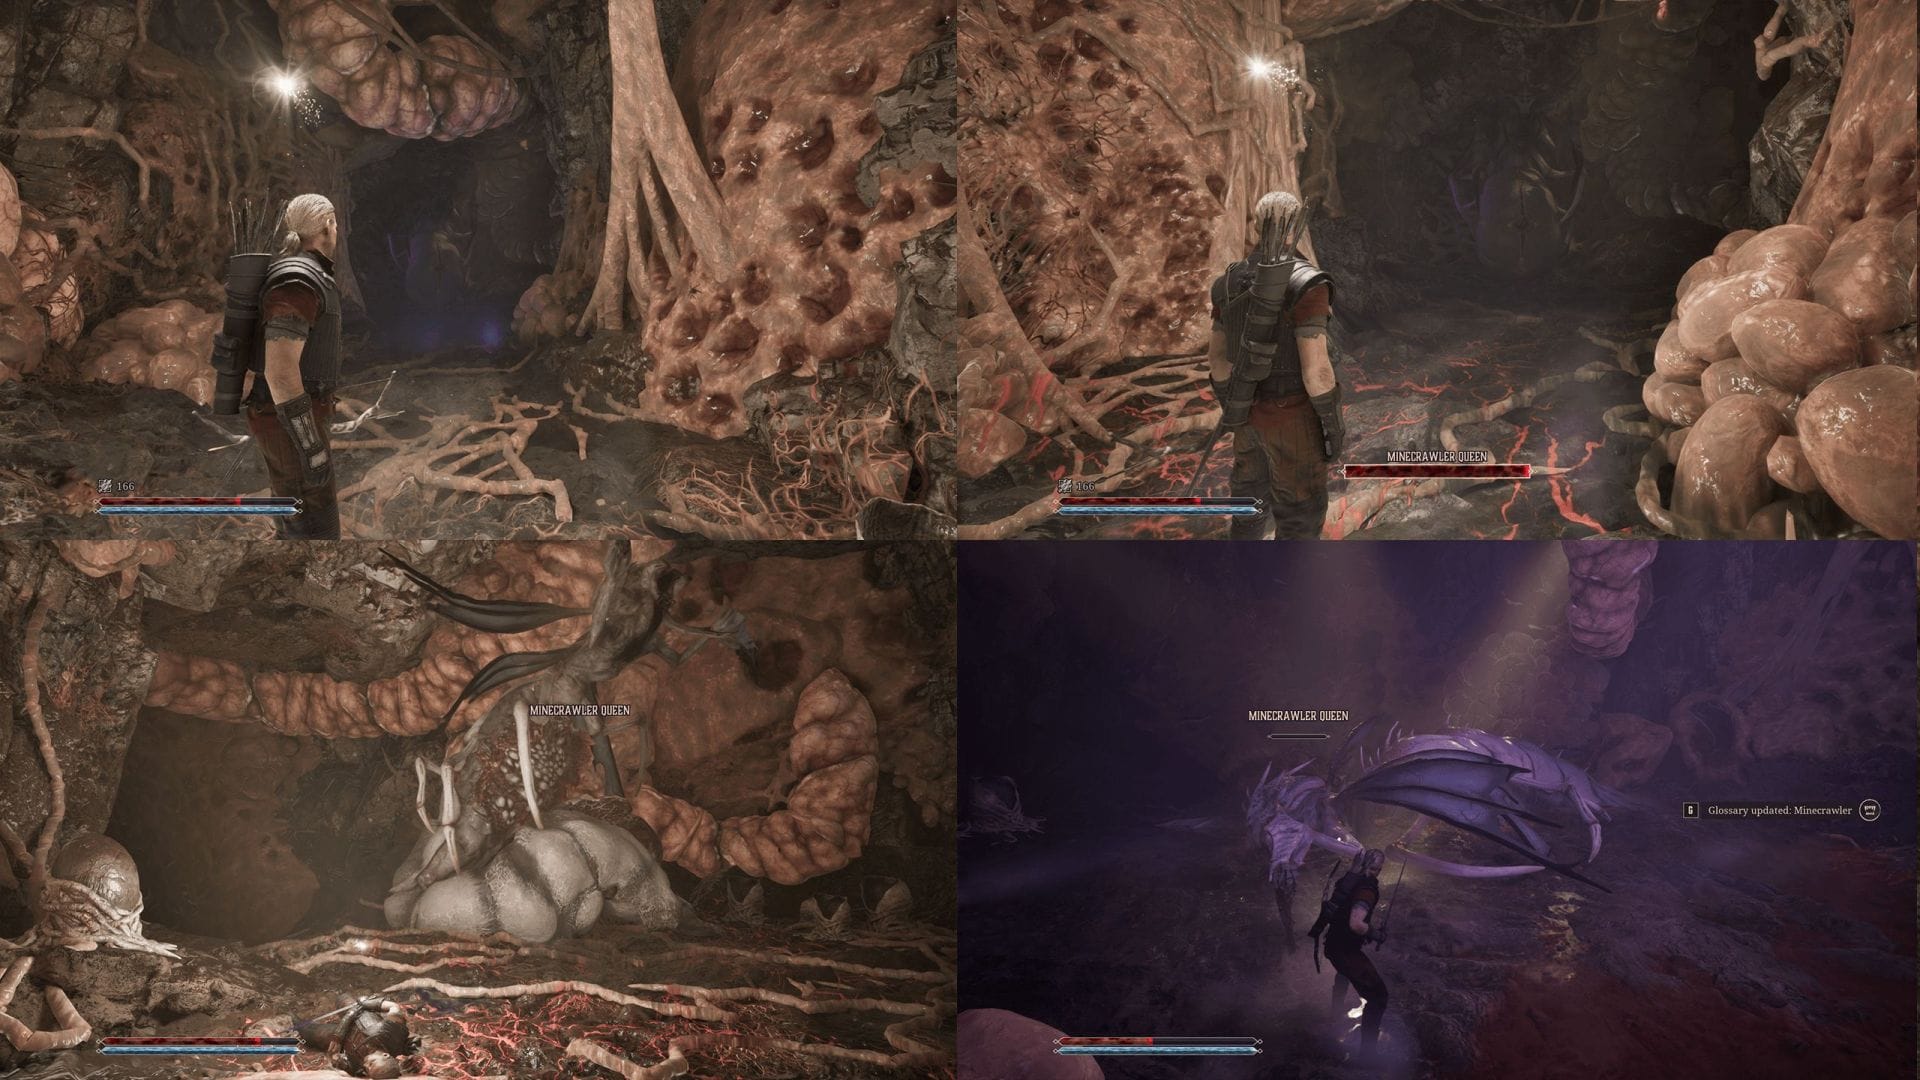
Fight through multiple Minecrawlers to reach the central chamber where you will find a queen. There are two stages of this fight; here’s how they play out:
Stage 1:
During this stage the queen will be attached to the eggsac, making her immobile. She will only be using ranged attacks, so it is recommended to rush her. Stay around her back and deal as much damage as you can. She will also summon Minecrawler Nymphs during this stage.
Stage 2:
After her health drops, she will separate herself from the egg sac and run deeper into the nest. Follow her to an open section of the nest to start the boss fight. Avoid her pincer attacks at all costs. Try sticking to the backside area of the queen. Use timely Dodge Rolls to create room between you and the queen.
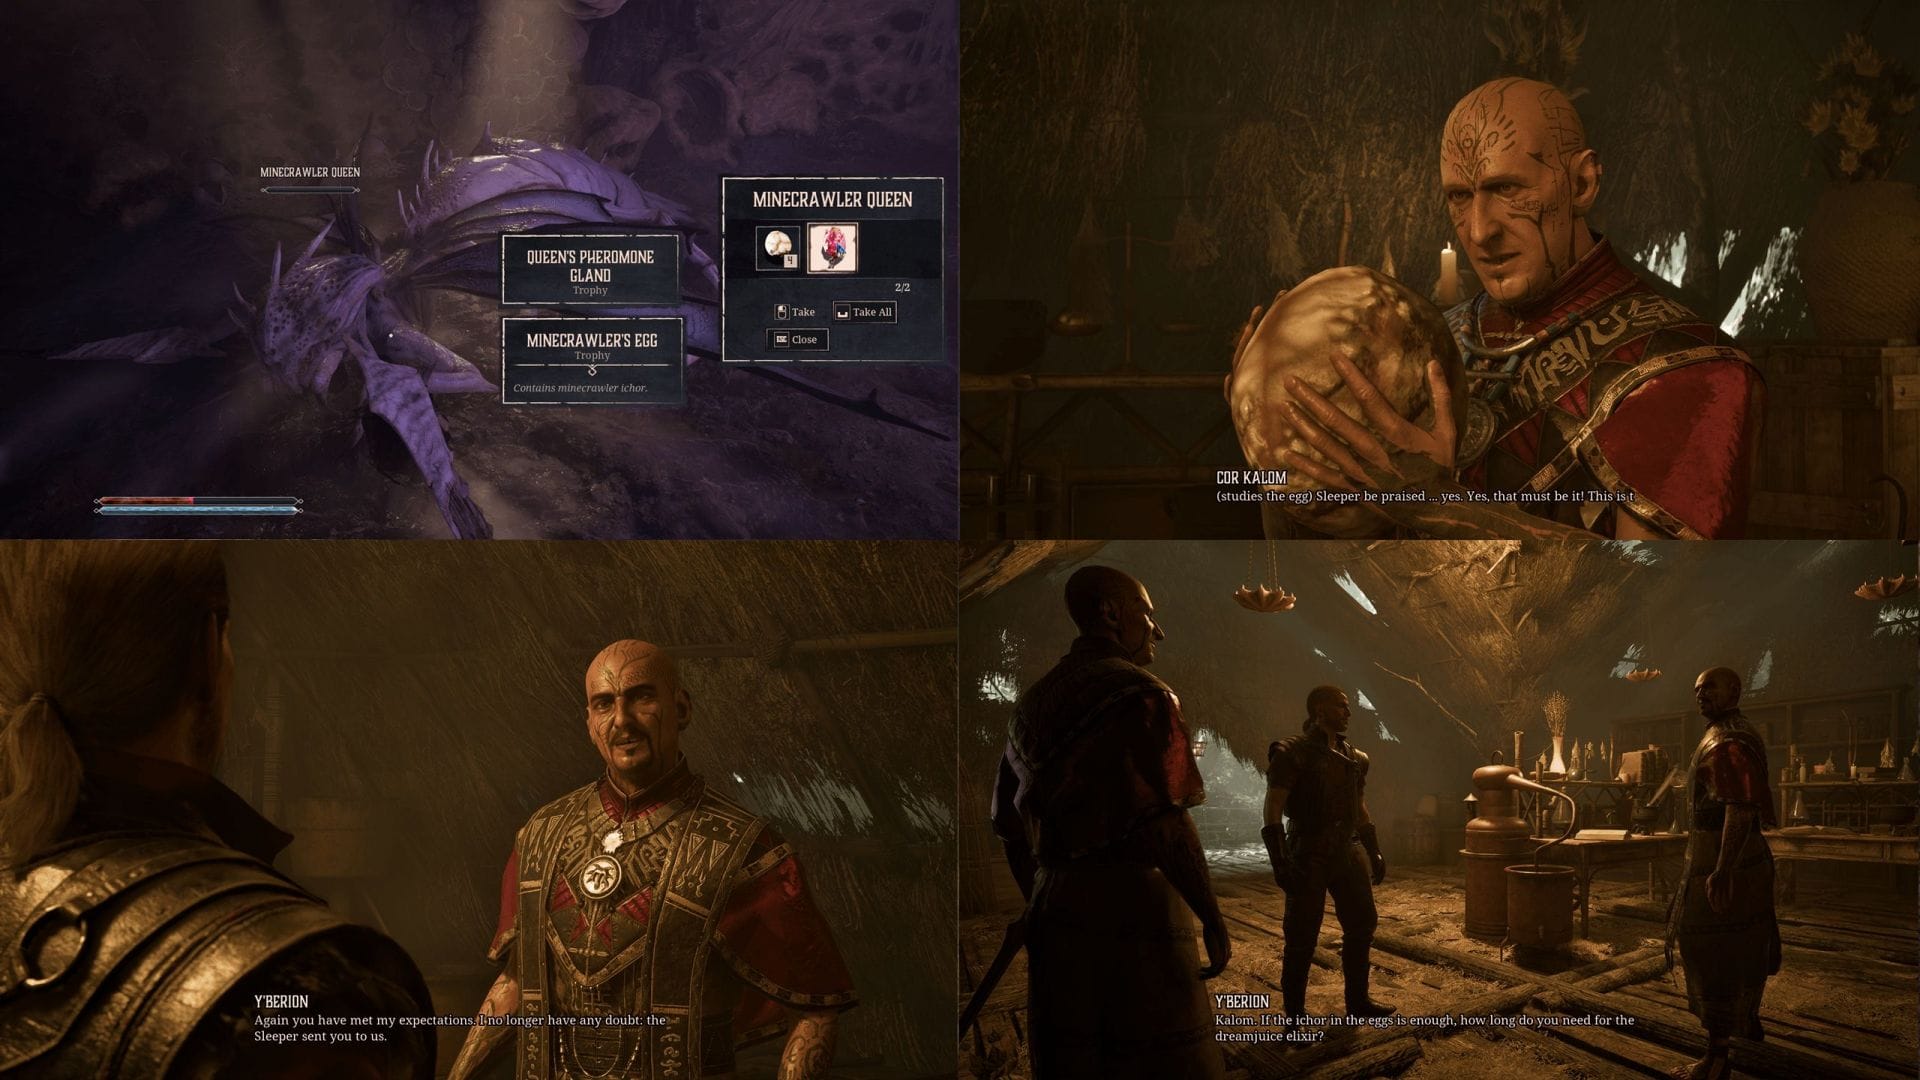
You will get the following items from looting the corpse of the queen:
- Queen’s Pheromone Gland
- Minecrawler’s Egg
Return to Cor Kalom and deliver the egg to conclude the quest and trigger the next quest.
Also Read: Gothic 1 Remake Climbing guide: Trainer location (Aiming High quest)
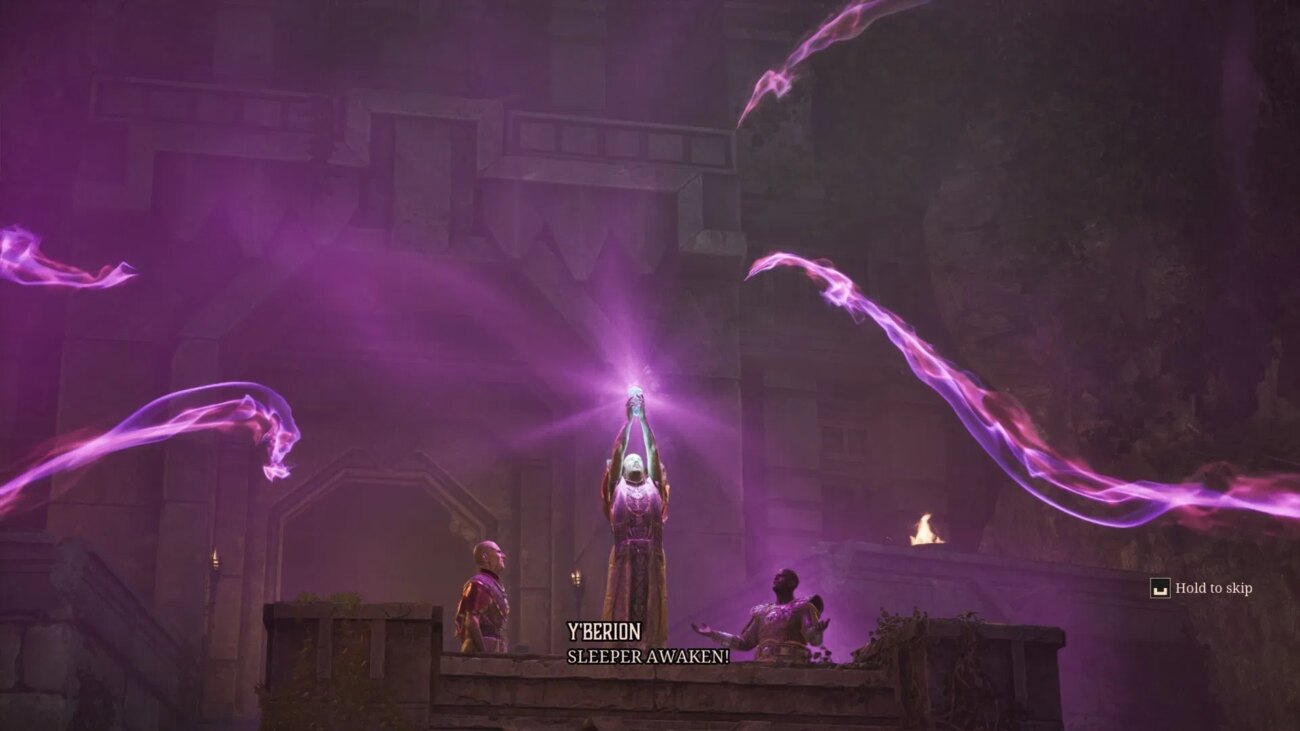
Quest 5: The great Awakening
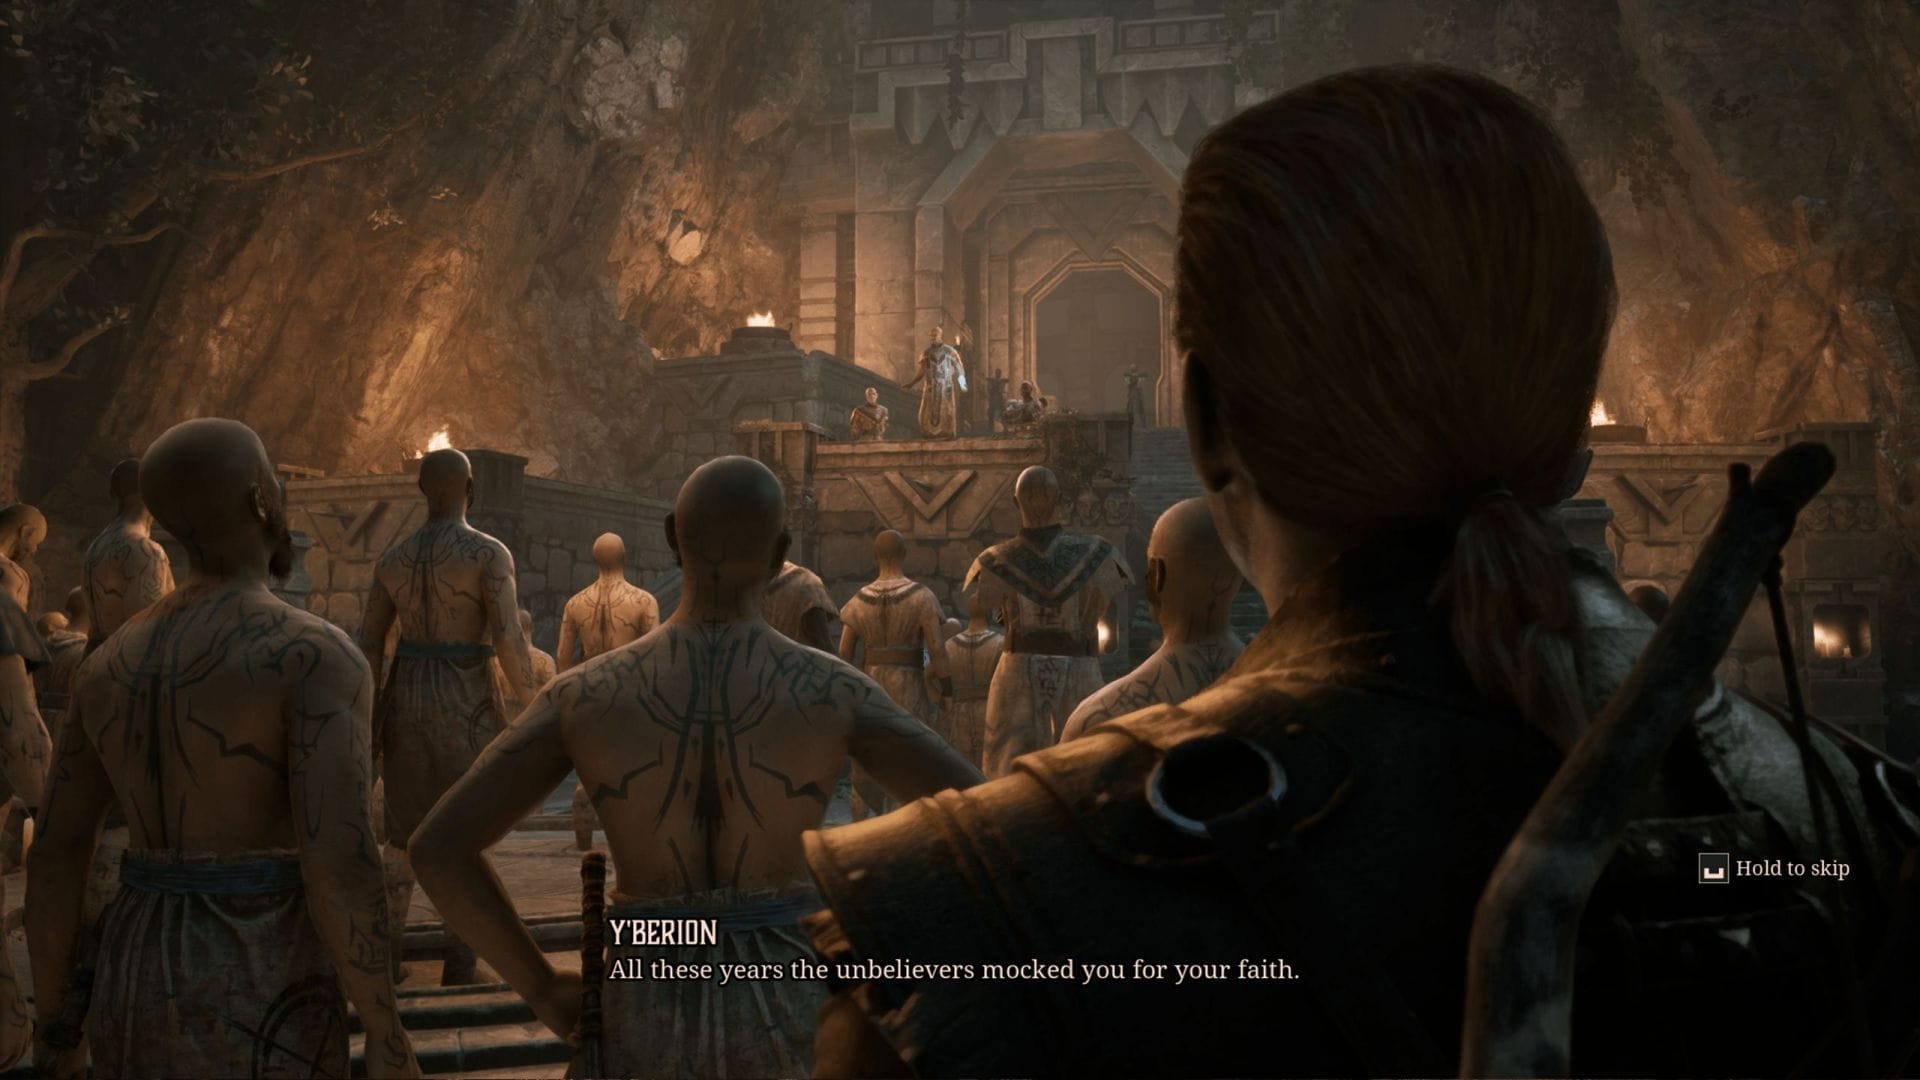
Y’Berion will ask you to be present during the Awakening ceremony. The summoning ceremony will go horribly wrong, and you will need to speak with Cor Angar and Cor Kalom during its aftermath to get the final part of the quest.
Also Read: Gothic 1 Remake Walkthrough: How to complete Beasts of Khorinis 1
Quest 6: Orc cemetary
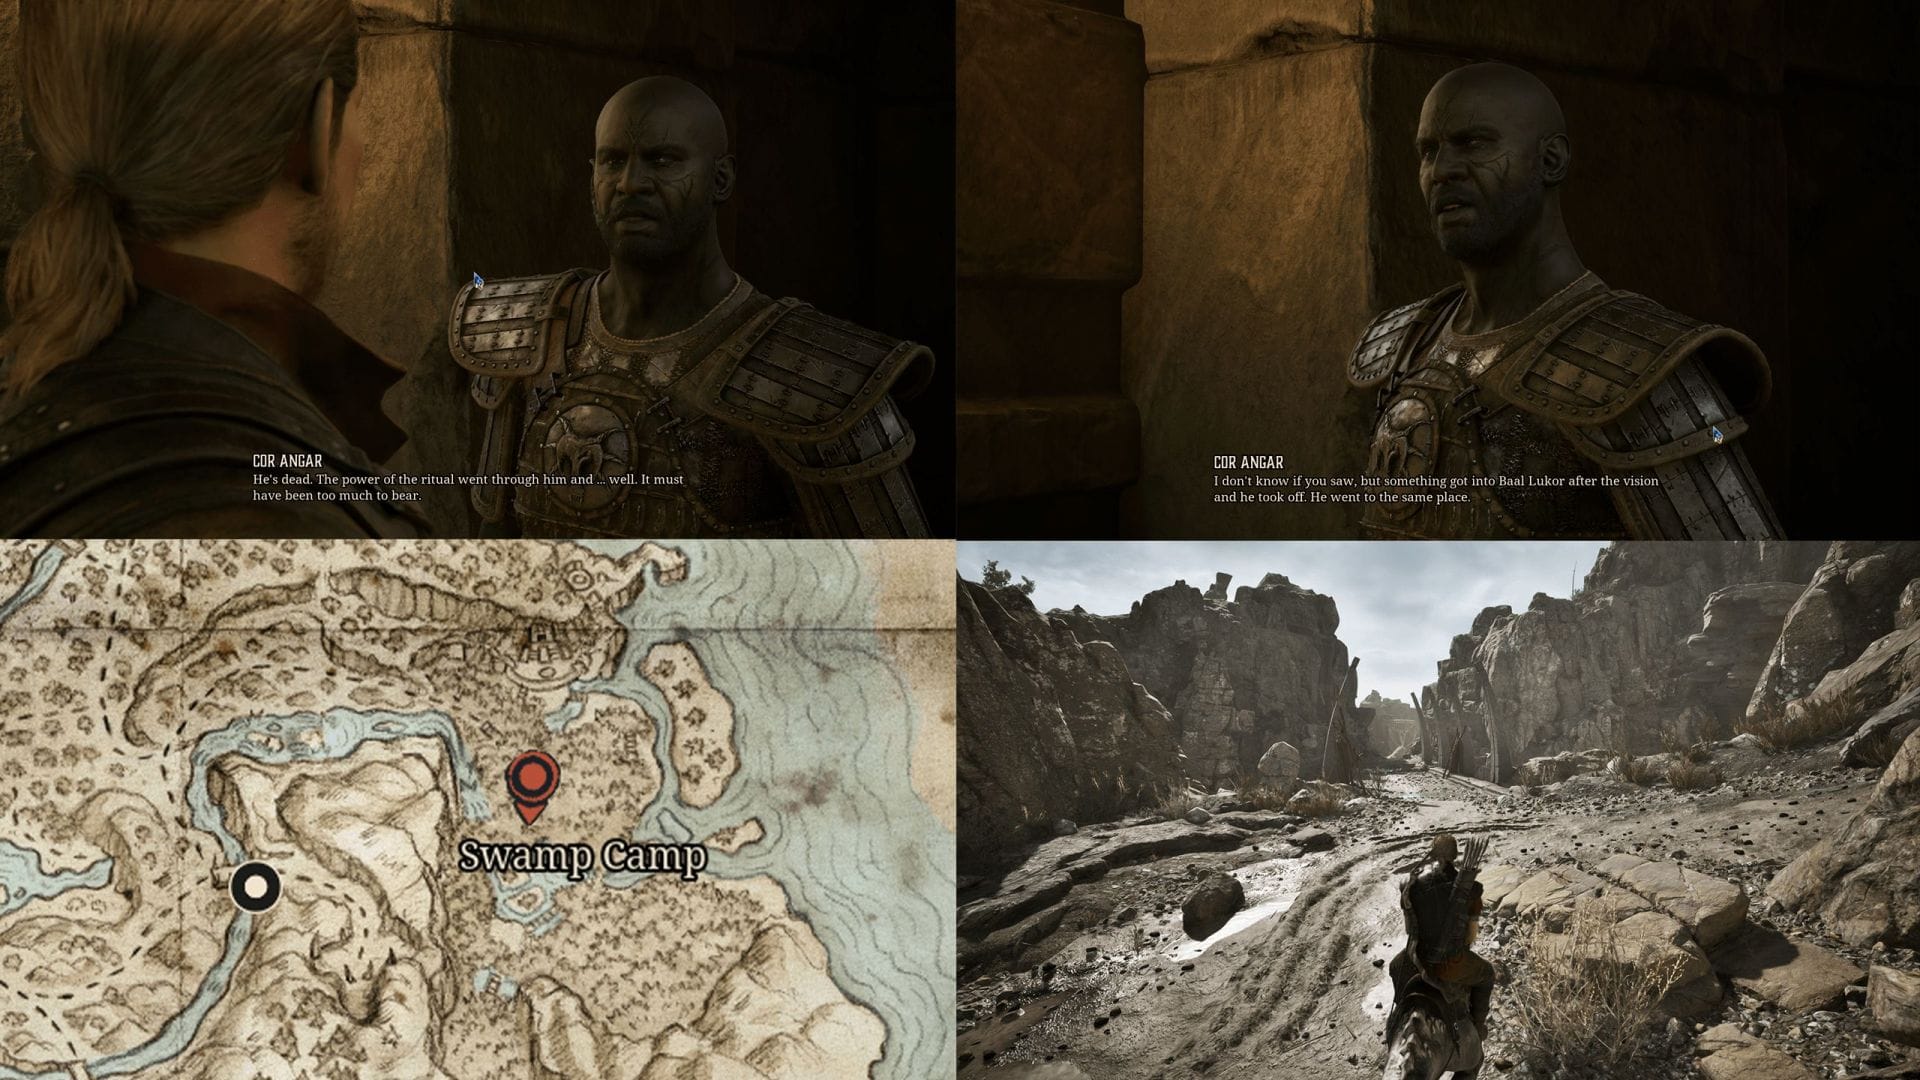
After the ceremony fails, go inside the temple and speak with Cor Angar, who will send you to meet up with his crew at the Orc Cemetary.
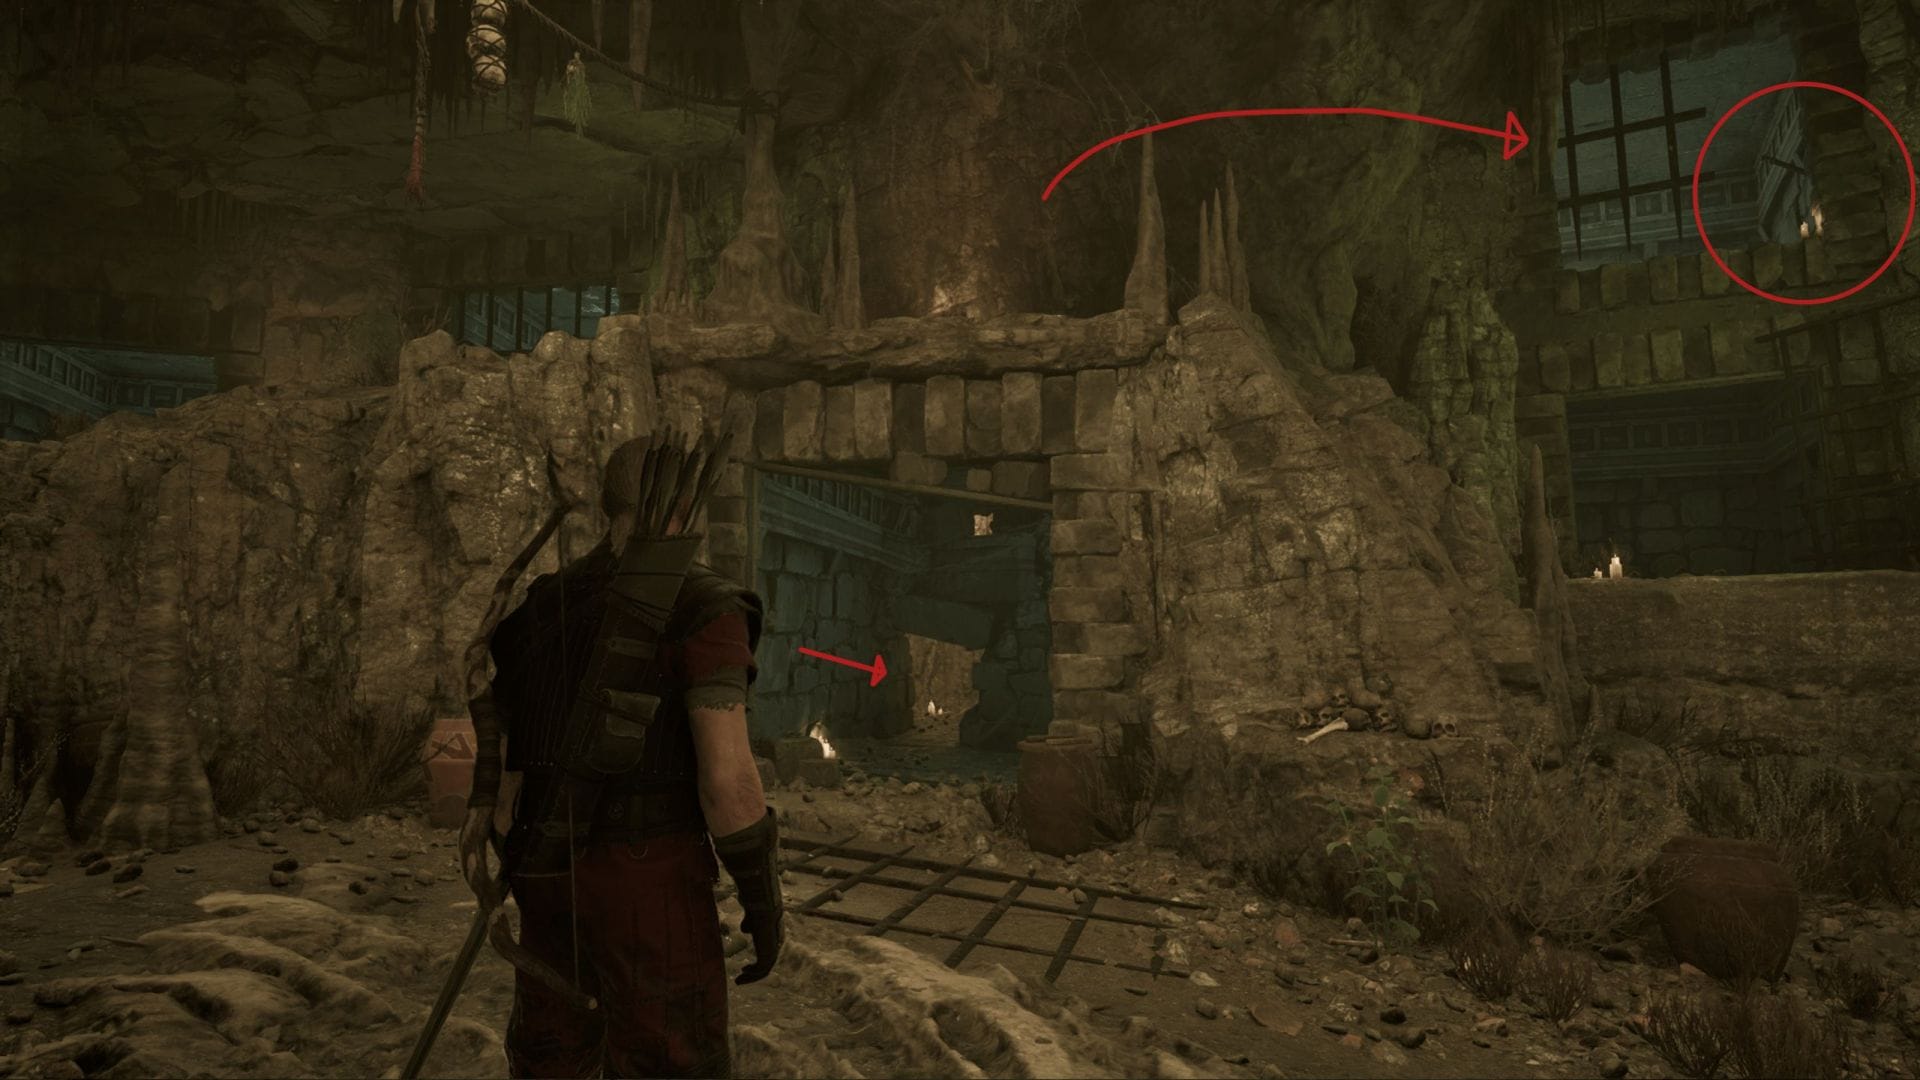
The Orc Cemetery is located at a higher elevation and can be found on the left side of the main path after you have exited from the Swamp Camp. Here you will face three new types of enemies: Biters, Bloodhounds, and Orcs.
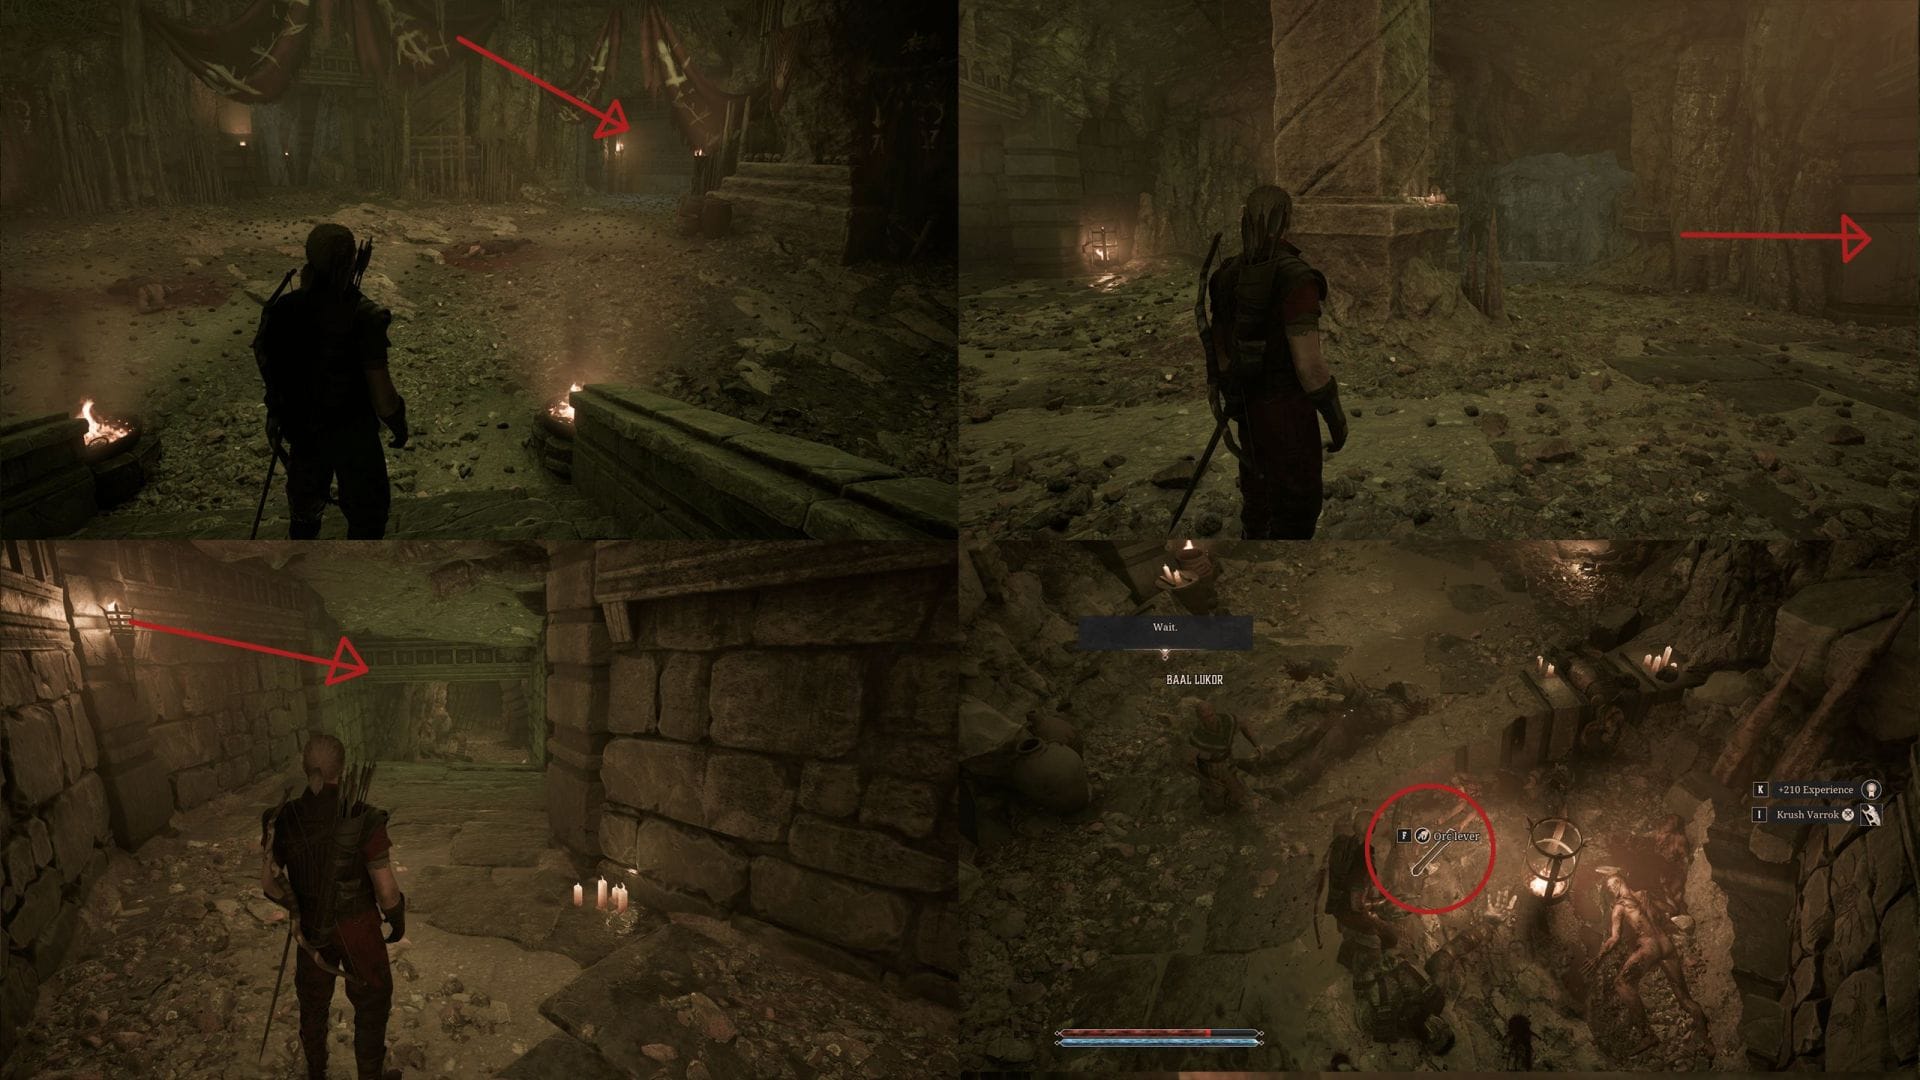
Enter the Orc Cemetary:
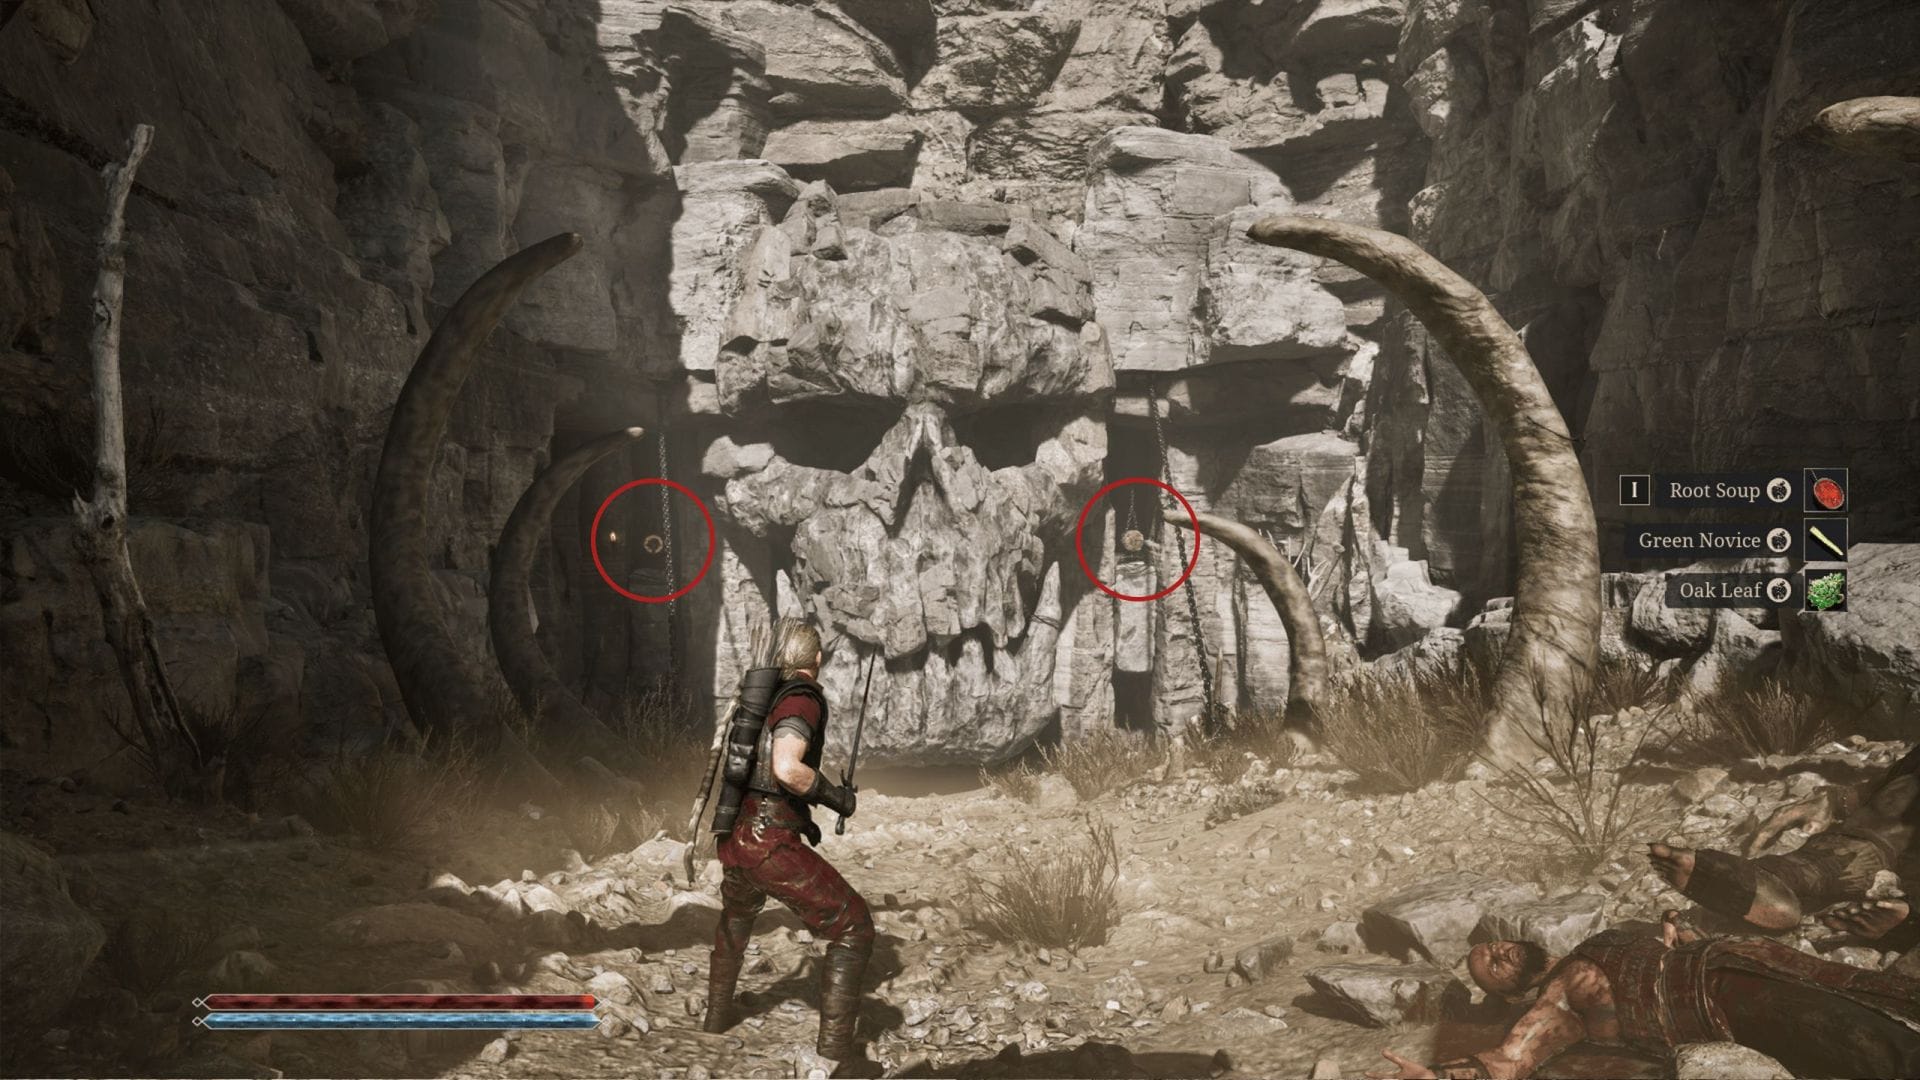
To open the entrance of the Orc Cemetery, you will need to shoot down the counterweights on both sides.
You will face multiple orcs inside, so make sure you are prepared for a tough fight. Explore every room thoroughly. Follow the direction below to hasten your exploration:
1) In the first room, you will find a small gap in the wall, squeeze through it and climb up until you reach the chamber with the lever. Pull it down and return to the main chamber below.
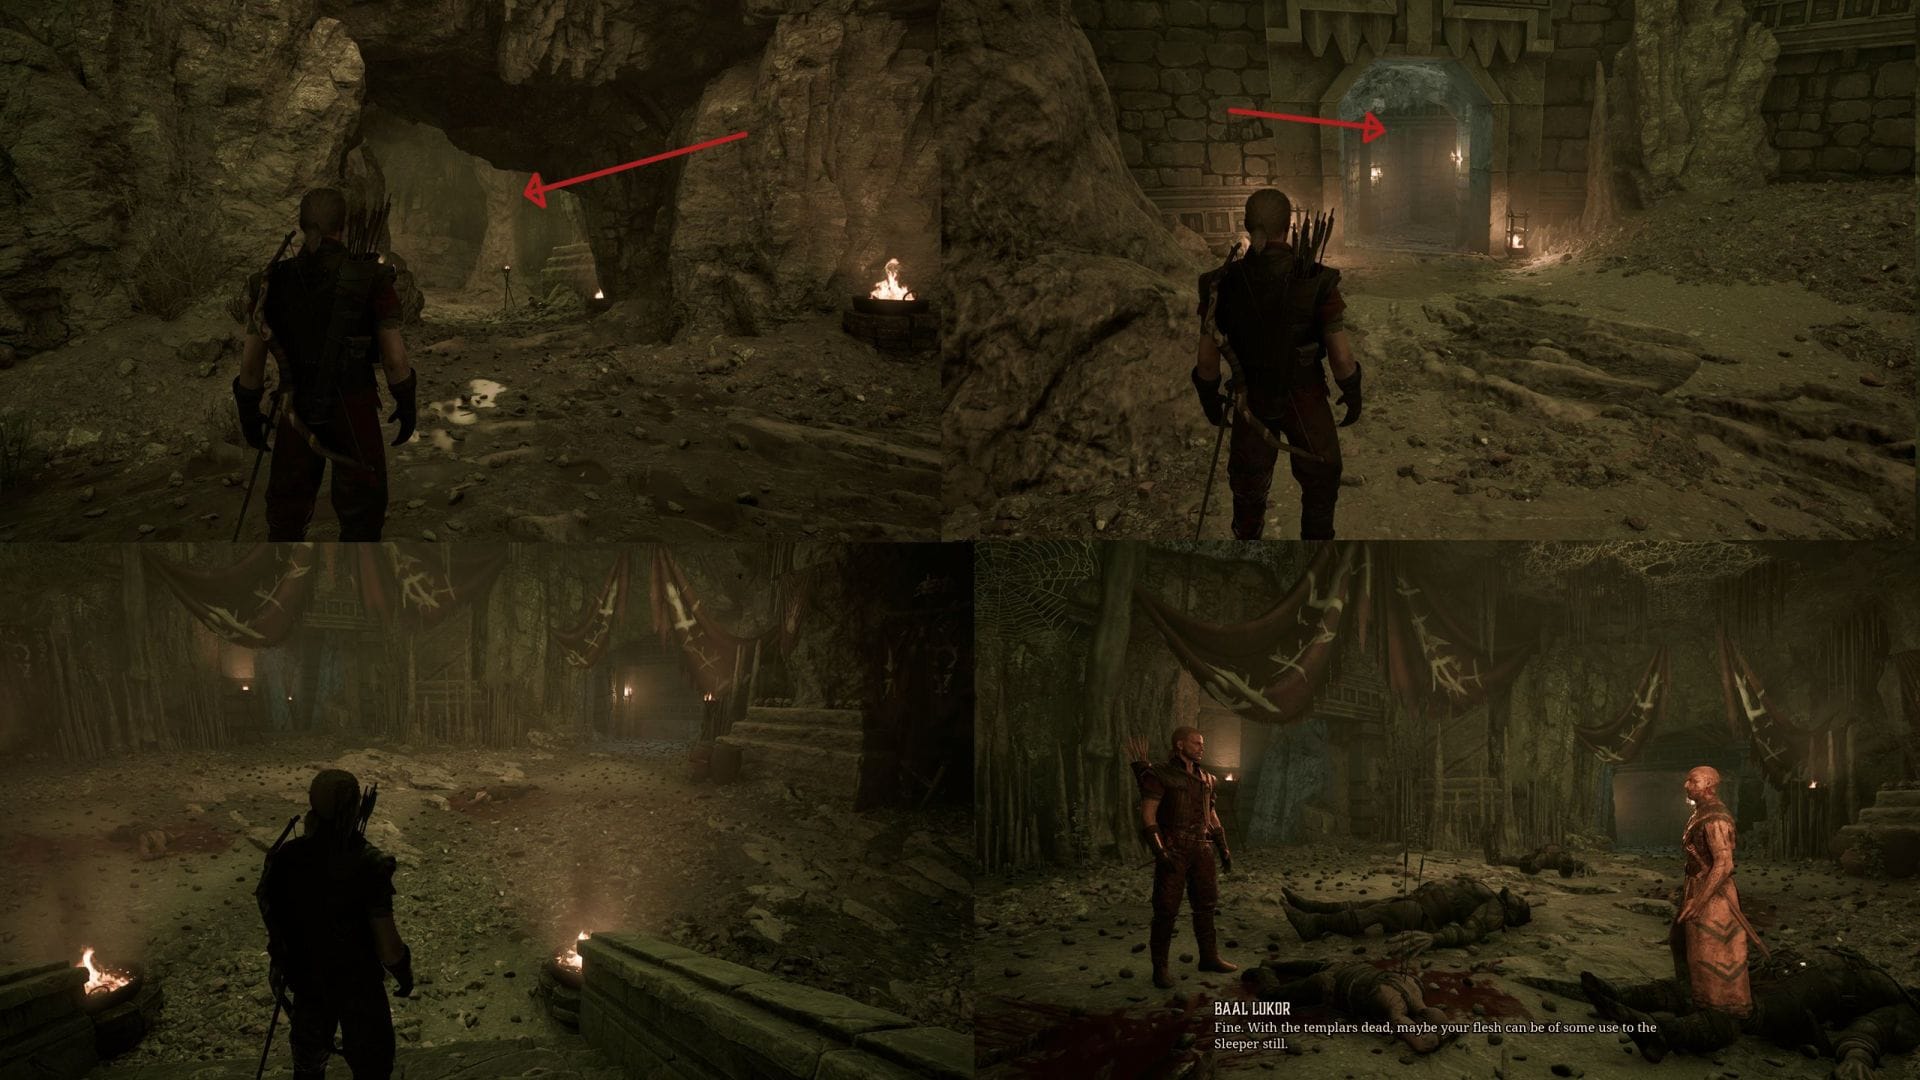
2) Keep moving through the linear path until you reach the chamber where Baal Lukor will be fighting off Orc Scouts by himself. Defeat the Orcs and team up with Lukor.
3) You will find a locked door in the room where you find Baal Lukor. The objective is to find the key for the locked door.
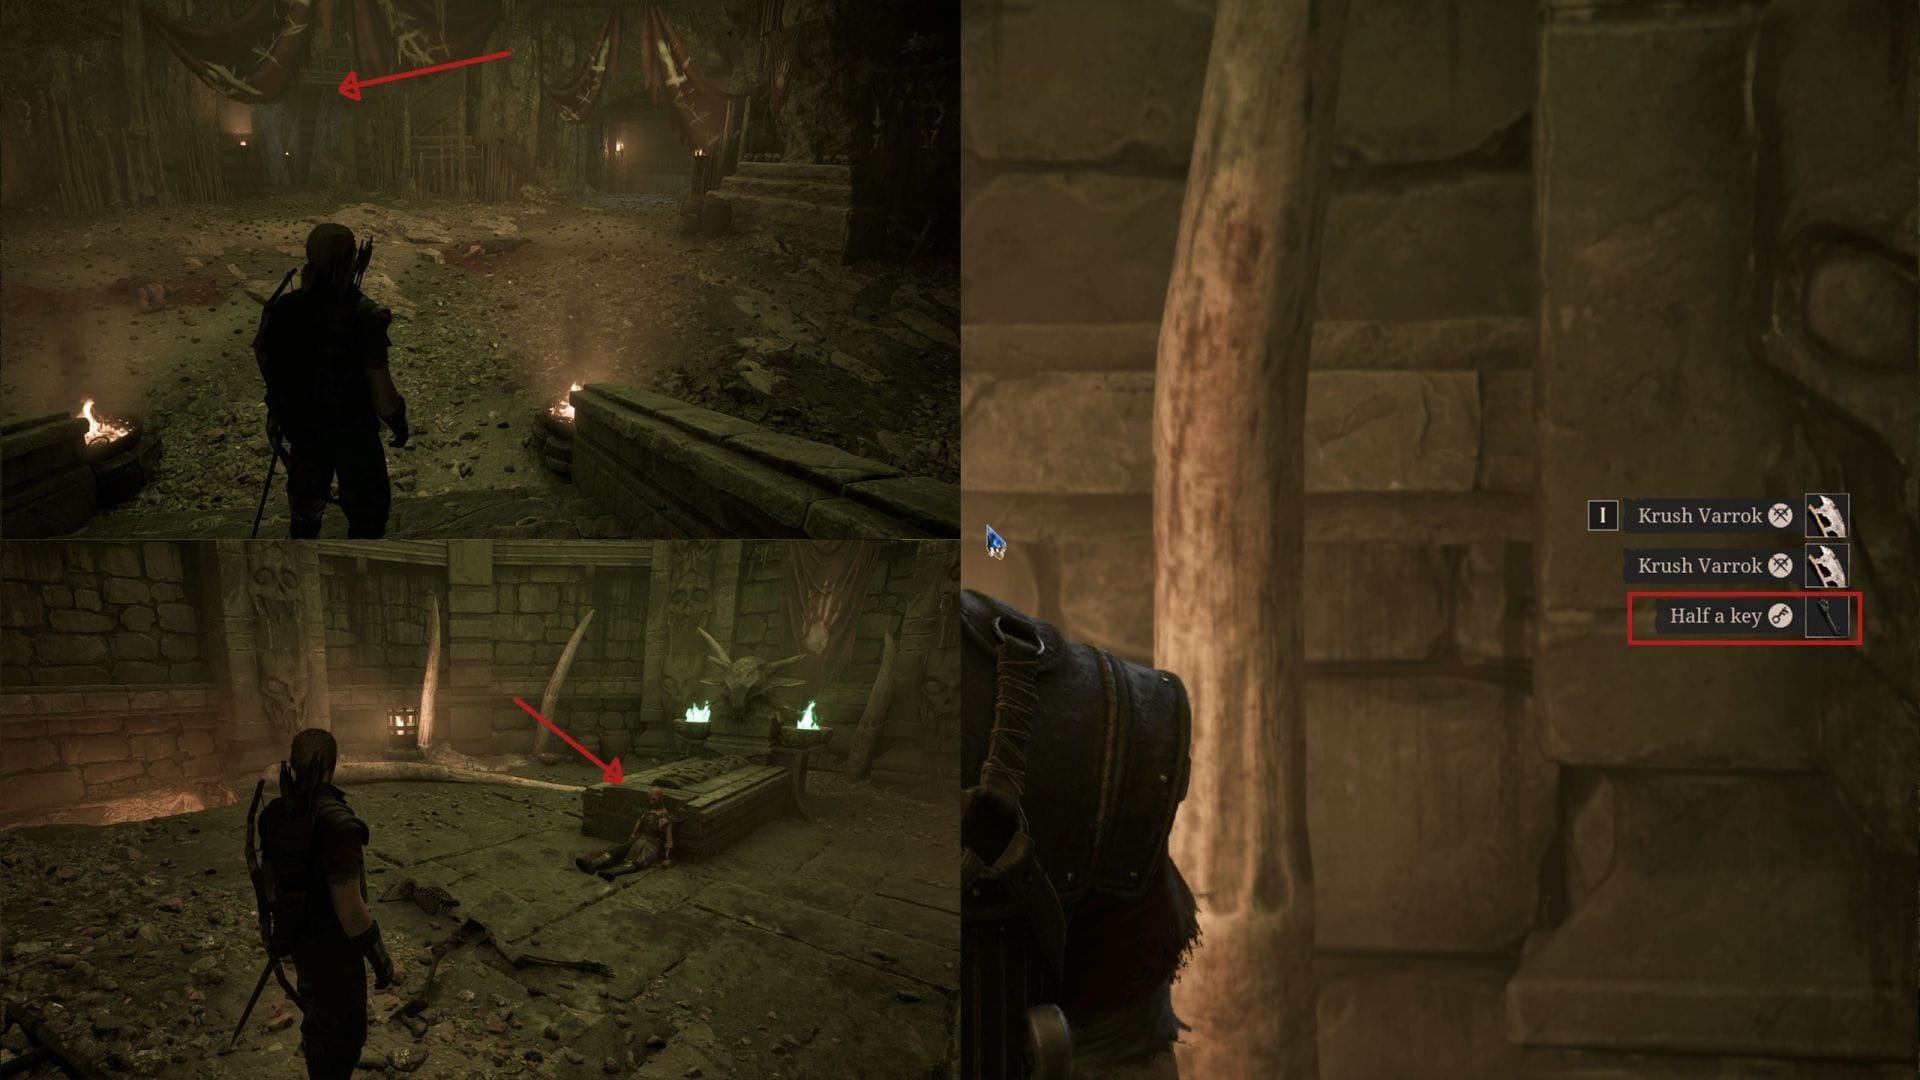
4) Go through the door right next to the locked door to find the first piece of the key on the corpse of a Templar. Grab it and return to the main chamber.
5) Go through the third door in the main chamber which will lead you to a fork. Take the path on the right side and go down until you find a few corpses. Kill the Orcs in the room and grab the lever near the dead Templar.
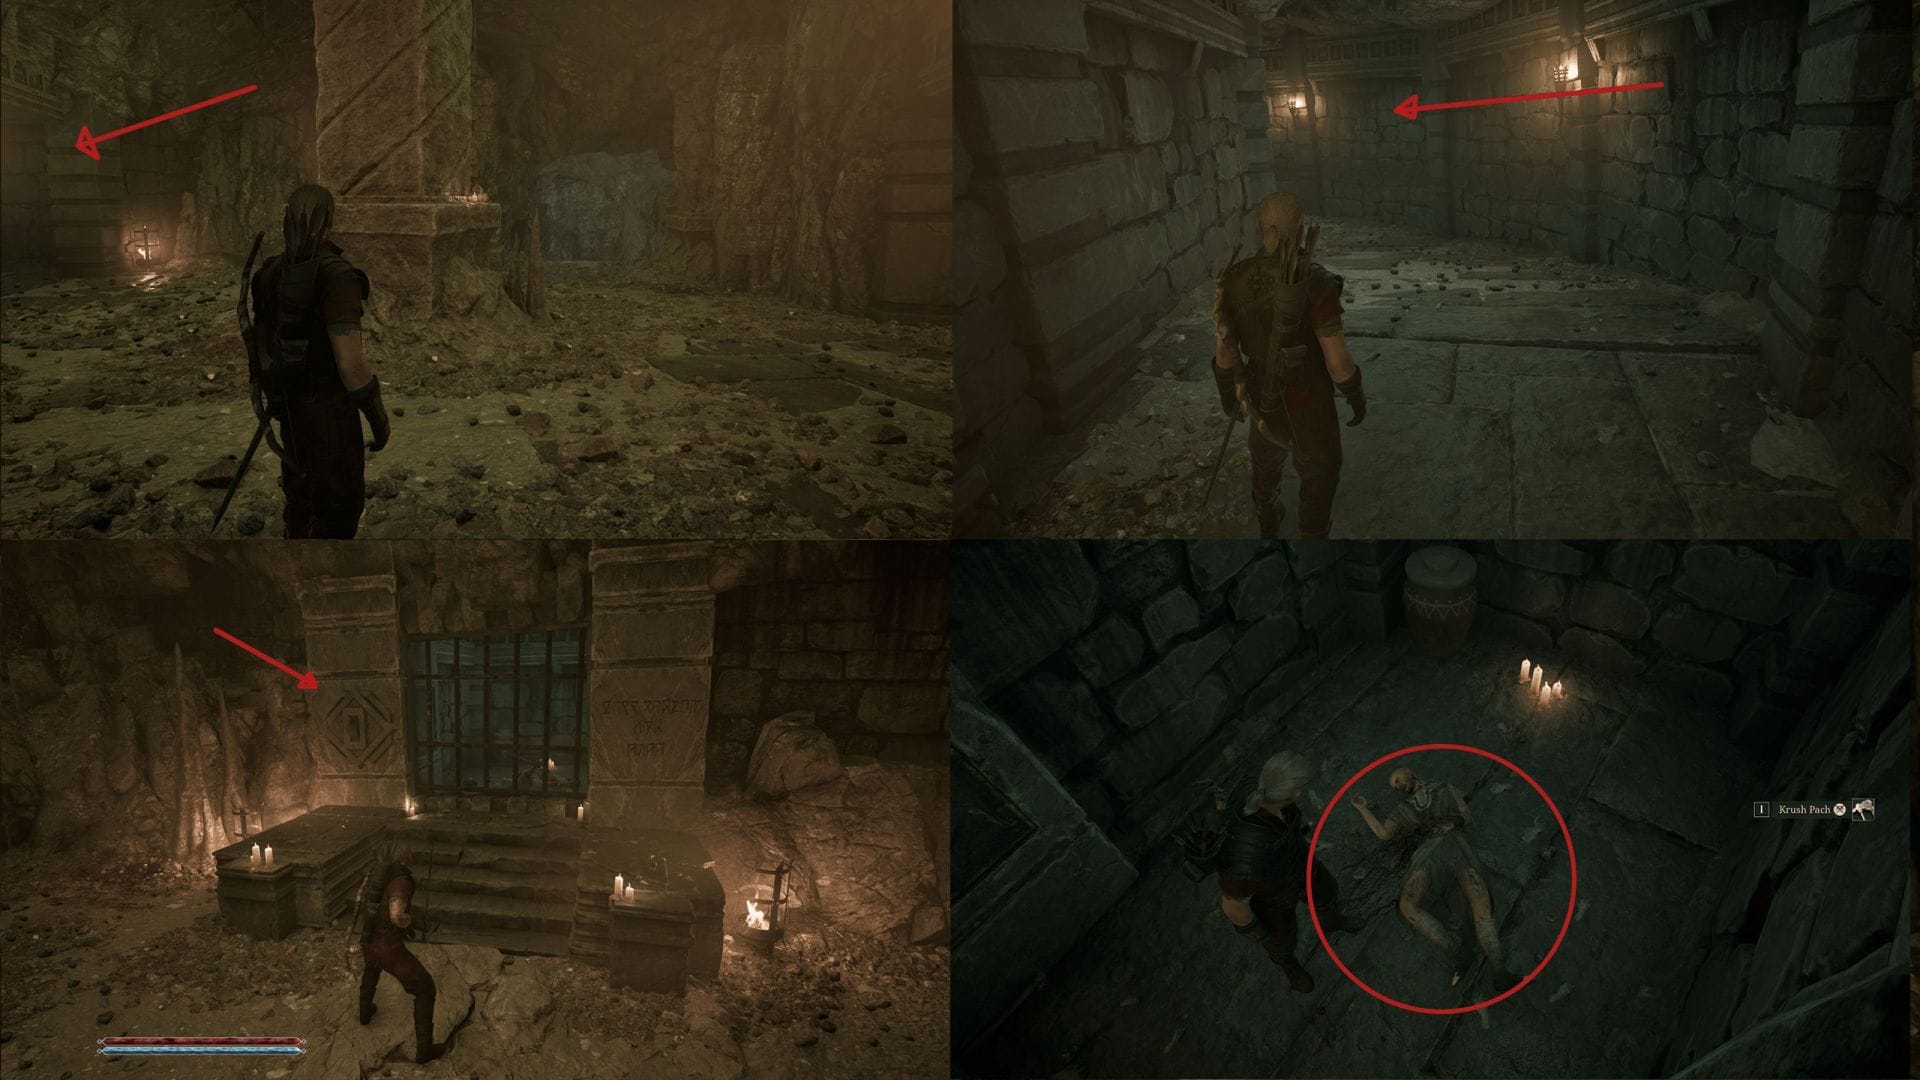
6) Once you have the lever, return to the fork. Now take the path to the left side and kill the Orcs inside. You will find a locked chamber; use the lever to open the chamber. You will find the key on the corpse inside the chamber.
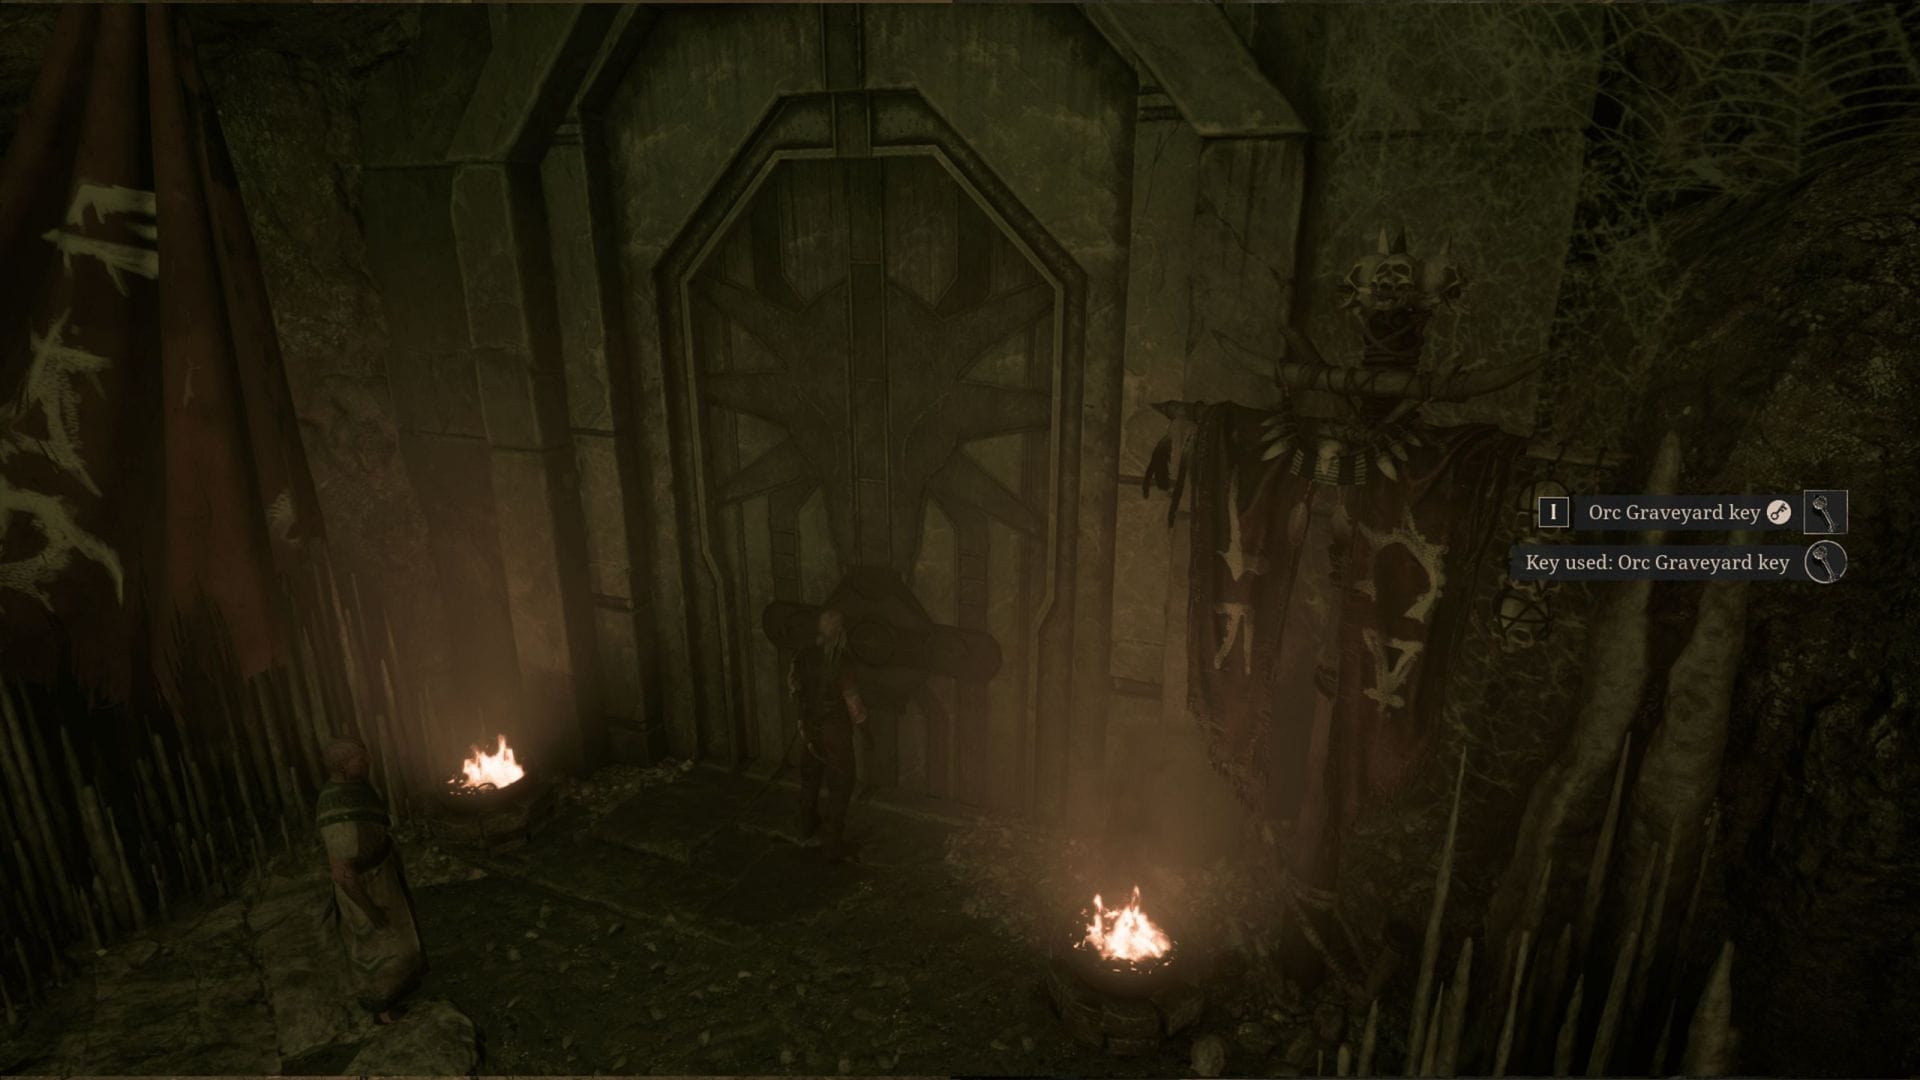
7) Return to the chamber with the locked door and use the keys you found to open the door.
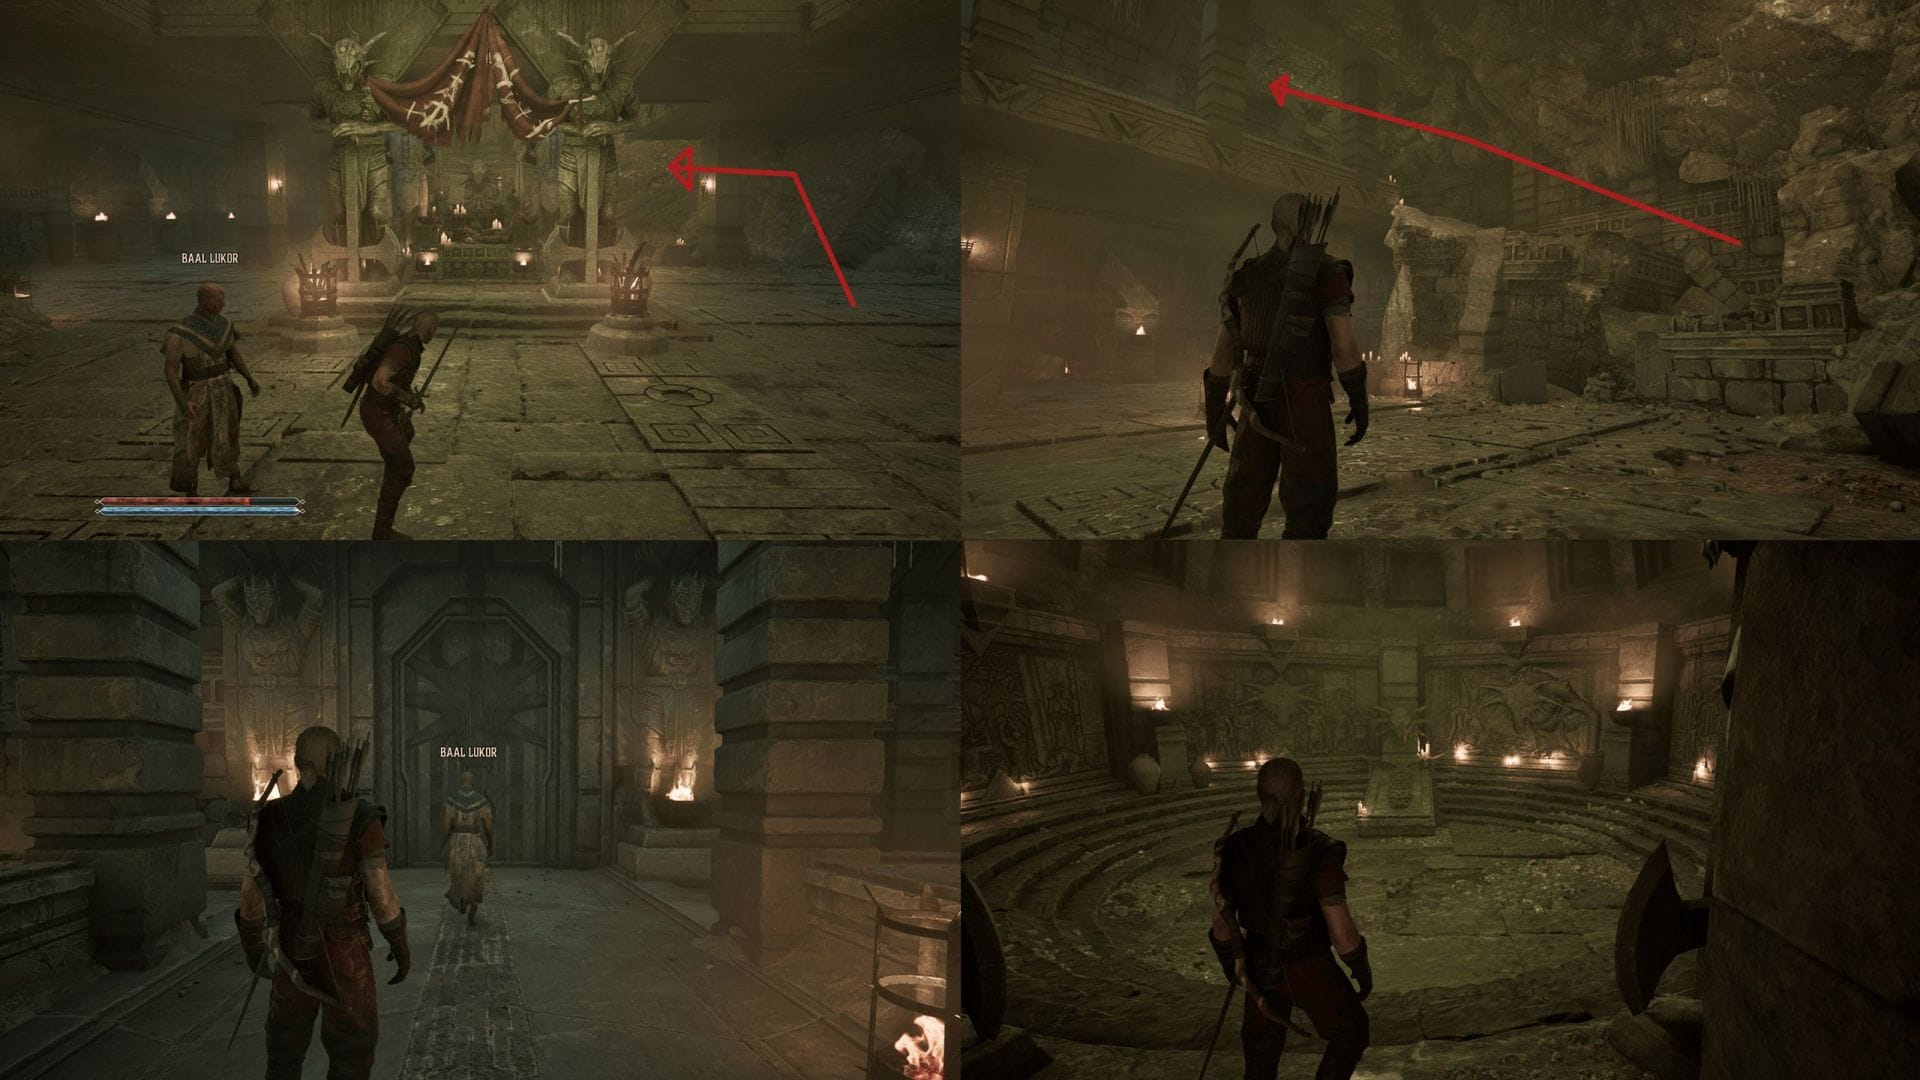
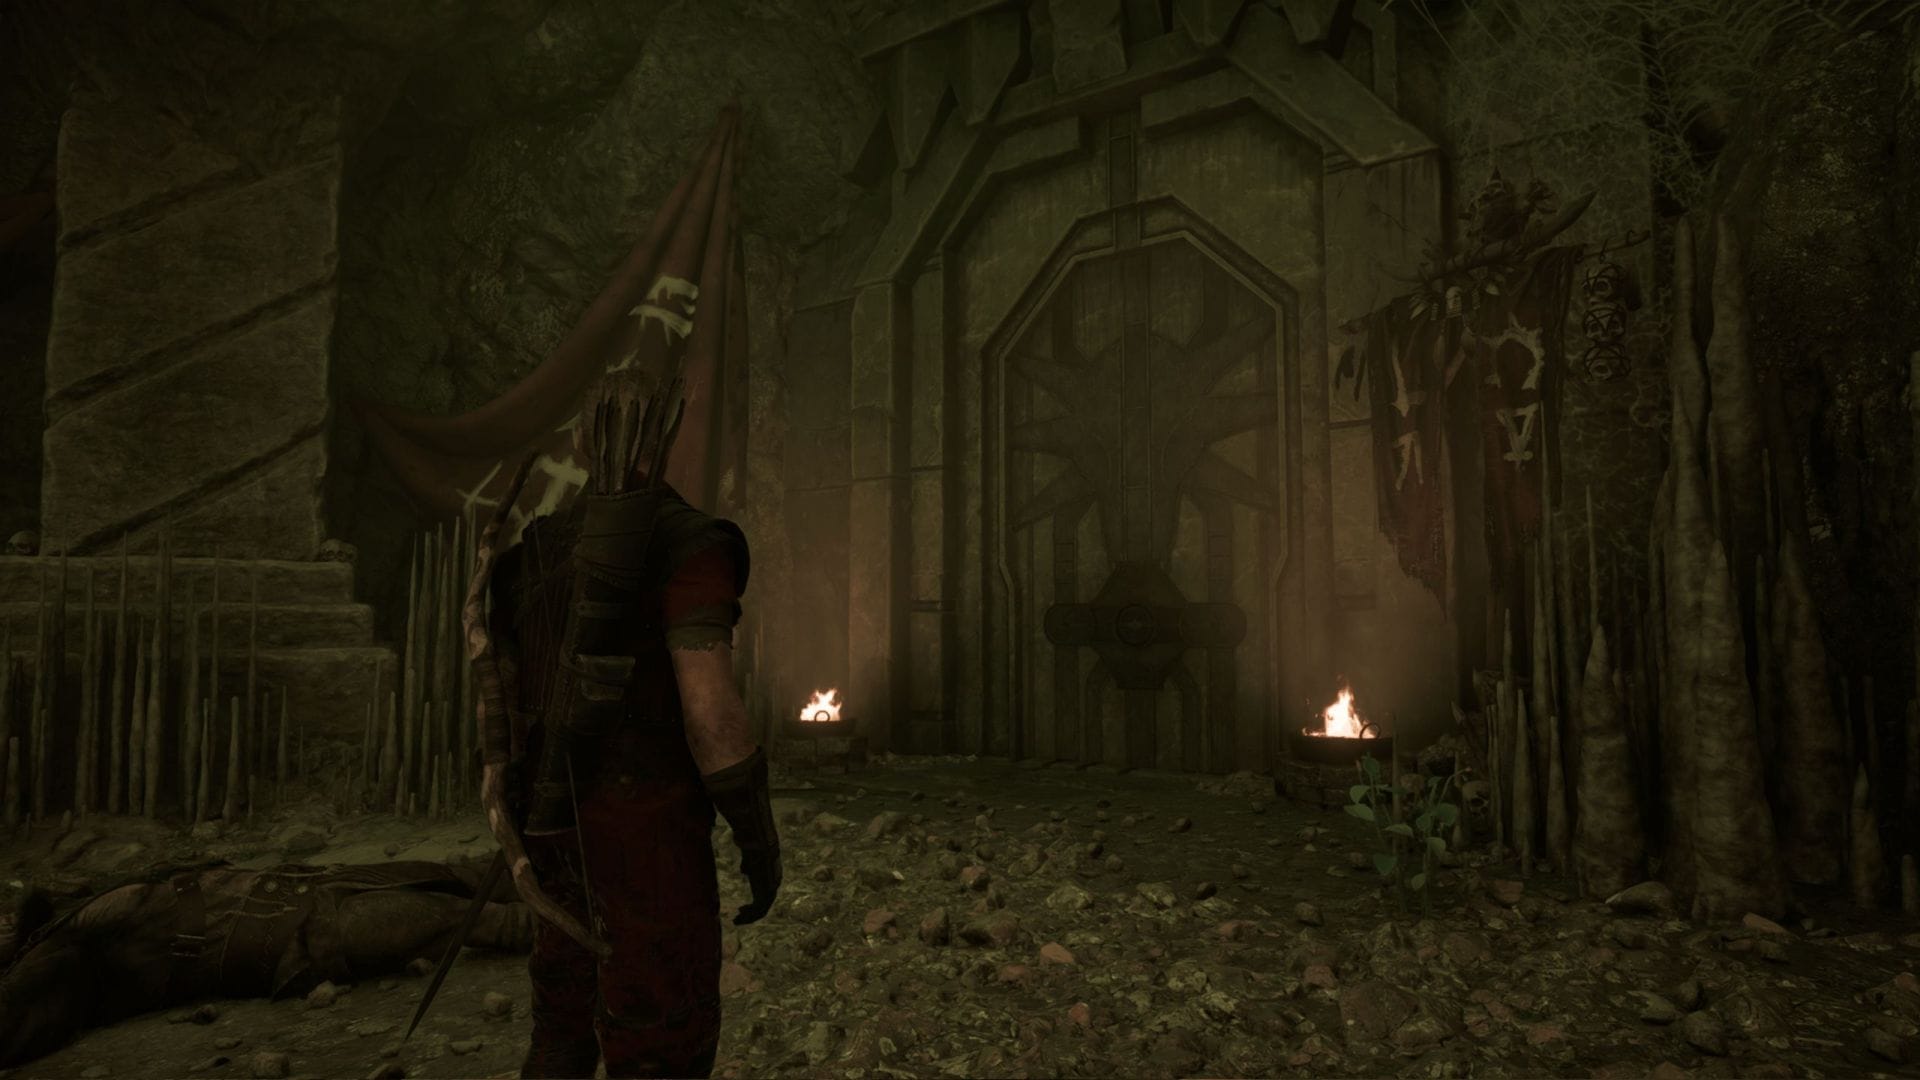
8) Inside the chamber you will face three to four Orc Scouts and one Orc Warrior. The warrior is much stronger than the scouts, so avoid getting hit. Once you have dealt with the enemies, climb up to the upper area and open the locked door to the mural chamber.
You will find the Sword of Fear in this mural chamber, which has an edge damage of 42.
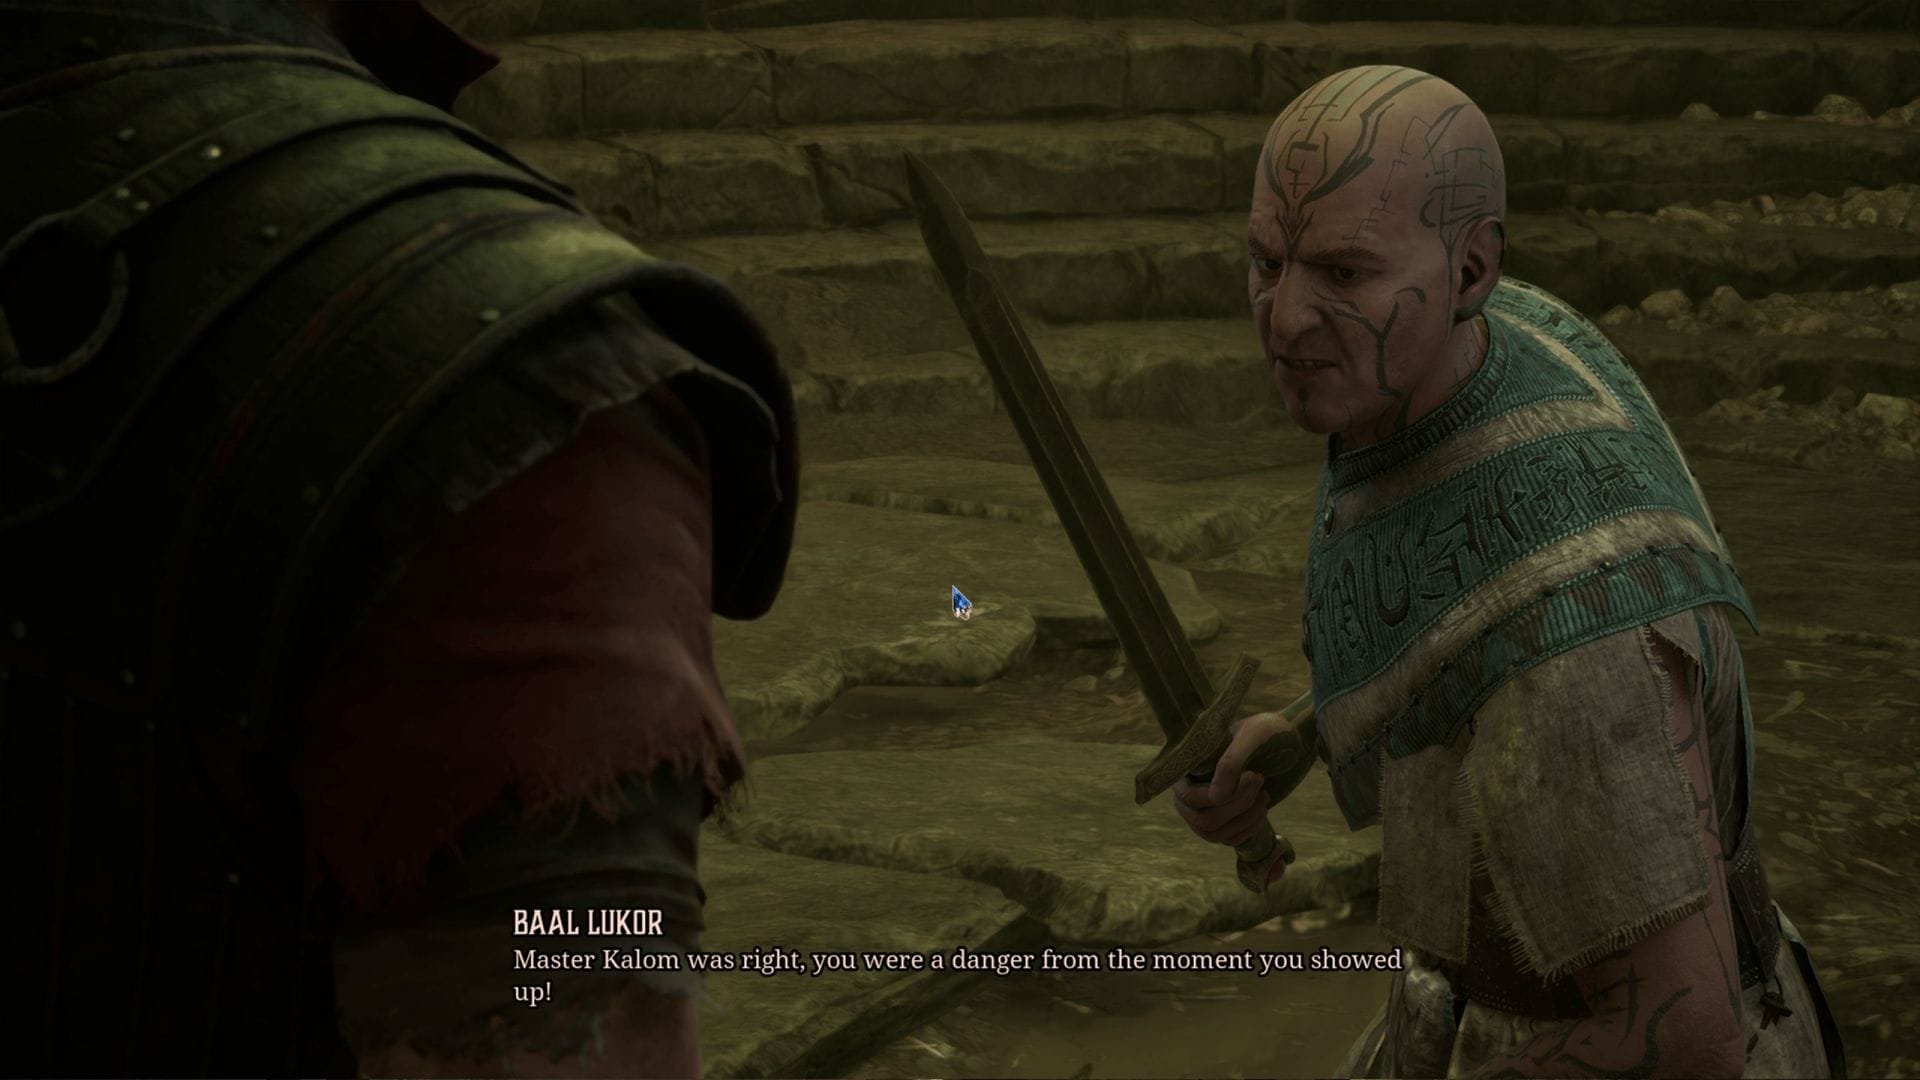
9) Baal Lukor will accuse and attack you. Defeat him (which will kill him) and return to Cor Angar.
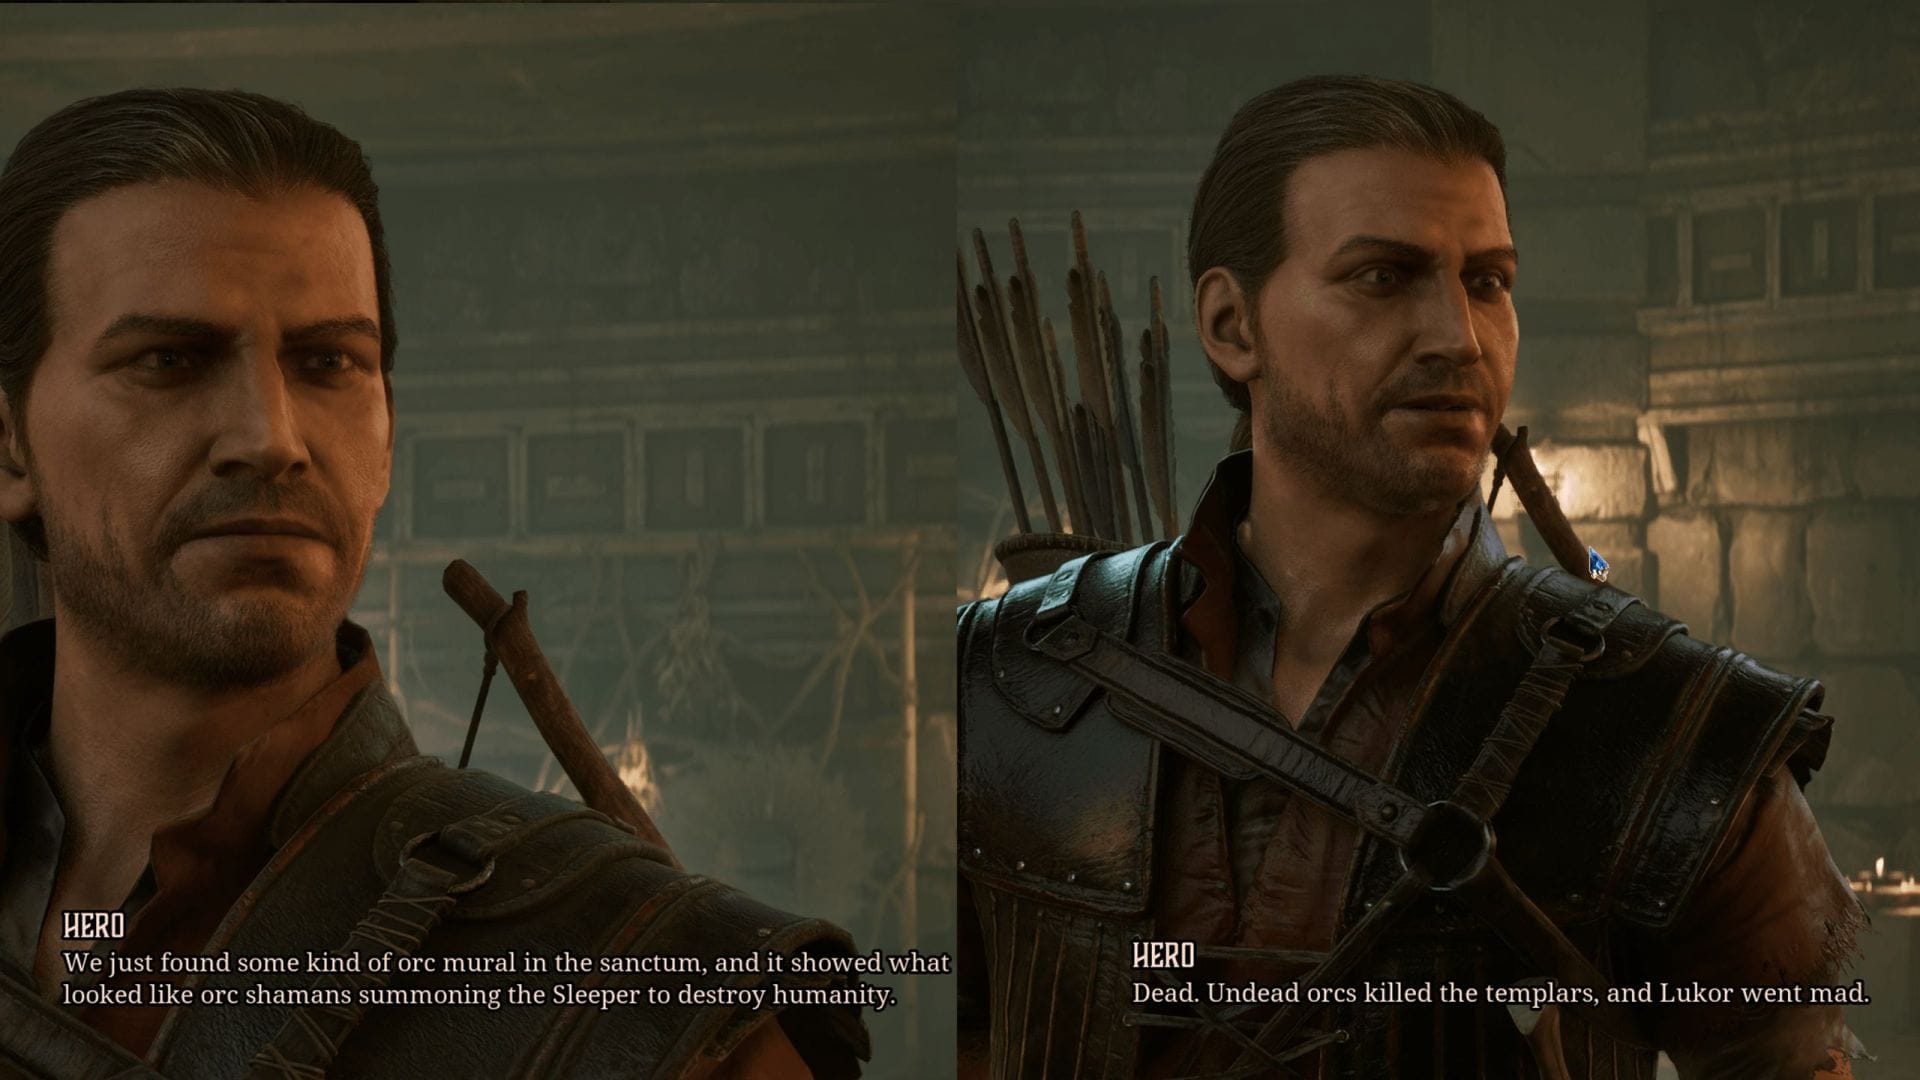
10) Report back to Cor Angar and Cor Kalom about what happened at the Orc cemetary. While Angar will believe you, Kalom won’t. This will divide the camp, with the loyalists leaving the camp and setting up a new camp near the Orc Cemetary.
Also Read: Gothic 1 Remake walkthrough: How to complete A Roof Over My Head
Report back to raven at the Old Camp

Return to the old camp, and Thorus will ask you to join the Warders. You can choose either to become a Warder or a Mage, so pick carefully.
Enter the castle and speak with Raven and relay your findings. This will conclude The Brotherhood’s Plan questline in Gothic 1 Remake.
Check out our other guides on Gothic 1 Remake:
Are you stuck on today’s Wordle? Our Wordle Solver will help you find the answer.
Edited by Jagaran Dutta